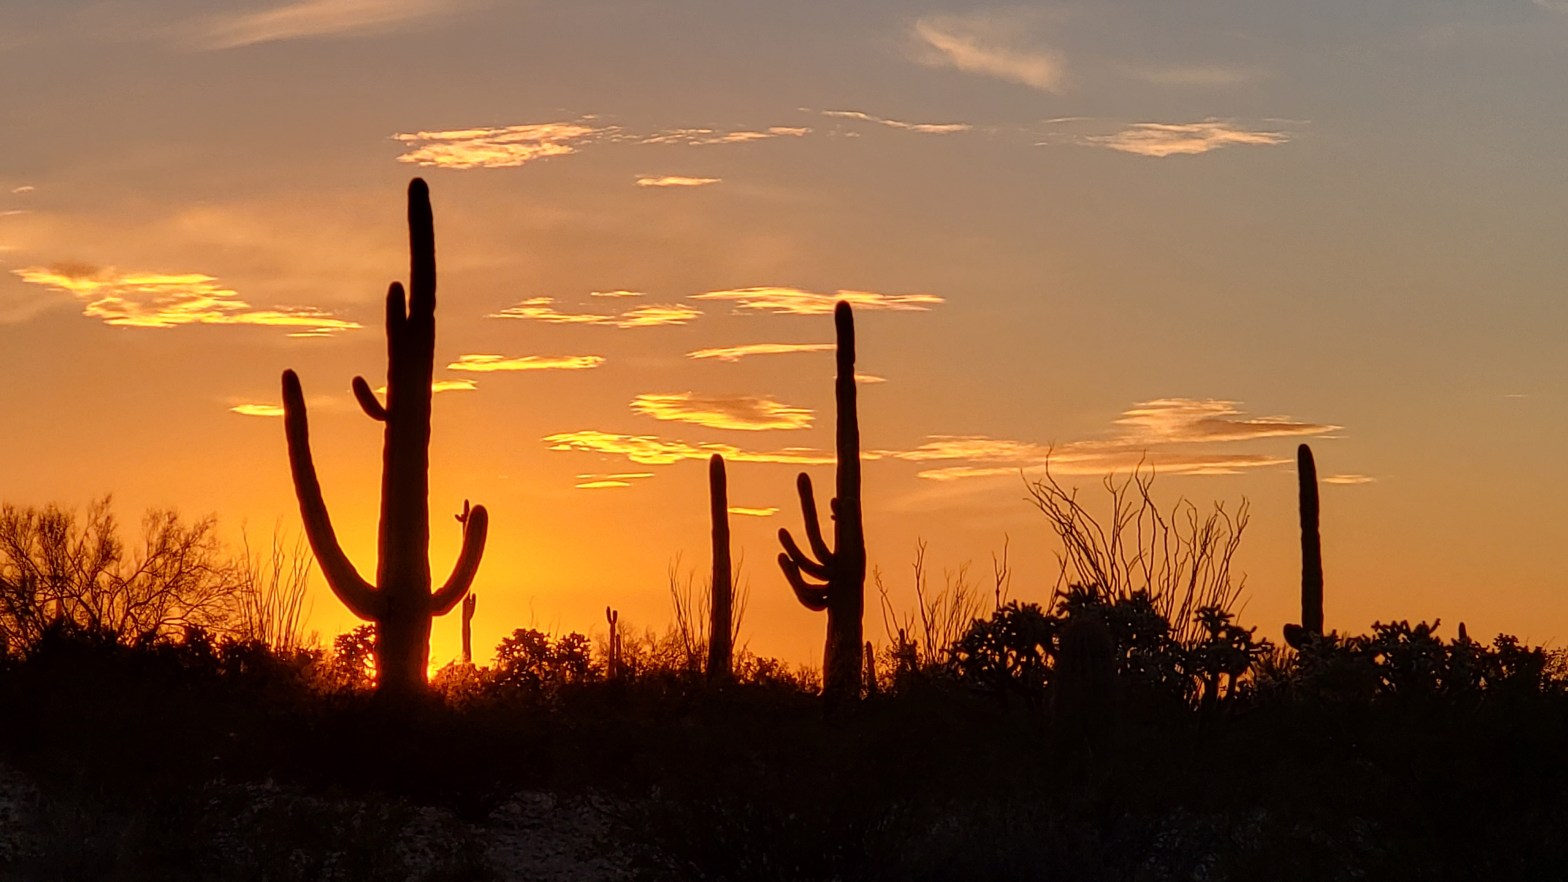
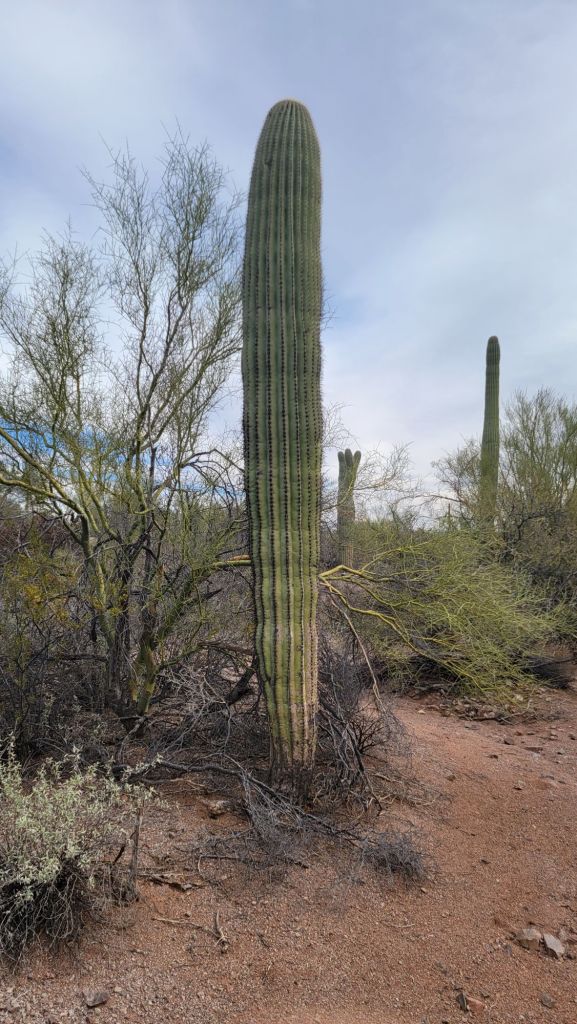
Before making it to Madera Canyon, I had a few stops and errands to take care of. I caught up with some friends in Mesa, Arizona along the way… always good to see familiar faces. I camped out in the cactus forest… an absolutely lush desert environment that completely blew me away.
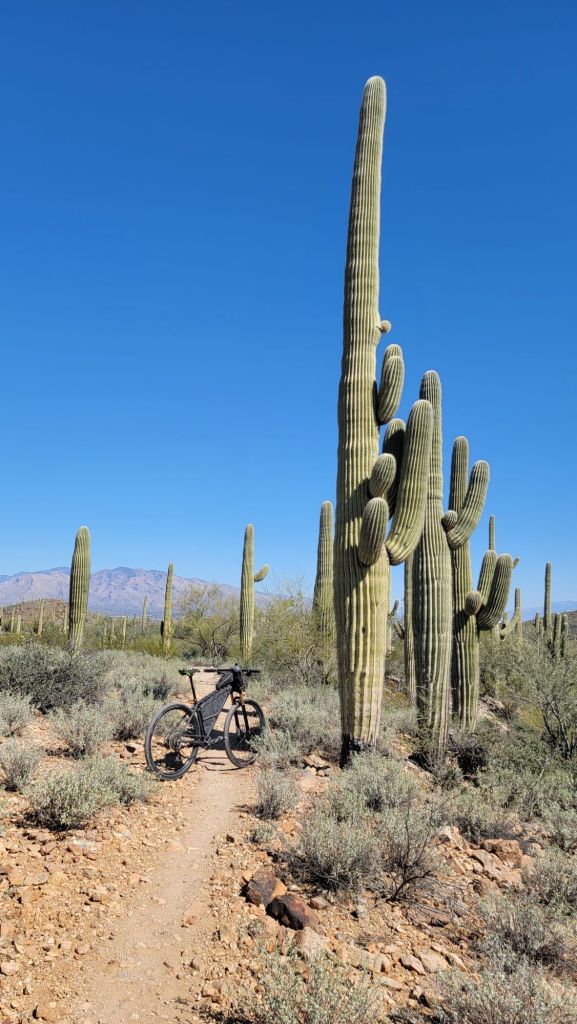
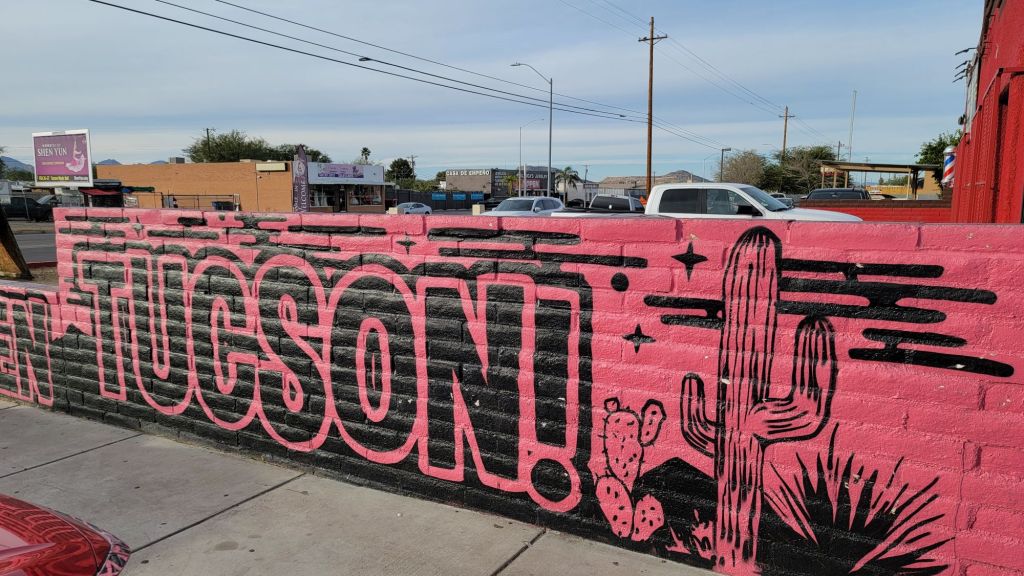
I also rode some of my favorite trails down in Tucson… the Star Pass area, part of the Star Pass trail system, where the cacti stand tall and majestic against the sky. The Sonoran Desert near Tucson is just unbeatable… pure magic.
And of course, I couldn’t skip a night or two at the trash pit. It has its own kind of beauty… rugged, chaotic, and utterly captivating. I love it. And with that, here we go… next stop… Madera Canyon
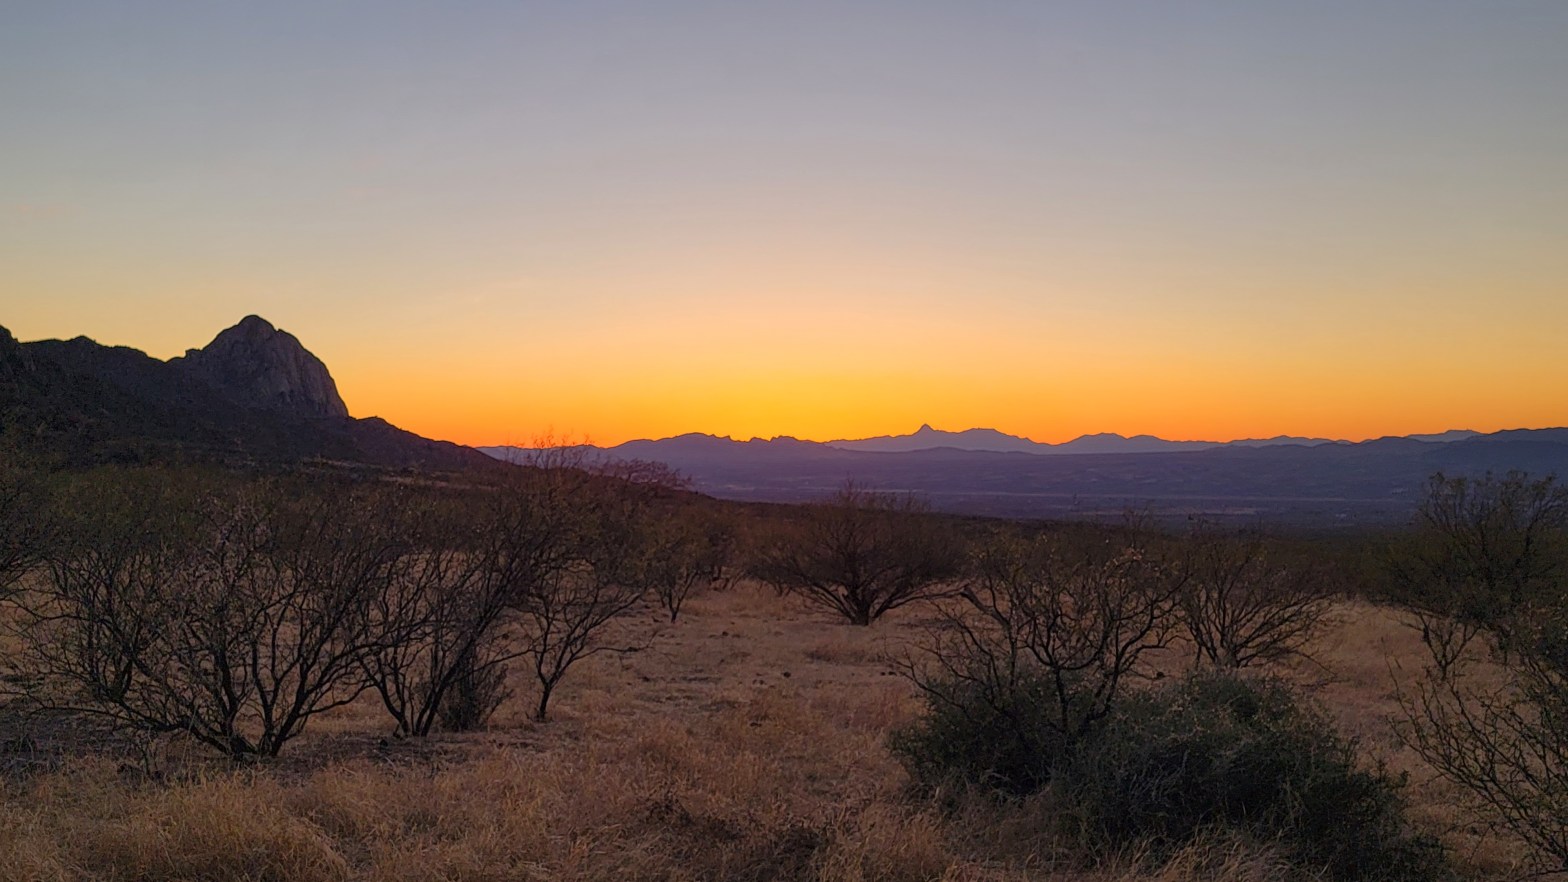
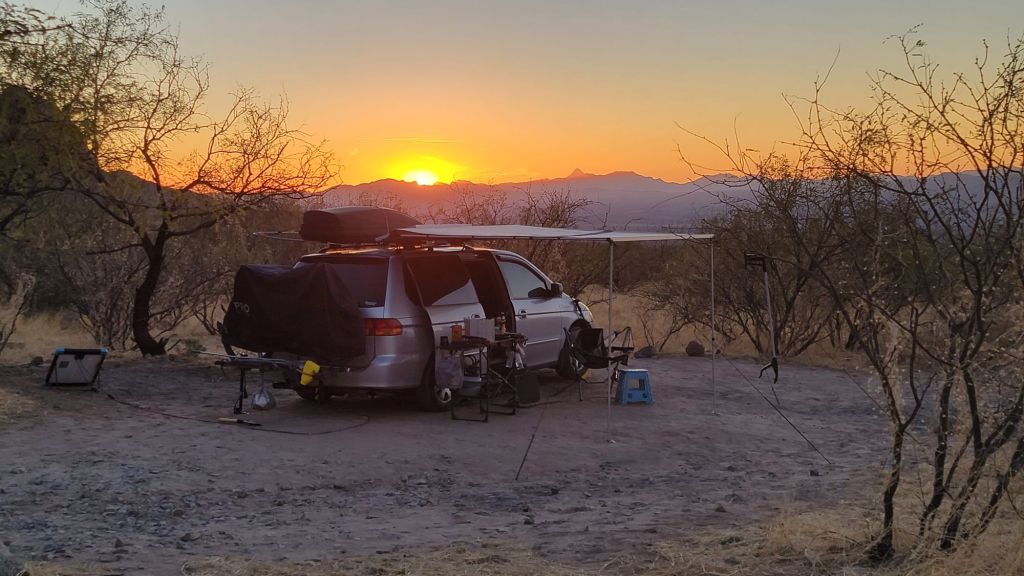
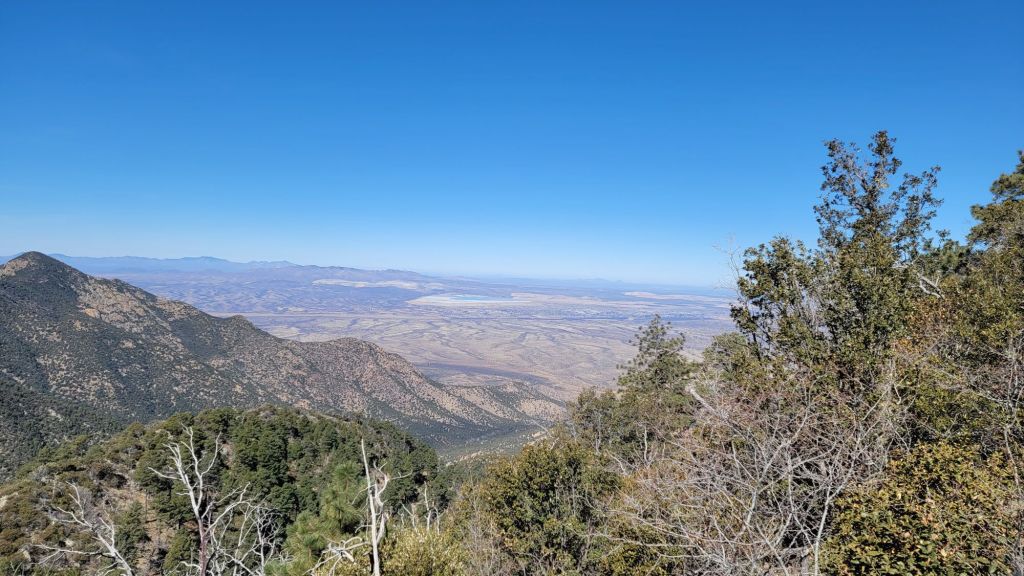
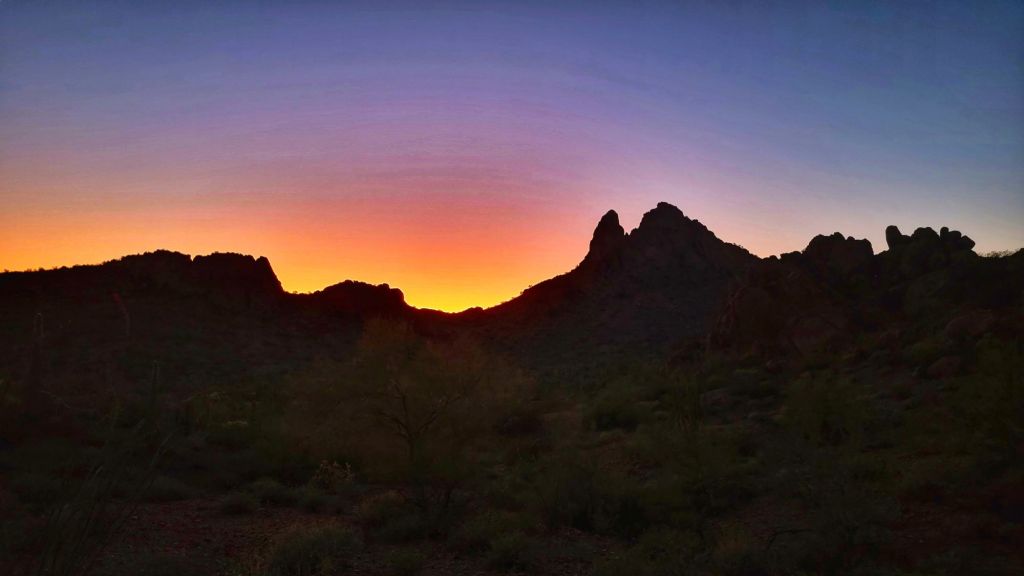
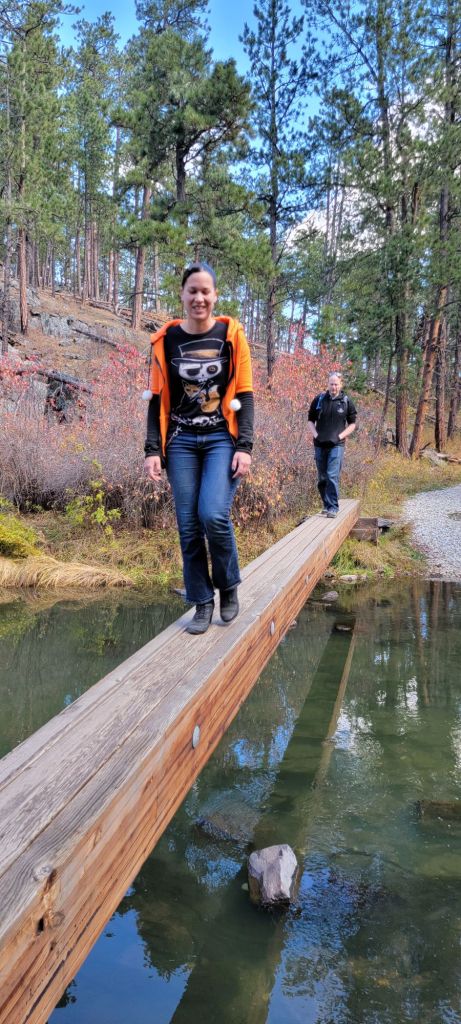
Madera Canyon sits in the Santa Rita Mountains just south of Tucson, and it’s one of those places that delivers every time. I found a great campsite on public land just outside Green Valley — free camping, legal for up to 14 days, and close enough to town that resupply was never an issue. The sunsets from camp were something else, with long views out over the valley that made it hard to go to bed.
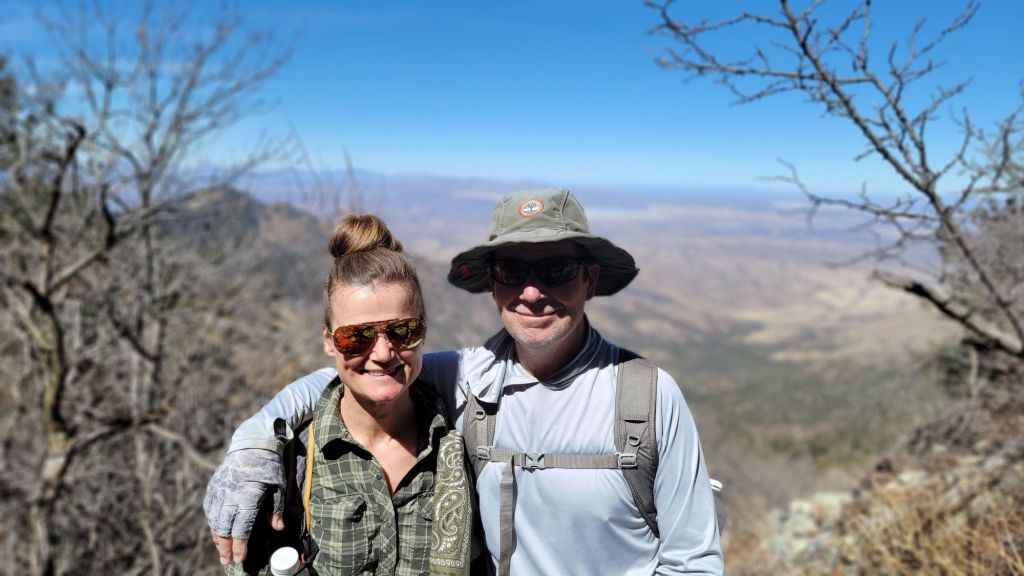
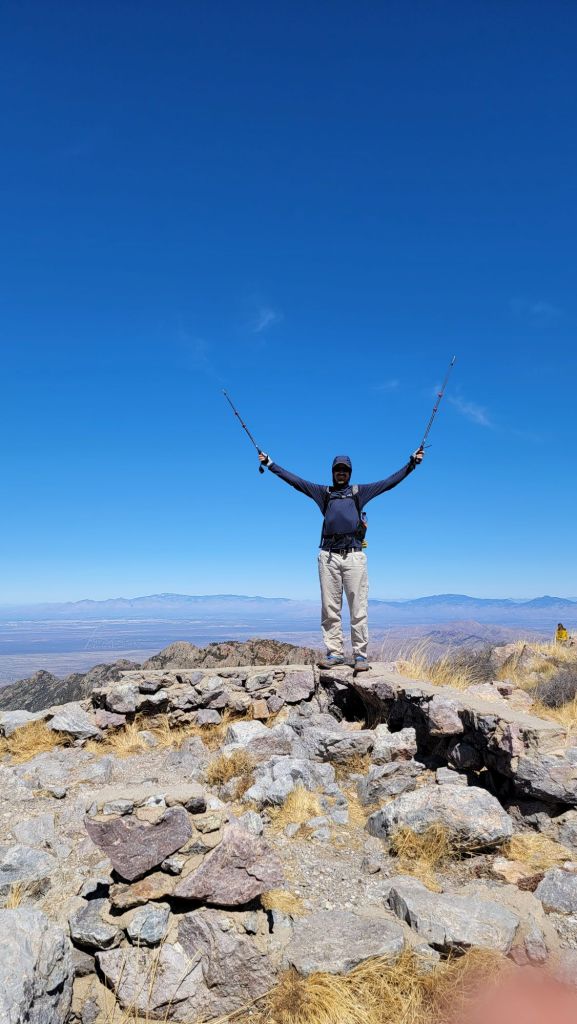
My friends Gary and Kiki were out here with me for a good stretch of the trip, and we made the most of it. We hiked pretty much every day — working up ridgelines, dropping into creek drainages, and eventually knocking out a summit that still had snow on it. Great views, great company, and the kind of hiking where you feel it the next morning in the best possible way.
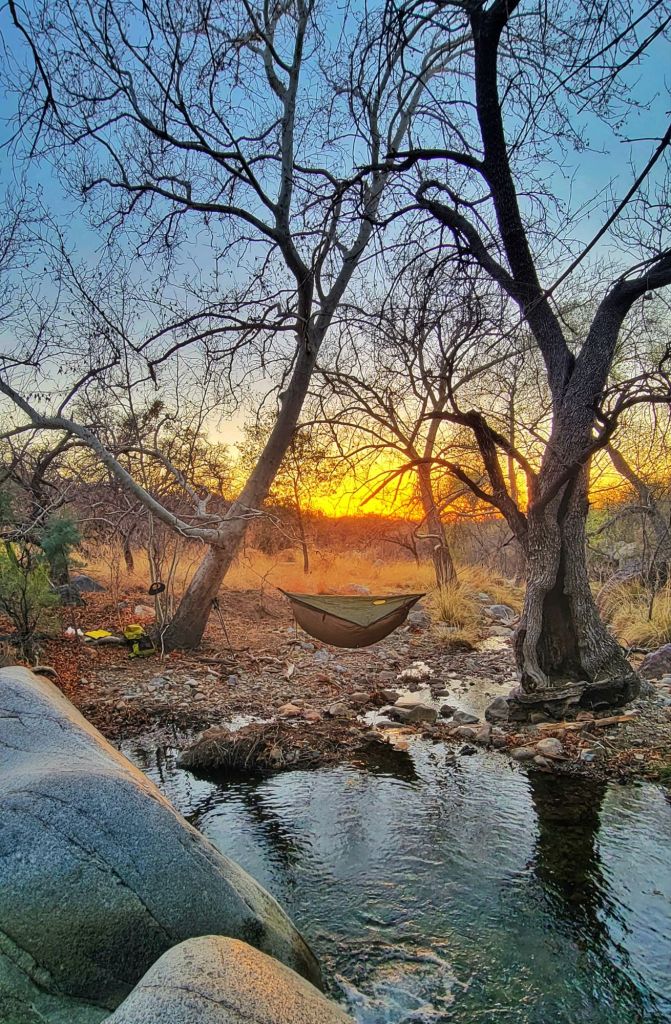
I also squeezed in a solo overnight, hammock camping right along the creek. No agenda, just the sound of water and the tree canopy overhead. Those simple nights are sometimes the best ones.
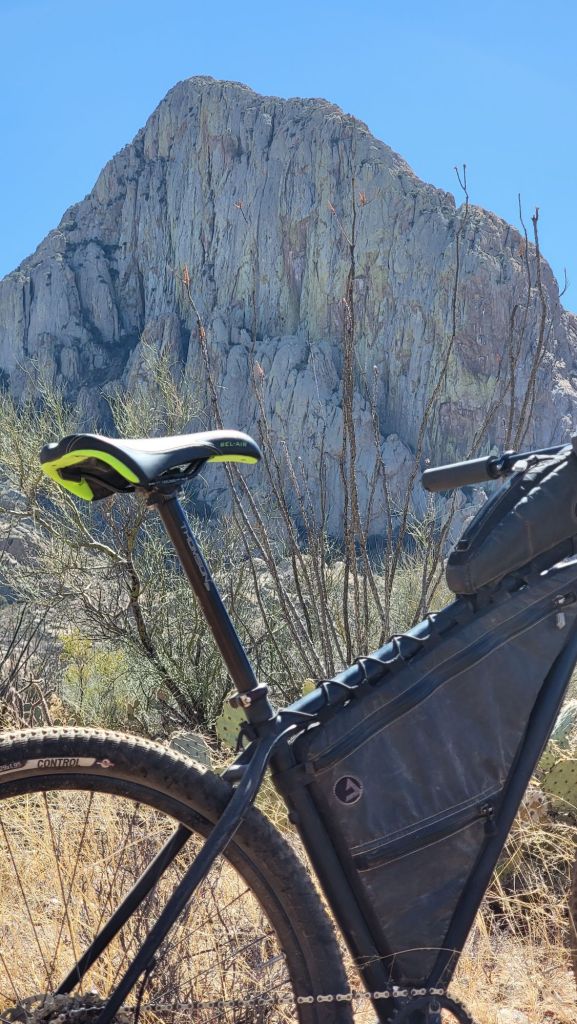
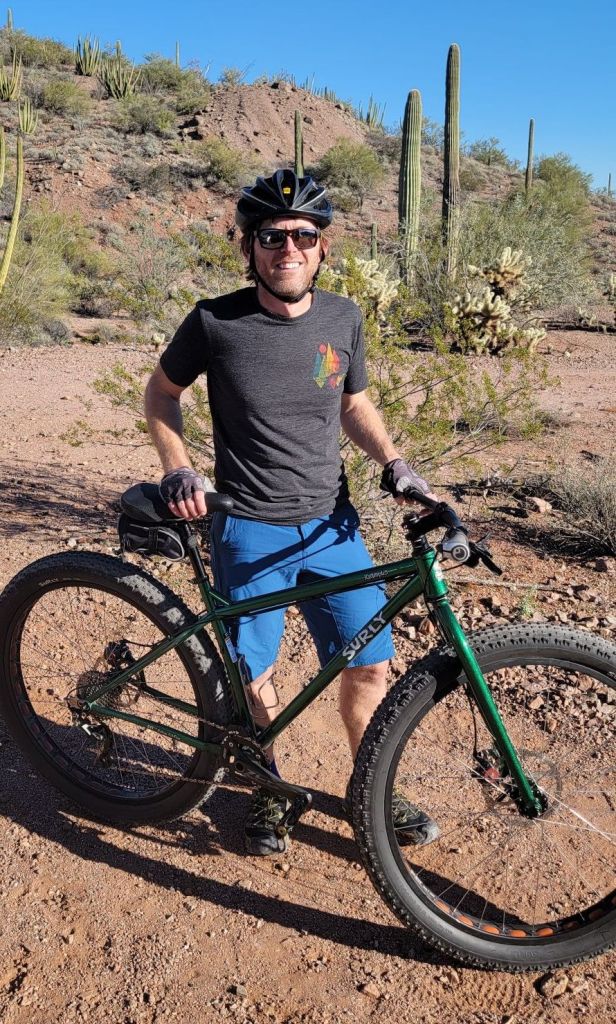
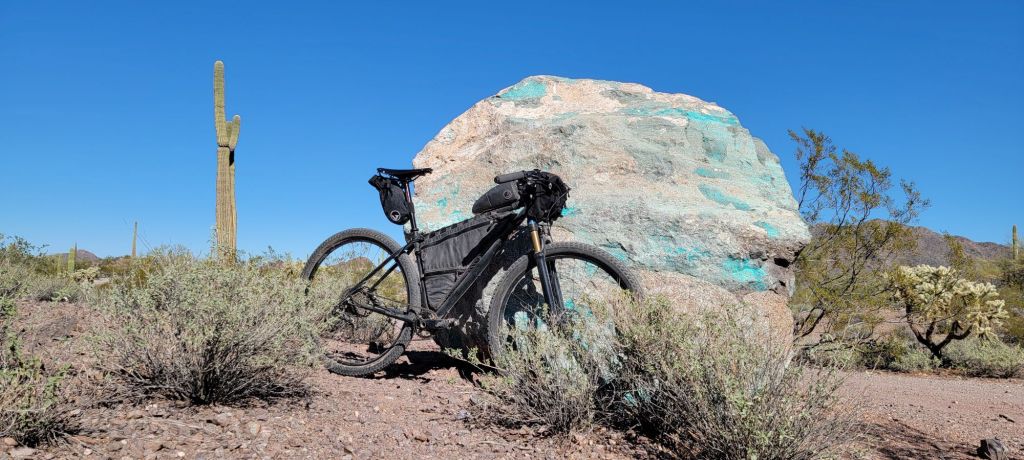
I got out on the mountain bike too, working through terrain studded with cool granite formations. The riding out here is underrated — varied, scenic, and just technical enough to keep things interesting.
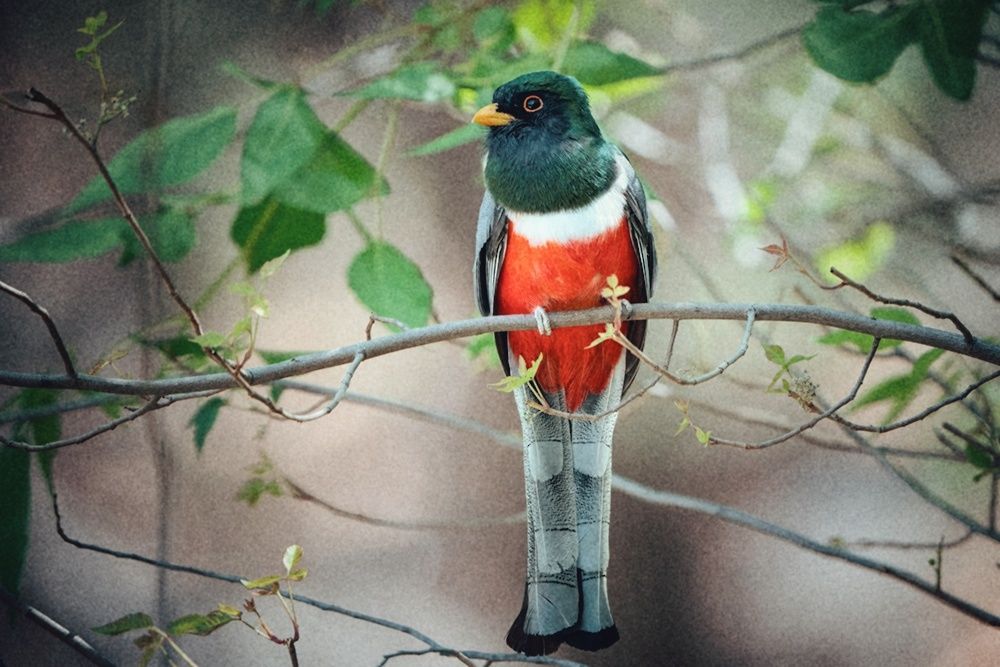
The birding in Madera Canyon is world class. It’s one of the premier birding destinations in the entire country, drawing visitors from everywhere hoping to spot species found nowhere else in the United States.
On one of my final hikes I got lucky — an elegant trogon stepped out into the open, vivid and unmistakable. A great way to close out the trip
Good friends, good trails, good camping. Madera Canyon never disappoints.
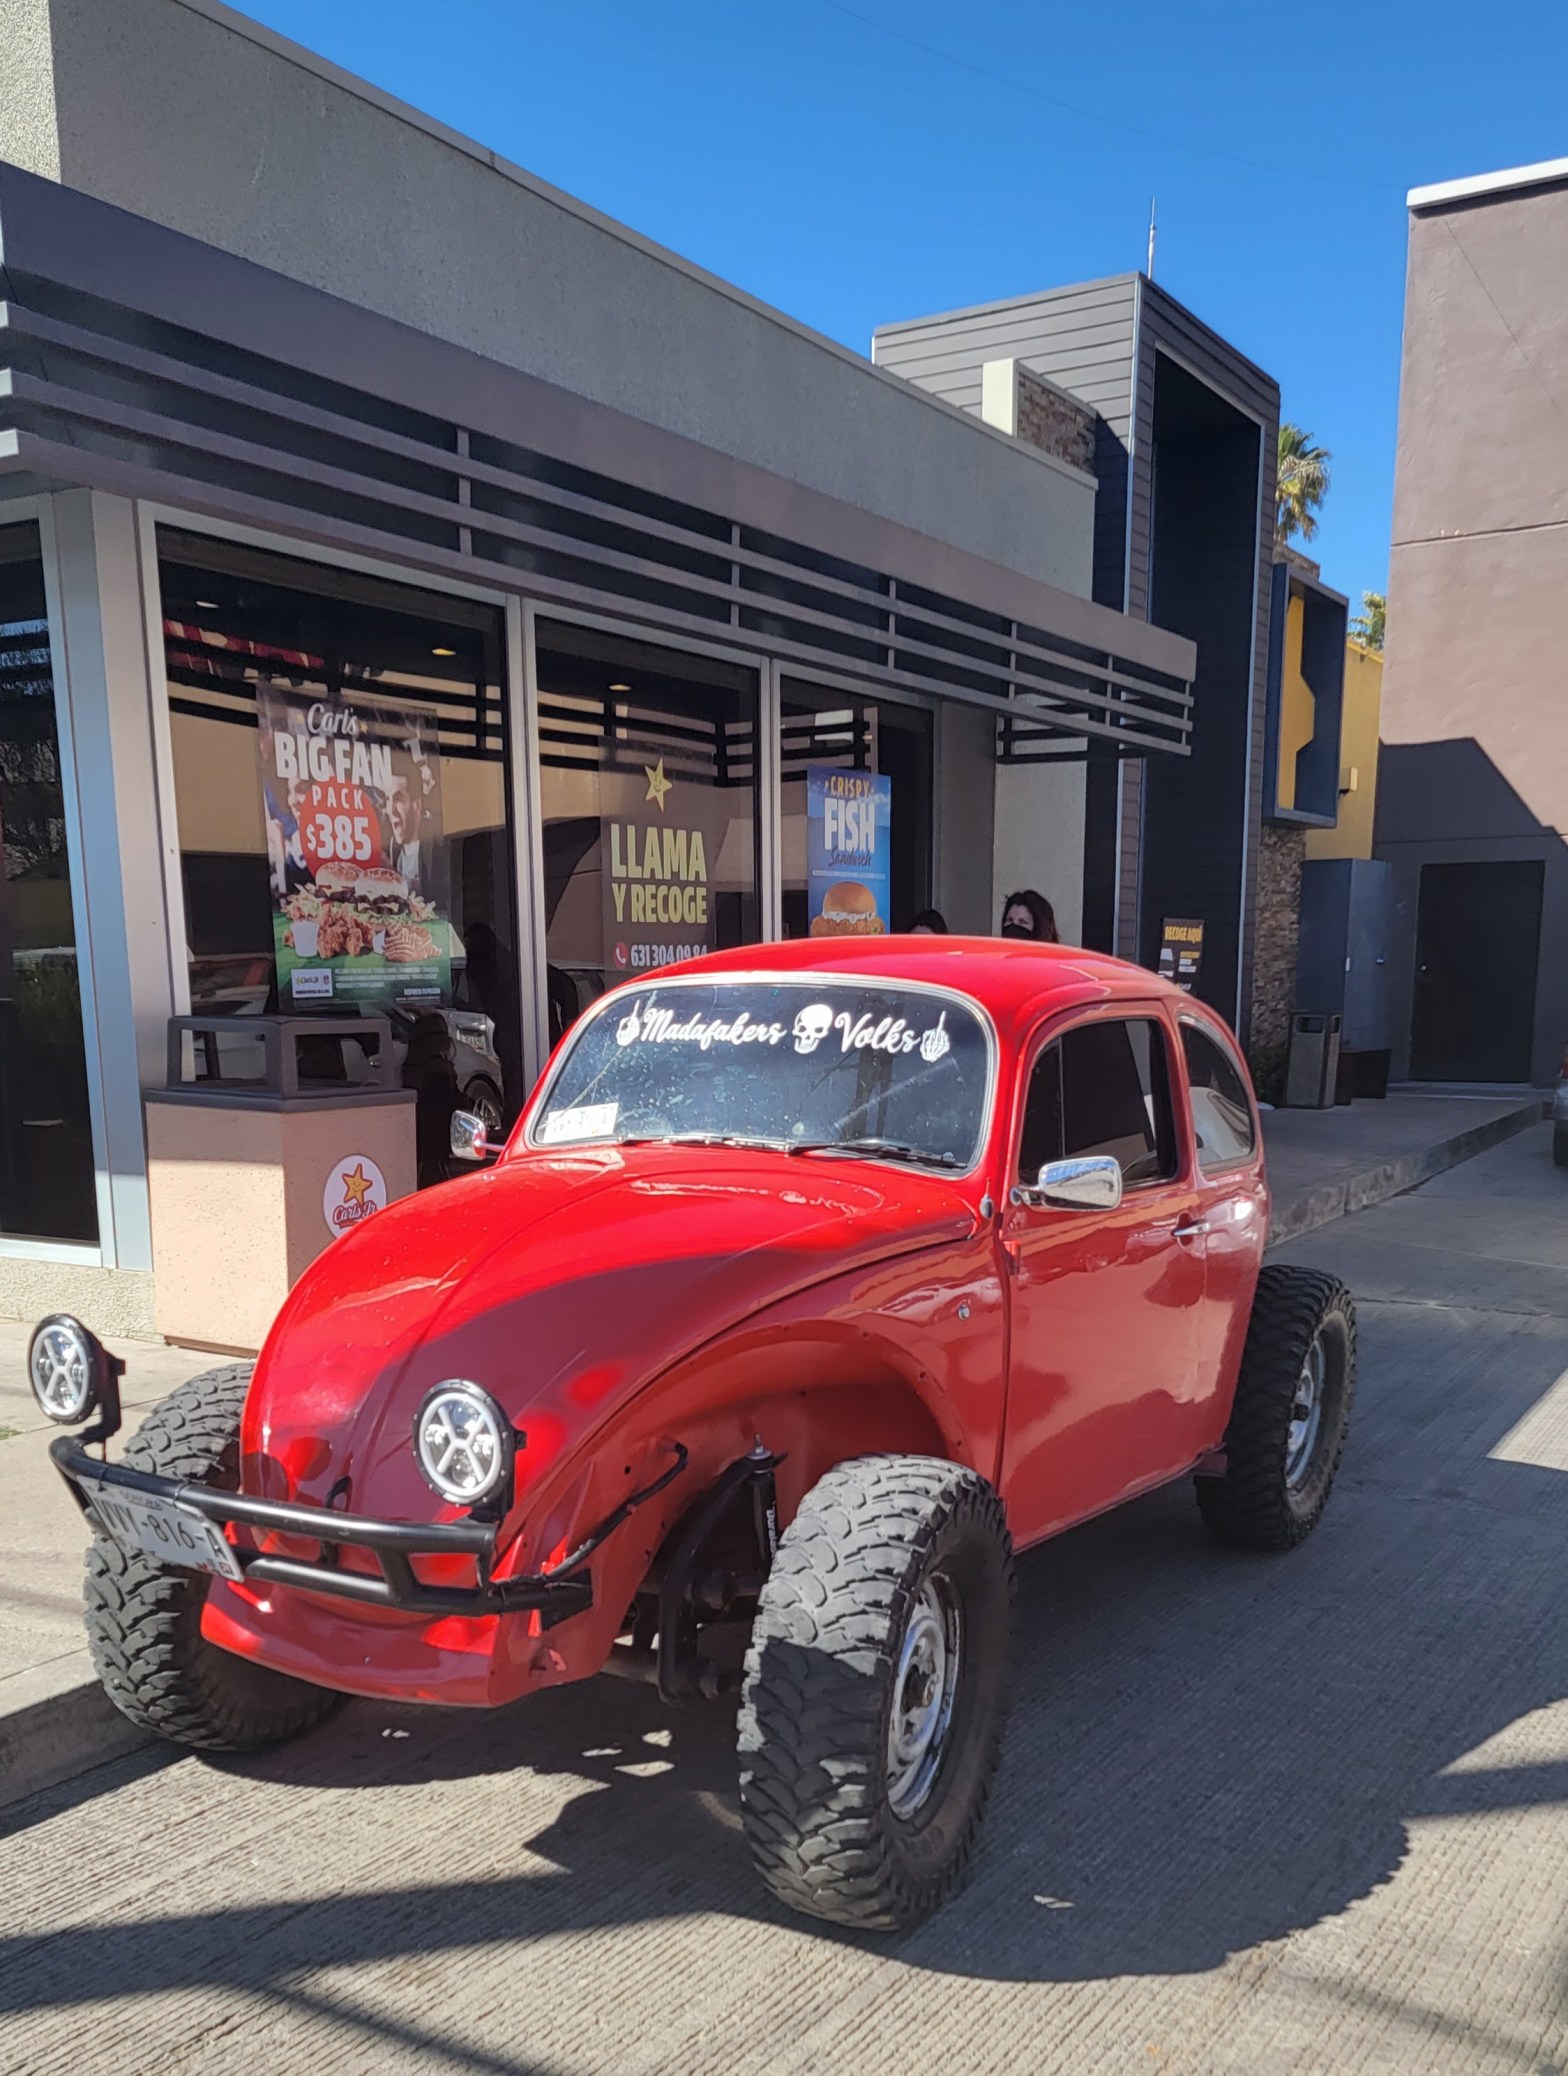
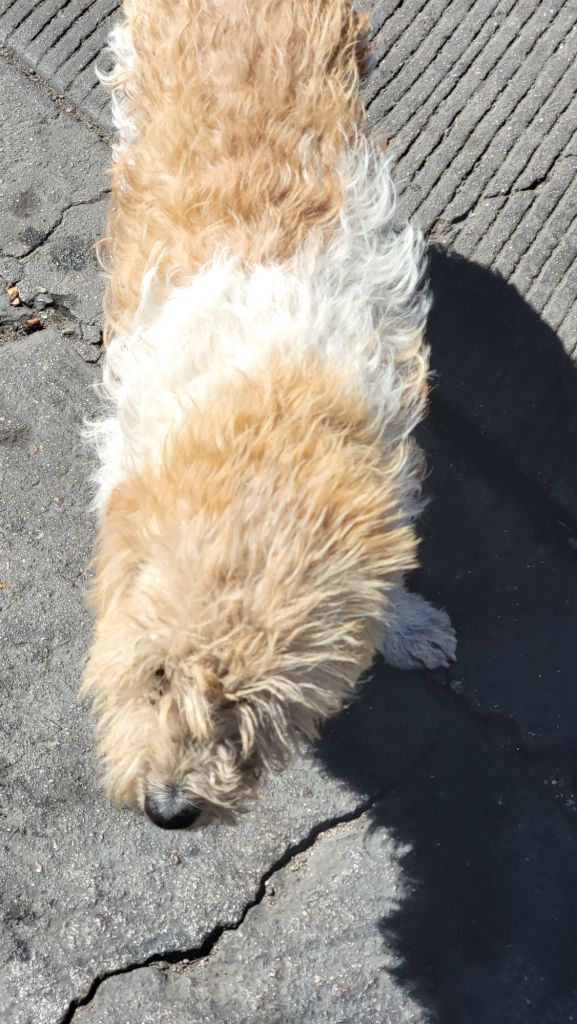
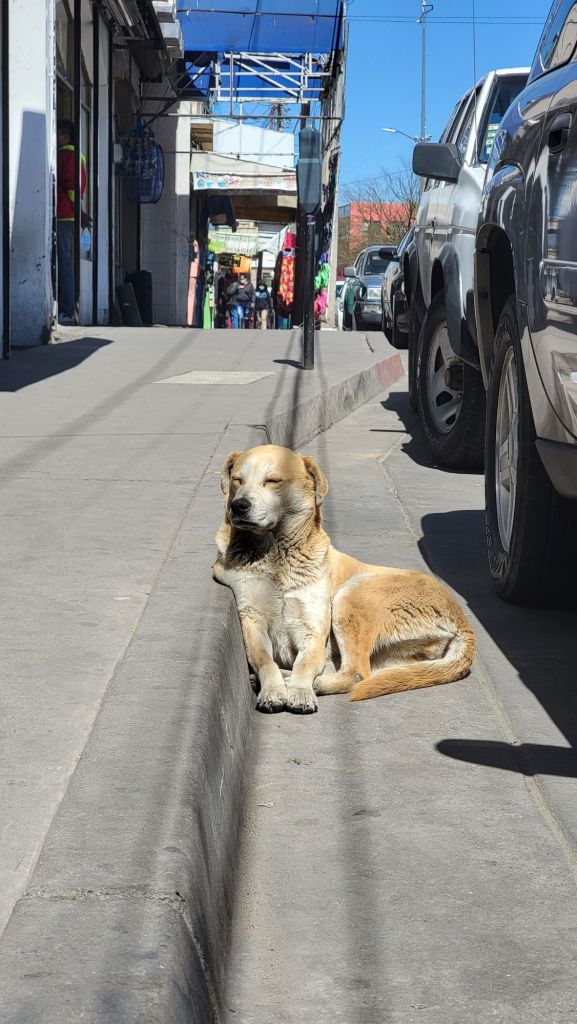
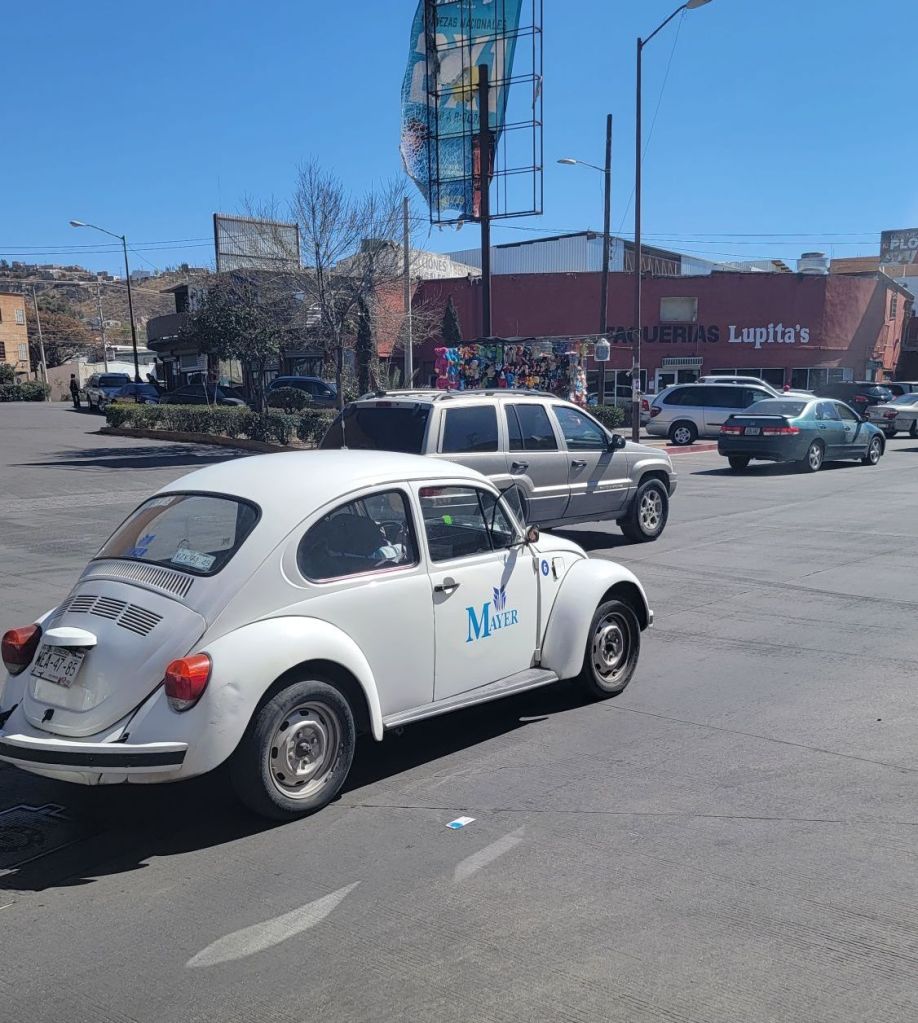
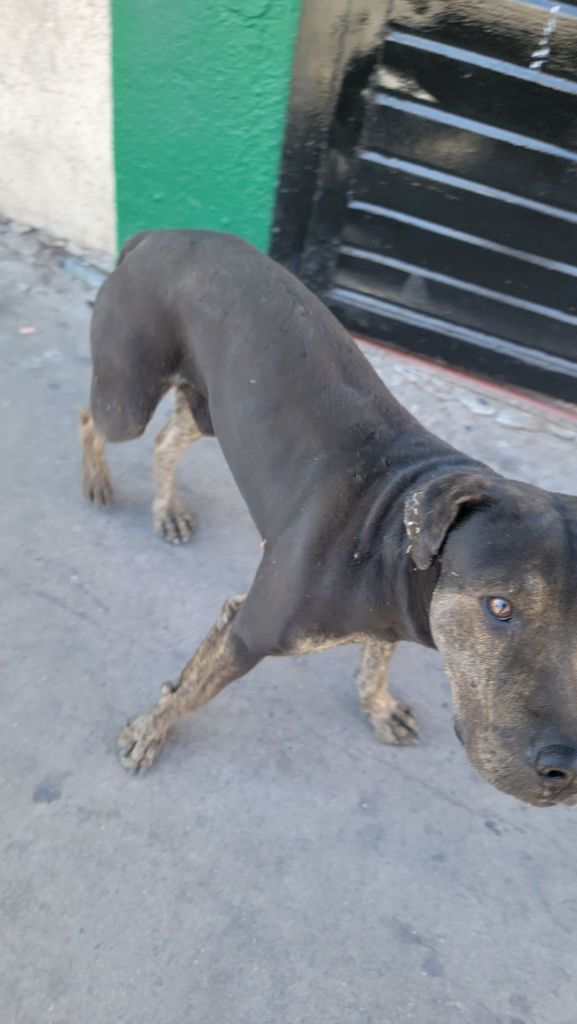
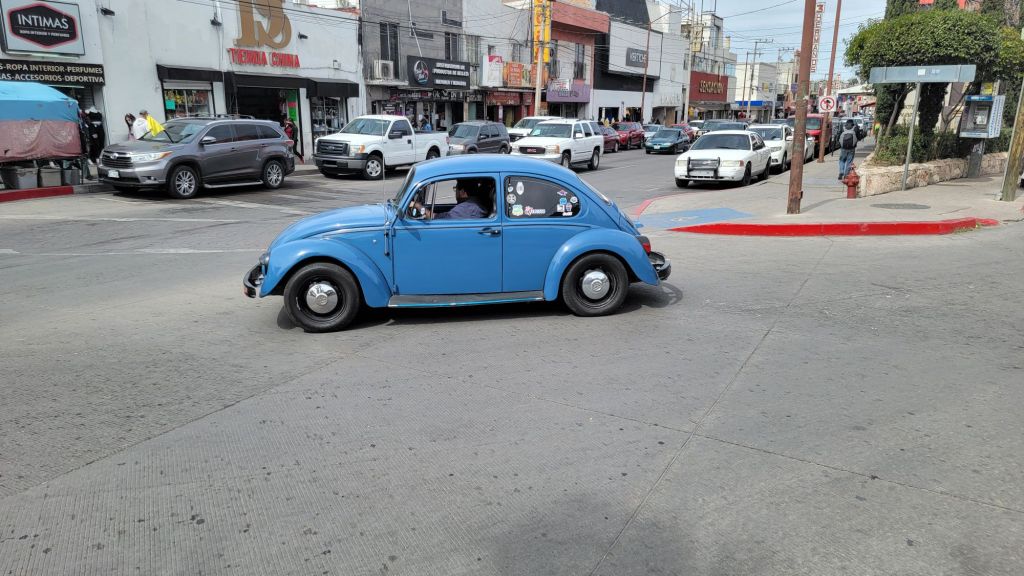
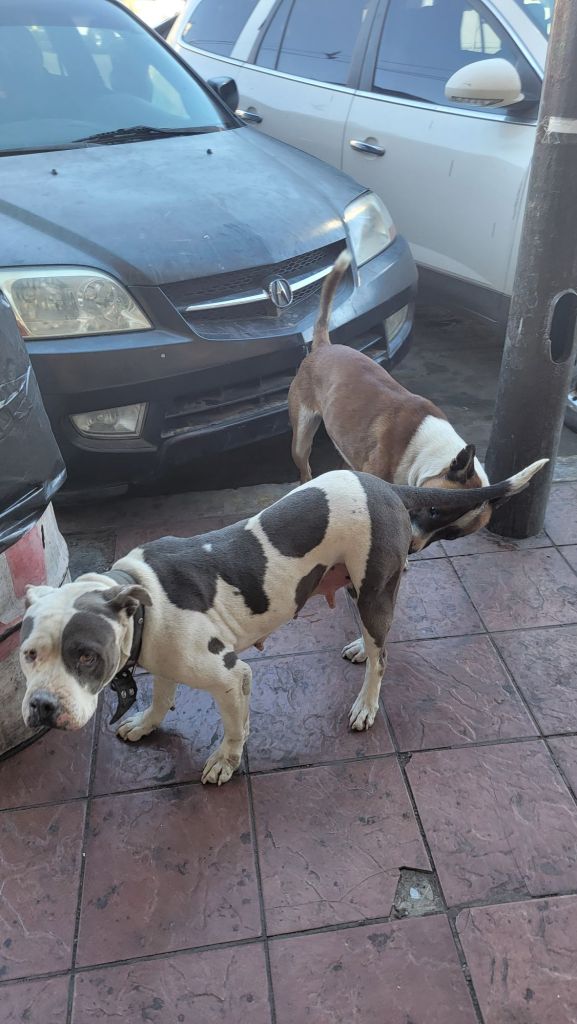
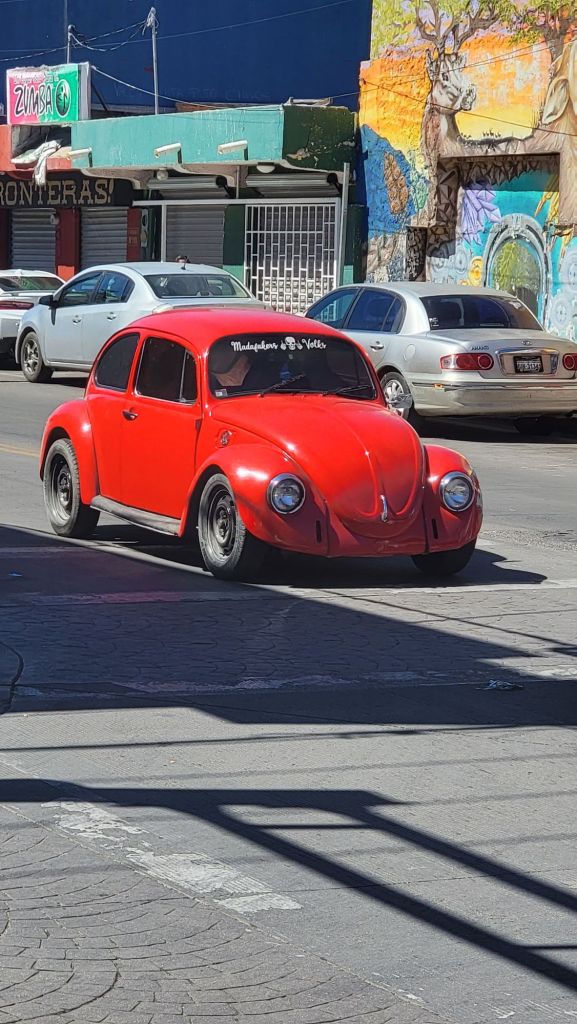
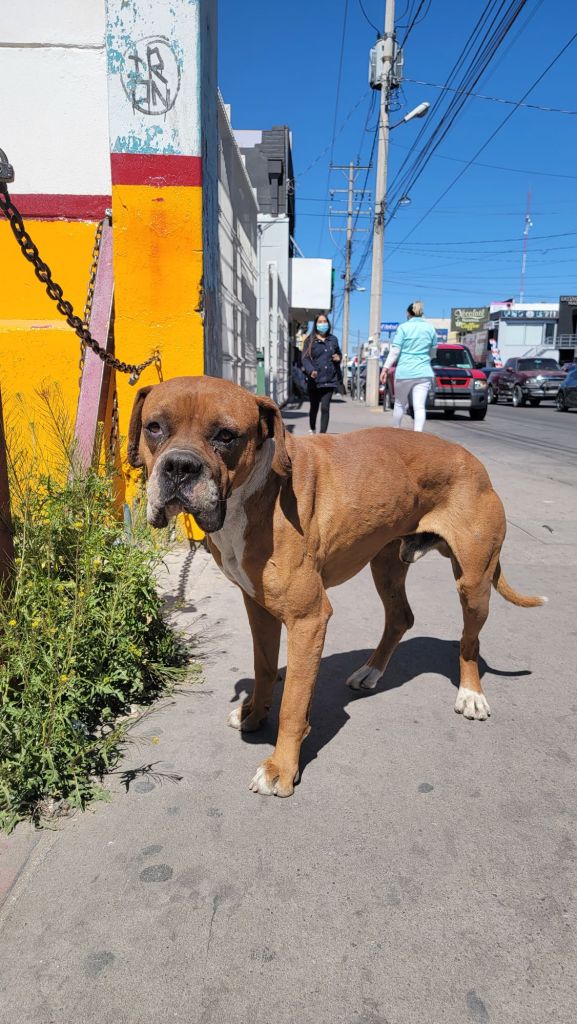
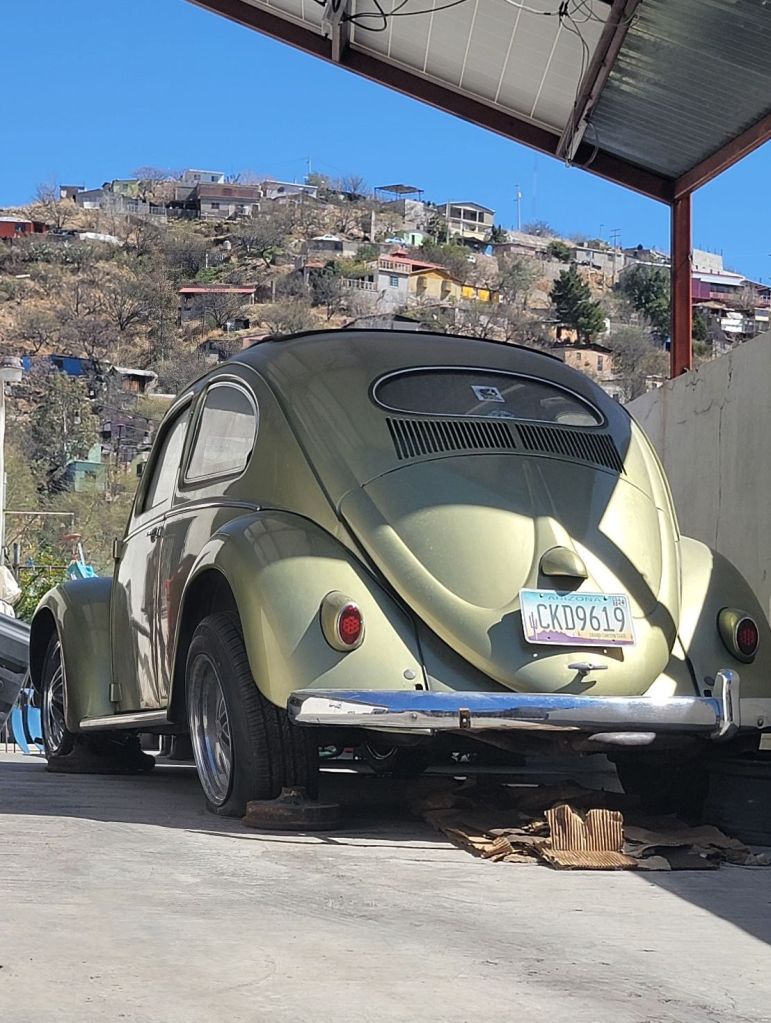
This post needs no real explanation. I love dogs. I love Volkswagen Beetles. Nogales delivered both in abundance, and I had my camera ready.
Mexico kept the classic Beetle in production longer than anywhere else in the world, and that love for the car never really left. The streets of Nogales are proof — modified, painted, and proudly maintained, these Bugs are anything but forgotten. And woven right in between them, the street dogs of Nogales, doing what street dogs do best: owning every block they walk.
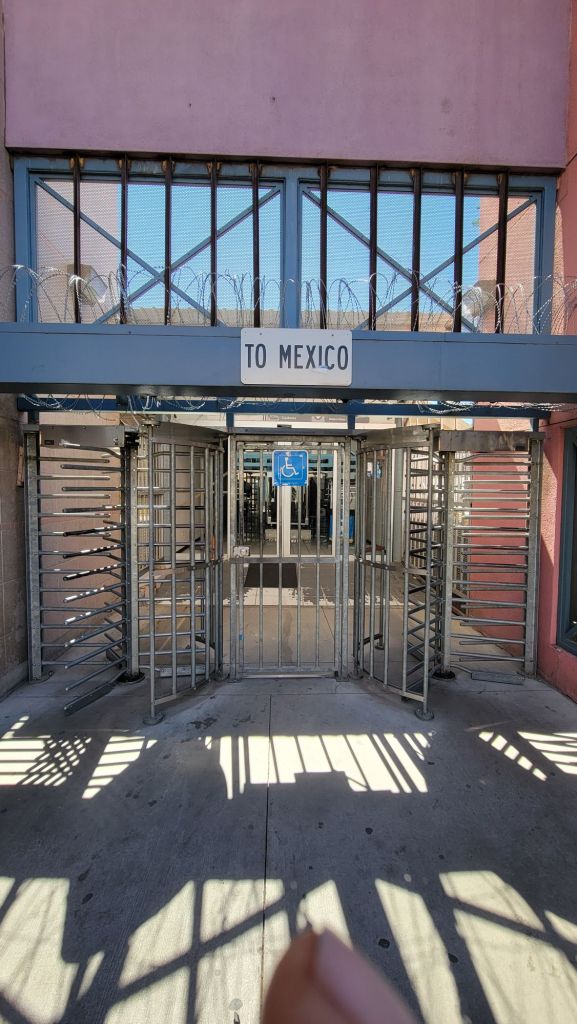
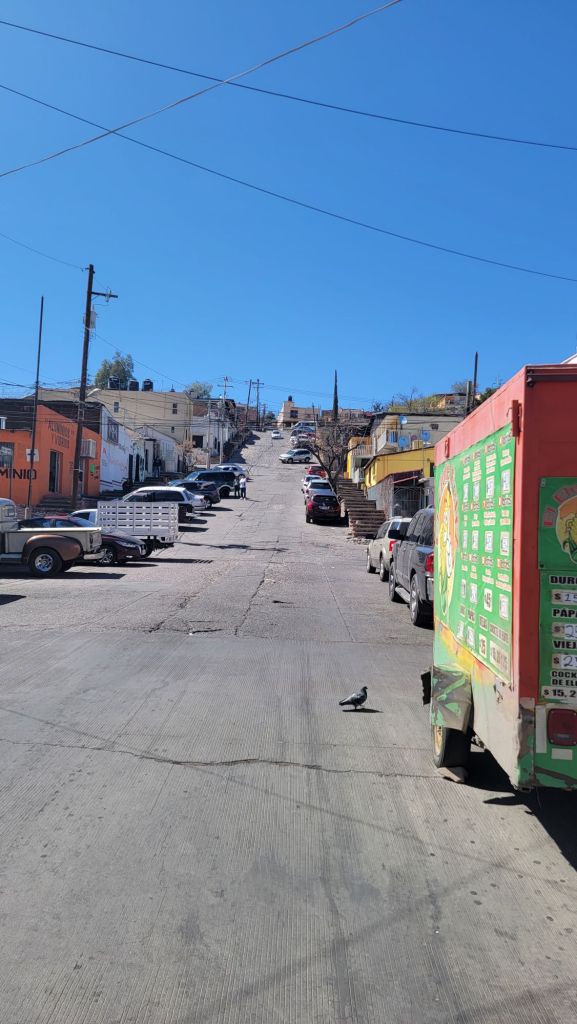
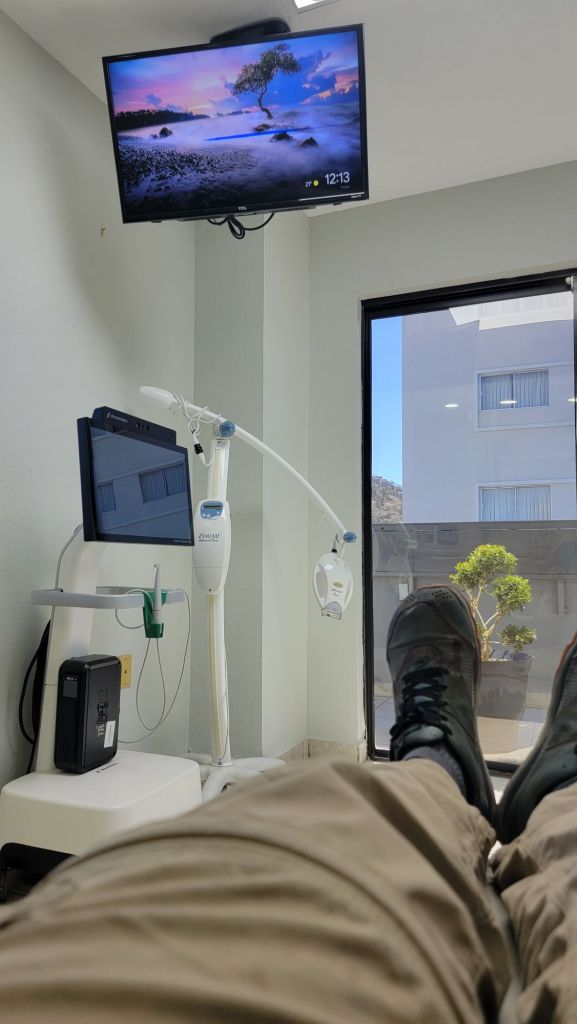
There’s a specific kind of adrenaline that hits when you walk toward the border. For my recent dental trip to Nogales, that journey started at the gates
The crossing itself was surprisingly seamless. There’s no daunting security line or intense questioning; you simply walk through the gates and, just like that, you’re in Mexico.
It’s one of those rare moments where a single step truly feels like entering a different world.
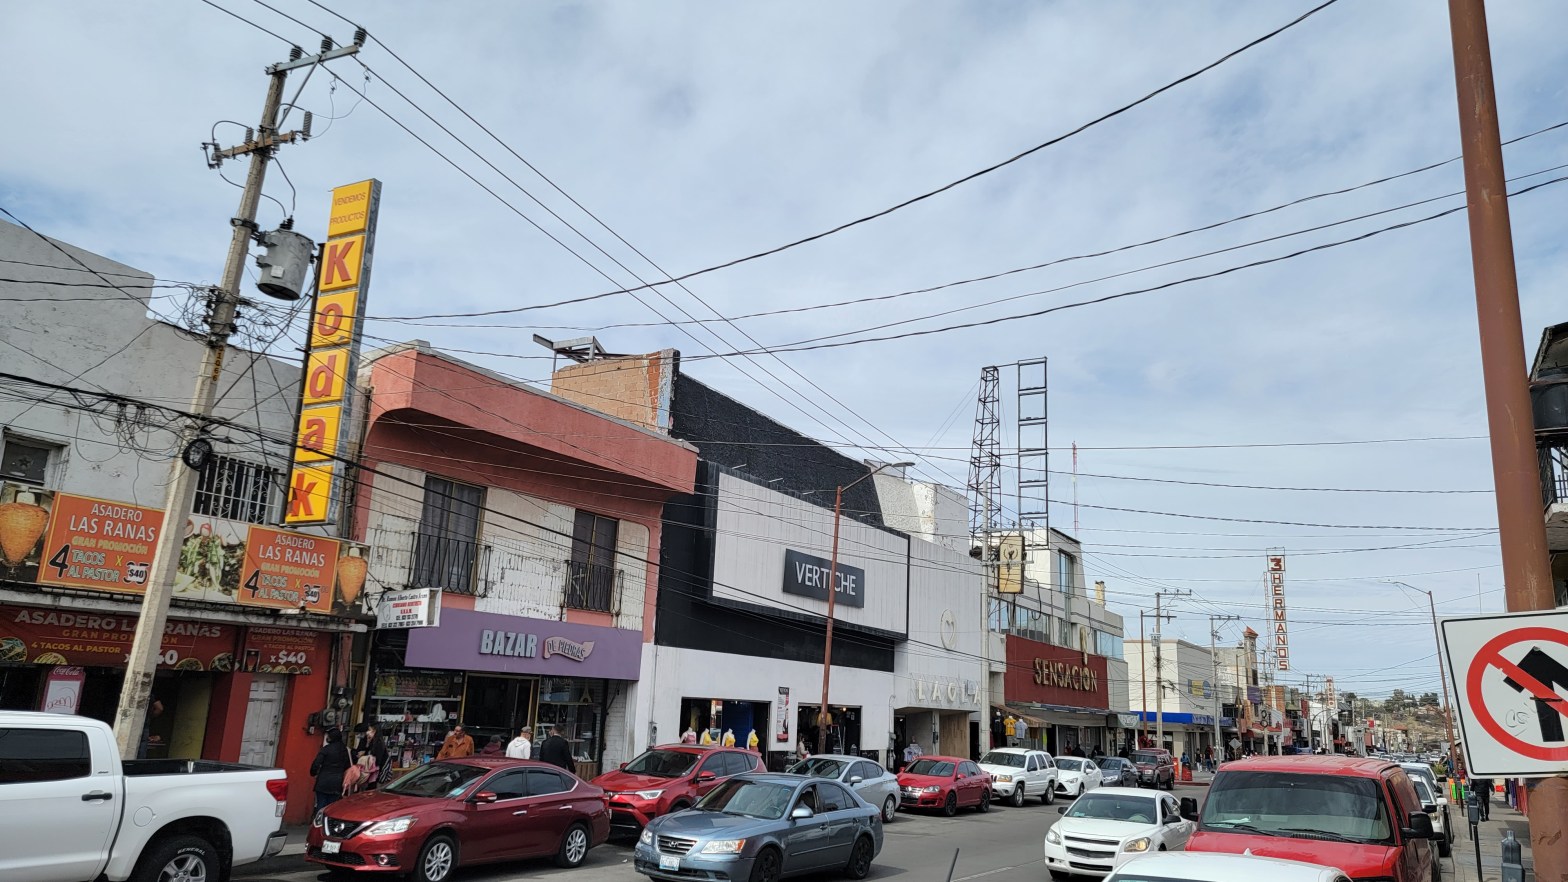
Immediately, the atmosphere shifts. The streets are a living timeline, filled with cars from twenty or twenty-five years ago, and the architecture is unmistakably local.
Everything is bathed in bright, vibrant colors that seem to glow under the perfect Sonoran sun.
Mmmmm Street Food!
Of course, I was there for a reason… the dental care I received was truly excellent. The quality was top-tier—I wouldn’t hesitate to go back in a heartbeat.
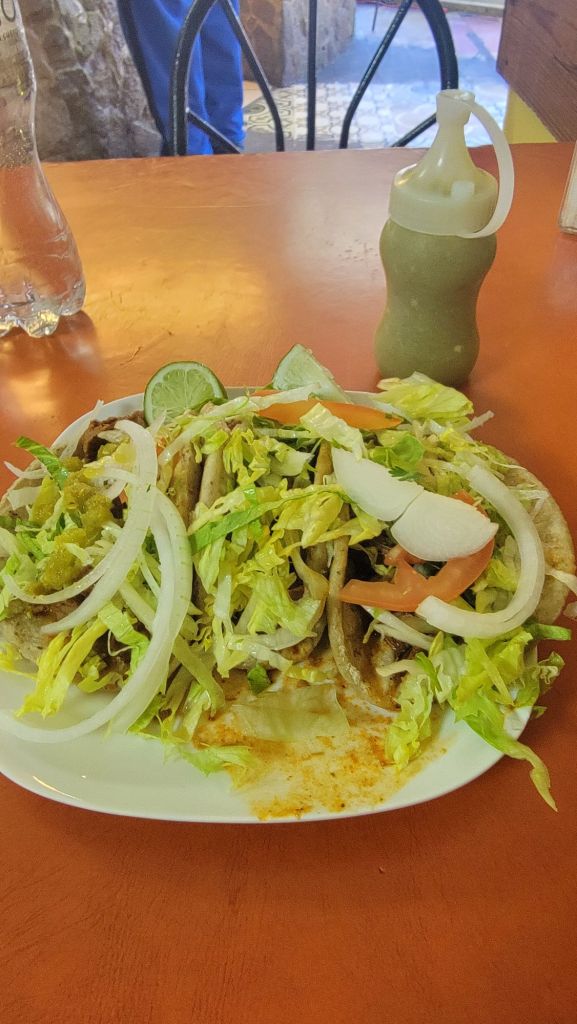
But a trip to Nogales isn’t just about the clinic. Between appointments, I fell in love with the local street dogs (who seem to run the town!) and, naturally, I couldn’t leave without tracking down some authentic tacos.
Nogales offered a perfect blend of high-quality care and rich culture. If you’re considering making the trip for your own dental work, I can say from experience: the water’s fine (and the tacos are even better).
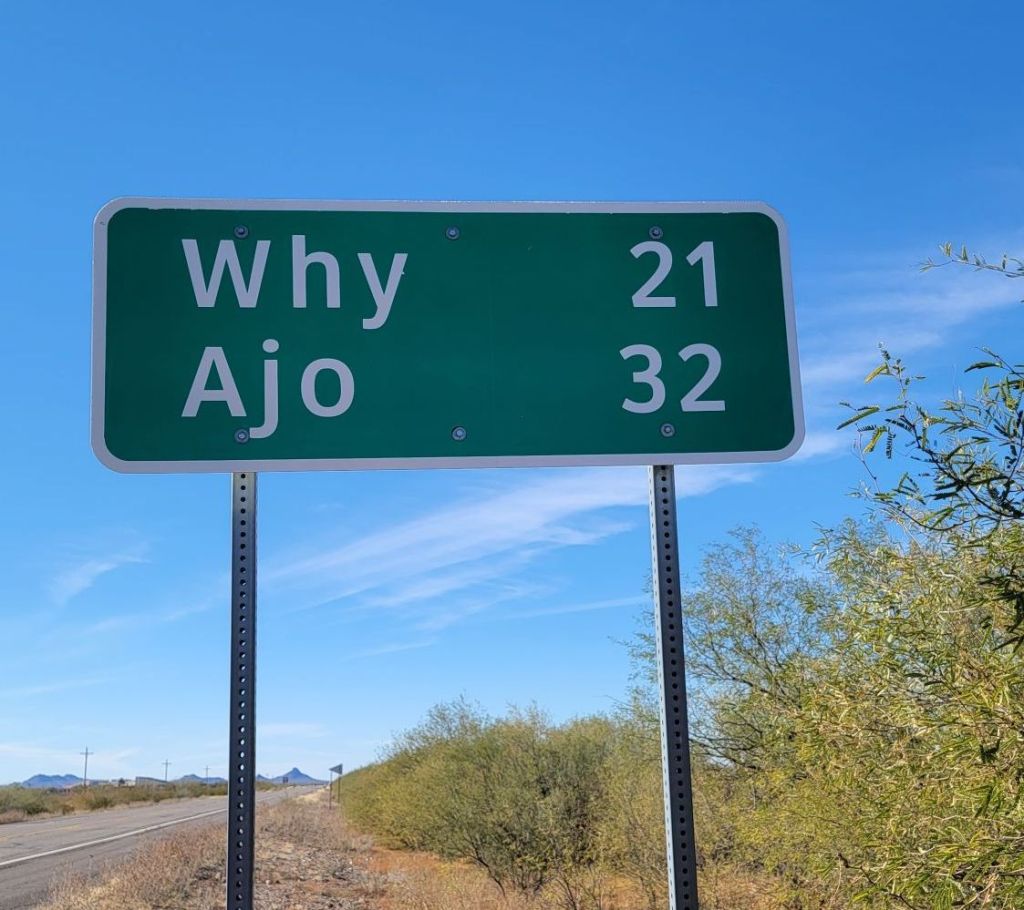
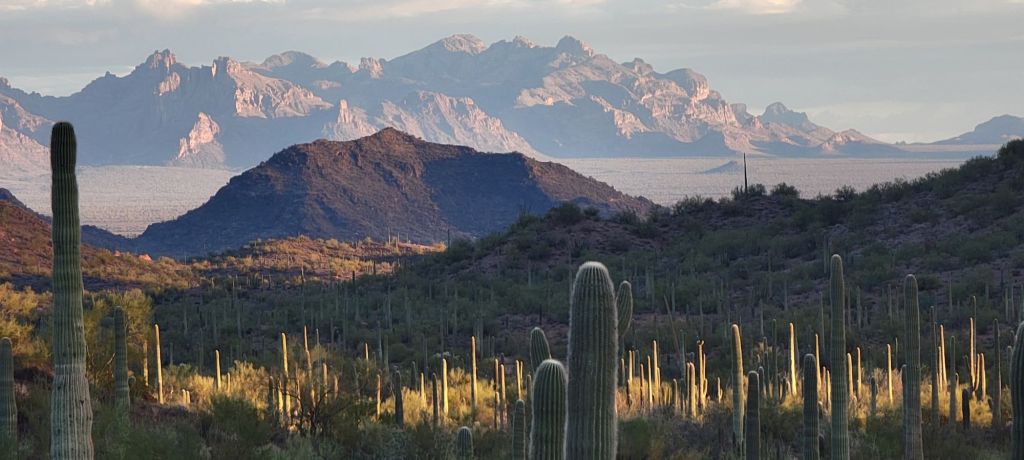
Why Ajo, you ask… well, it just happens to be one of my favorite places on the planet… right up there with Alaska. But this place sealed the deal for me when it comes to the Sonoran Desert… its majestic beauty, its quiet mystery, and a landscape packed full of incredible flora and fauna that feels alive in every direction.
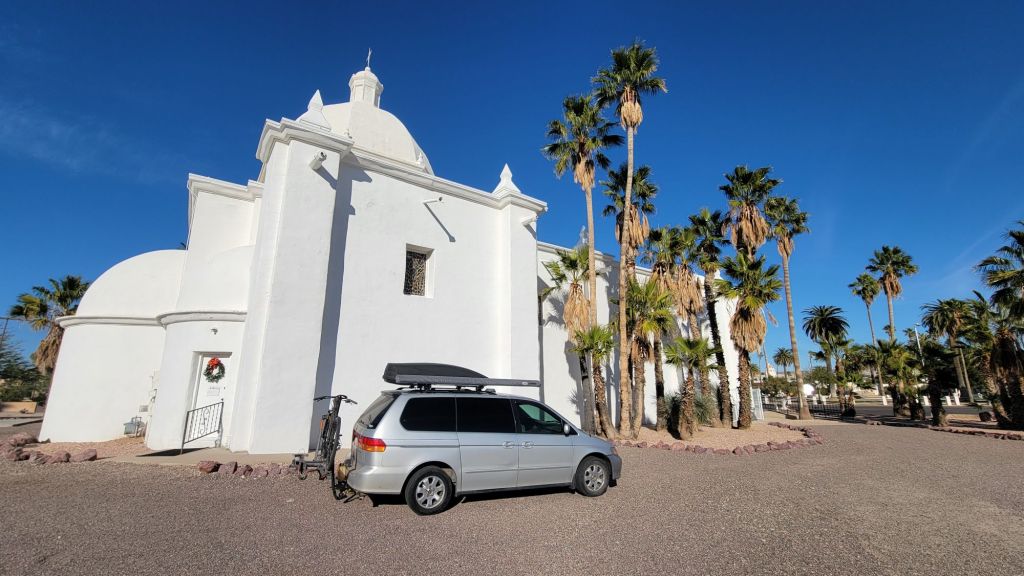
You’ve gotta stop by the iconic church in downtown Ajo… Immaculate Conception Church really sets the vibe. It’s the kind of place that instantly slows you down… white stucco glowing in the desert sun, palm trees swaying, and that quiet, timeless energy that makes Ajo feel like more than just a stop… it feels like a place.
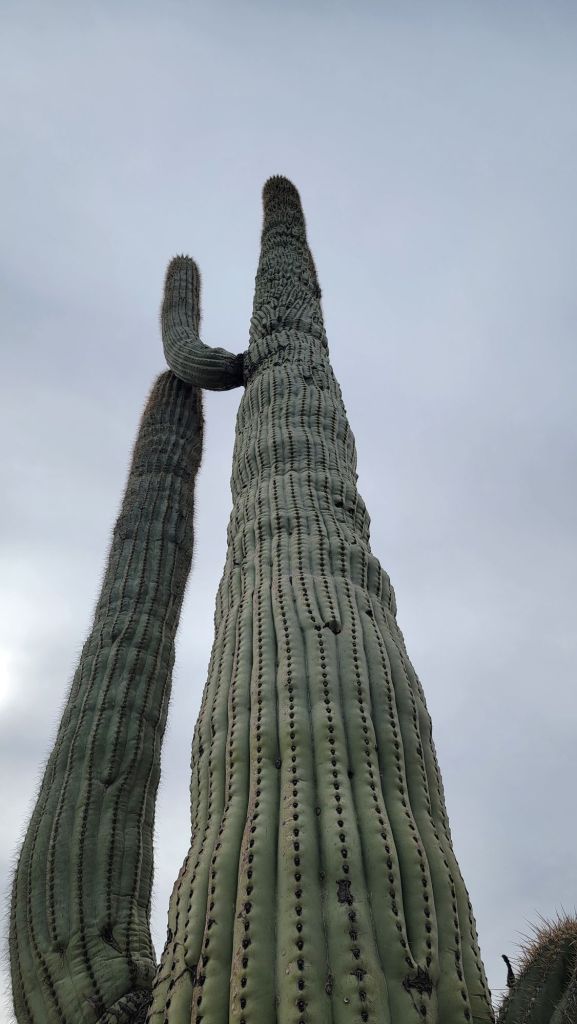
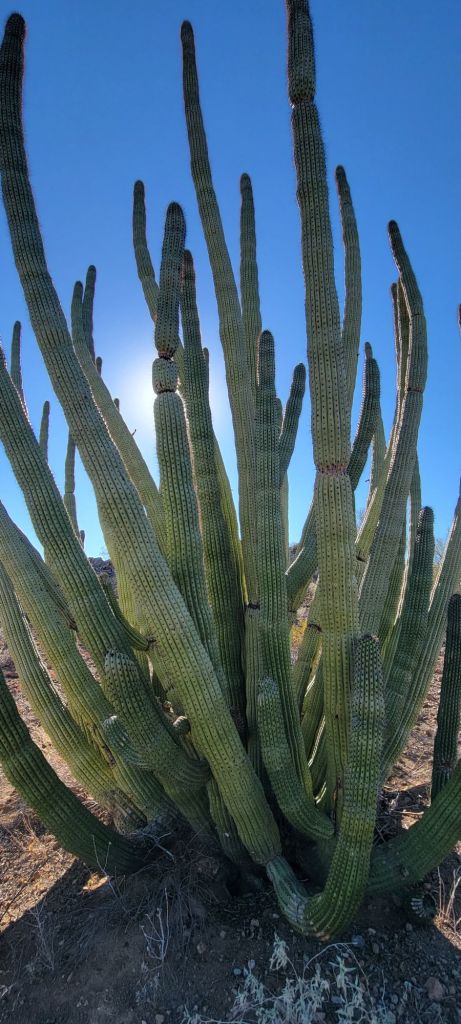
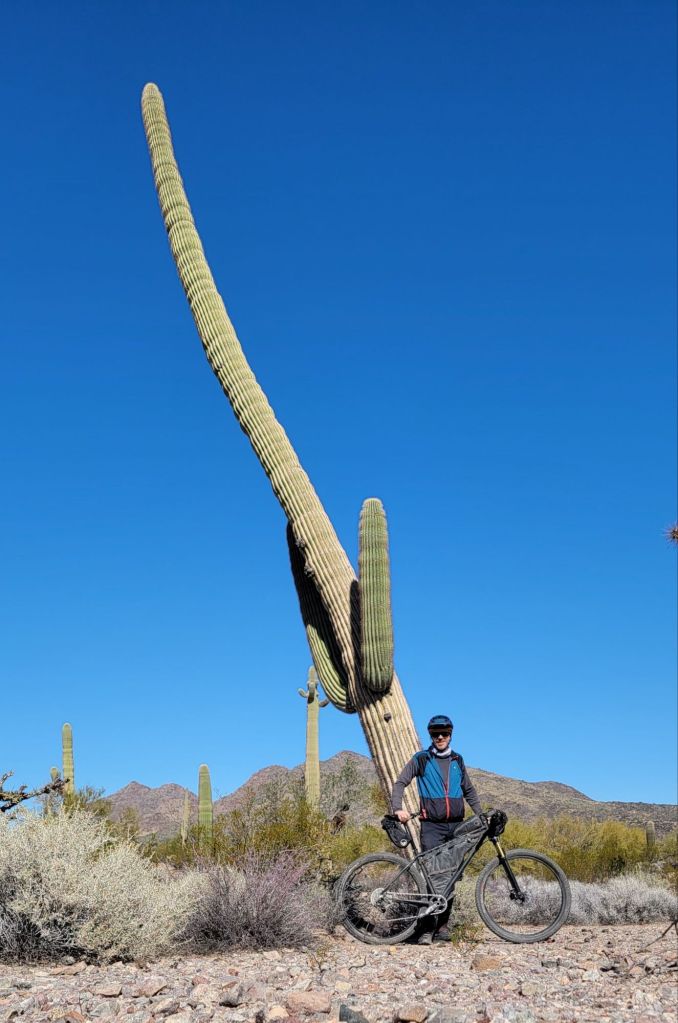
I immediately set up camp and take in the views… it’s amazing how much I’ve missed these beautiful cactus.
Each one has its own personality… like they’re all standing there with a story to tell if you’re willing to slow down and listen.
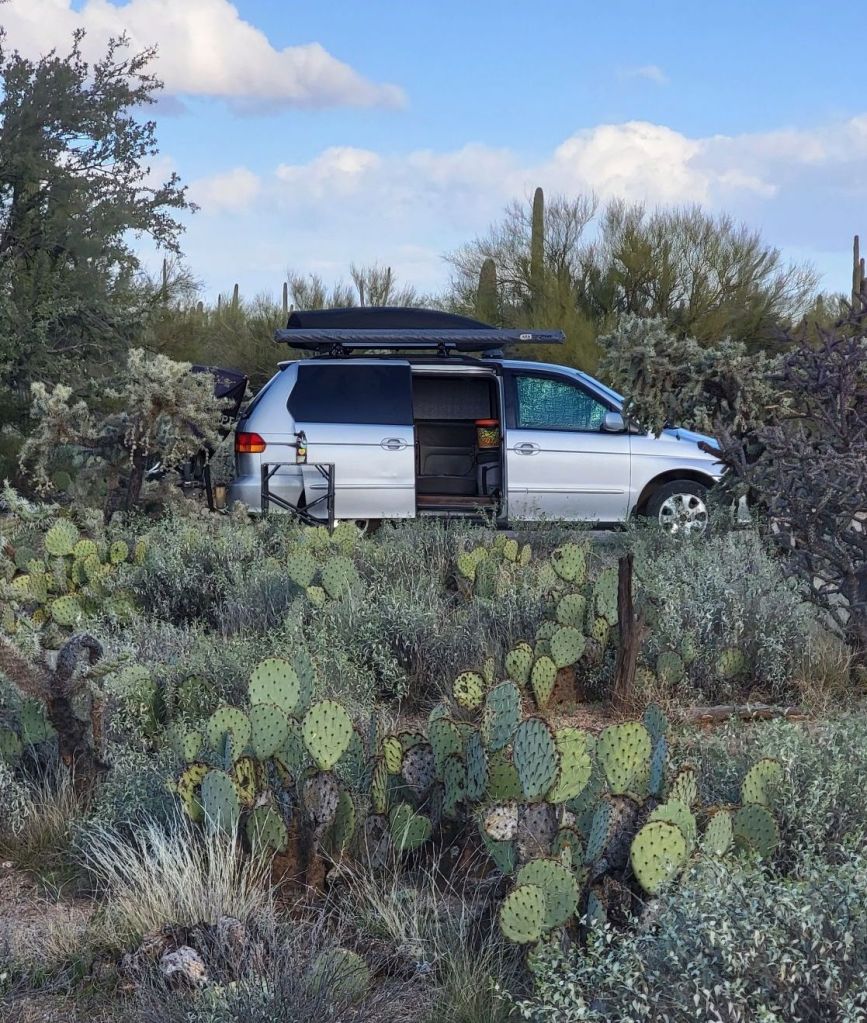
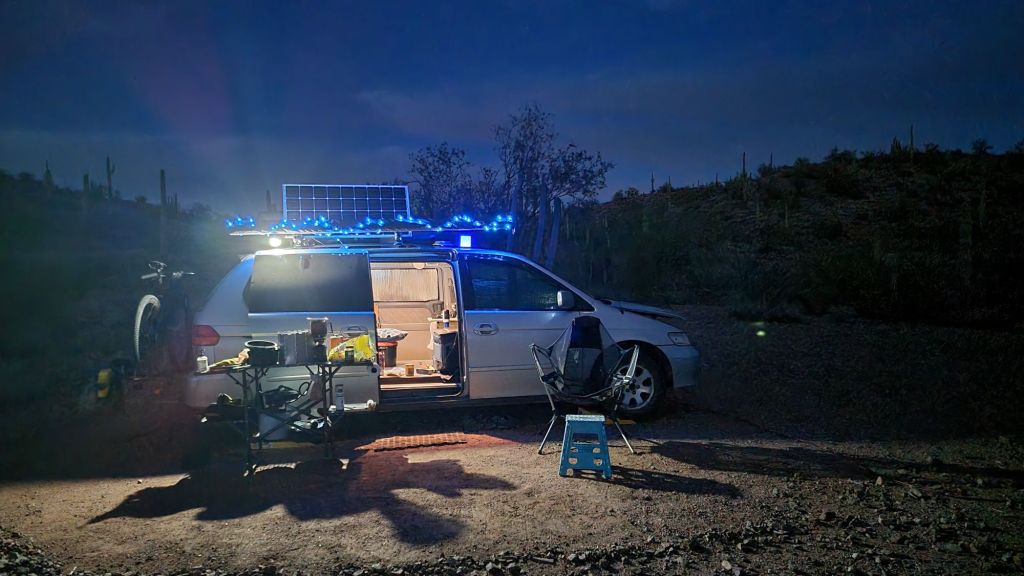
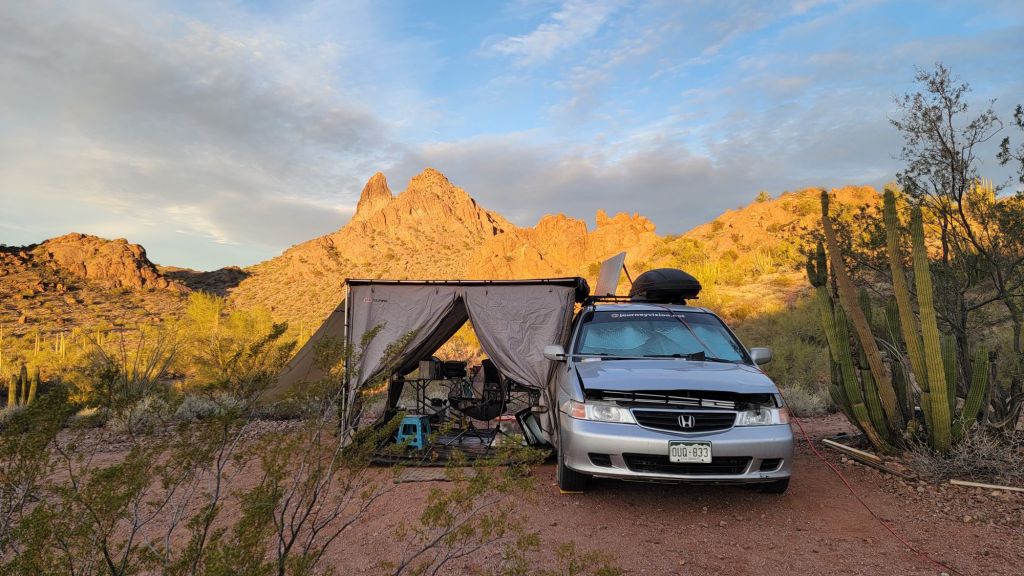
Here’s a shot of my iconic campsite… the full spread of gear set up. You’ll notice the little side room off my minivan camper… my own extra bit of space out here in the desert. But this spot… this right here… is what inspired the logo for journeyvision.
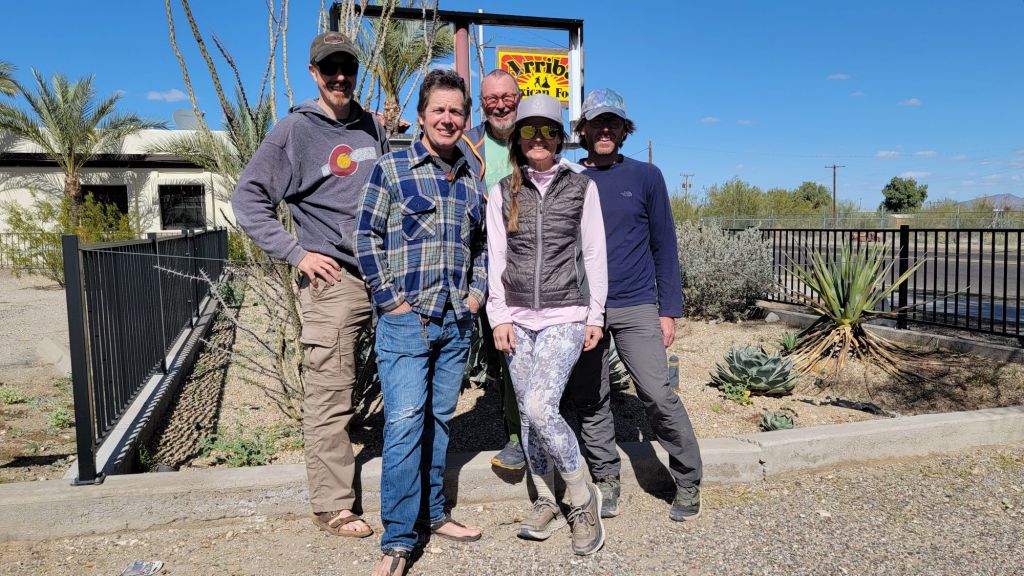
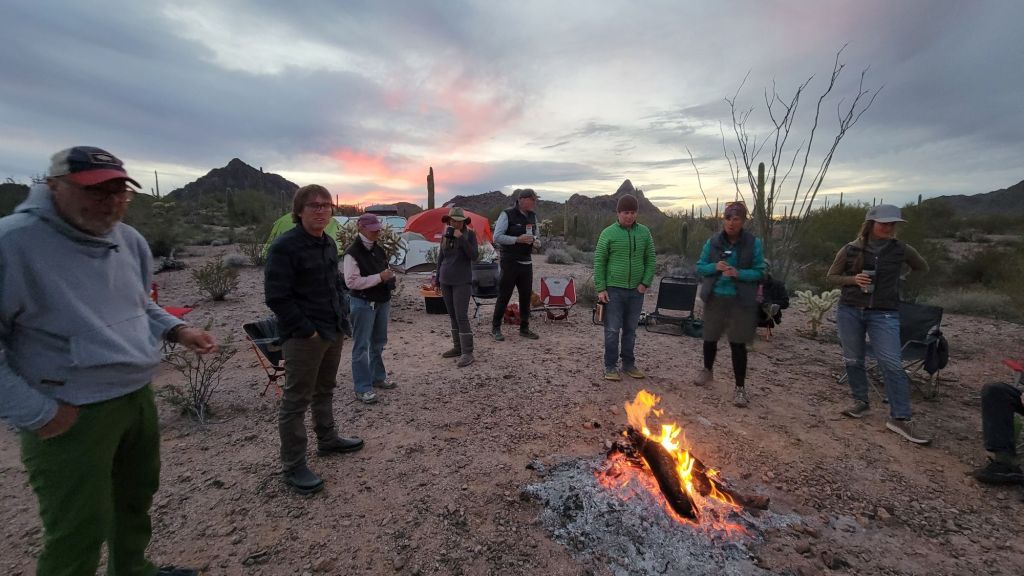
And of course… there’s the friends. All people I met last year… and every one of us thought Ajo was so good we had to come back.
We’ll start with Garrett… not a Colorado native, but that’s where he made his way from. A former lab engineer working in petroleum… he sold his townhome during the pandemic and essentially retired in his 40s… trading that world for the trail.
He’s a long distance hiker at heart… having completed the Continental Divide Trail… and, strangely enough, we were both out on the Colorado Trail back in 2015 and never crossed paths. It wasn’t until a random moment on social media that our paths finally did cross… one of those coincidences that doesn’t feel like a coincidence at all.
And here’s the whole crew together… a quick trip into town to run errands turned into one of those moments you wish you could bottle up.
There’s me on the left… and next to me is Gary, with his wife Kiki by his side. The two of them are triple crowned long distance hikers… having completed the Pacific Crest Trail, the Appalachian Trail, and the Continental Divide Trail… three of the longest and most demanding trails in the country.
Then there’s Barry… a retired postman who’s as chill and down to earth as they come. Loves to travel… loves a good landscape… just happy to be out here soaking it all in.
And finally, on the far right… Garrett… bringing it full circle
If you want to know the real secret to vanlife… it’s exercise. And the best kind of exercise comes through adventure… every day out here is a new opportunity for something fresh and challenging. There’s nothing like pushing yourself until you’re wiped out… then coming back to your little van to relax and a big meal. After a day like that, I don’t feel restless… I feel satisfied… content… grounded.
One of my favorite parts about coming down to Ajo is the endless gravel road riding. Not so much for technical singletrack, but just good old-fashioned gravel grinding… the kind that makes the miles melt away and your legs hum with that perfect kind of tired.
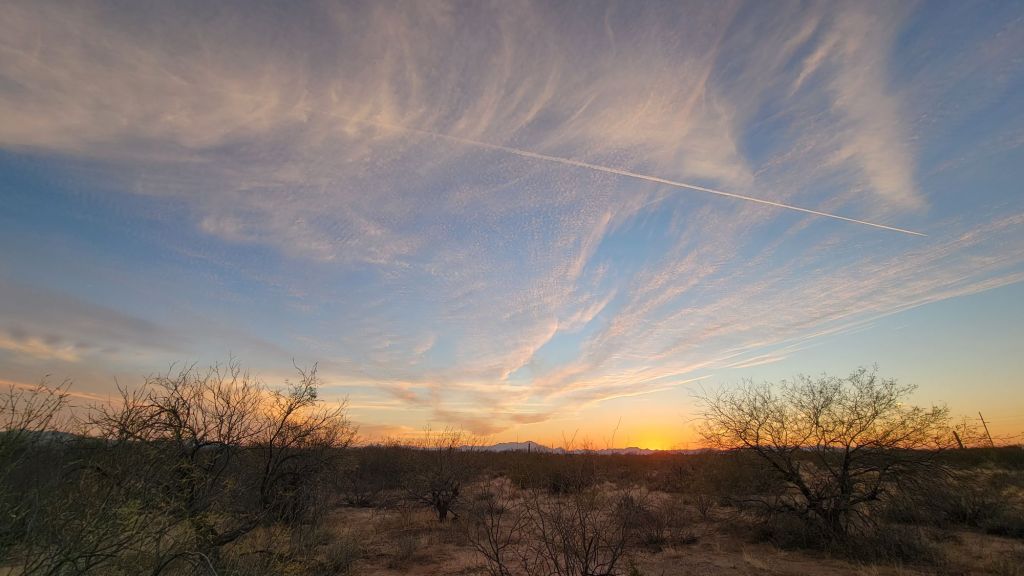
Along with the absolutely gorgeous sunrises and sunsets that seemed to happen every day, we also had regular nomad get-togethers. There were plenty of others out here doing the exact same thing… waiting out the cold winter months in a warm, beautiful place. It felt good to have that community around… made the desert feel alive, and I never once felt alone.
After a summer in Alaska that felt so big, so alive… everything down here feels a little smaller. Not worse… just not Alaska . I carry a mix of gratitude and restlessness… part of me is still up north, somewhere under those endless summer skies.
But waiting for me is Odie… my little minivan camper and my way forward. Even if I don’t have all the answers, I’ve still got the road.
So I started driving.
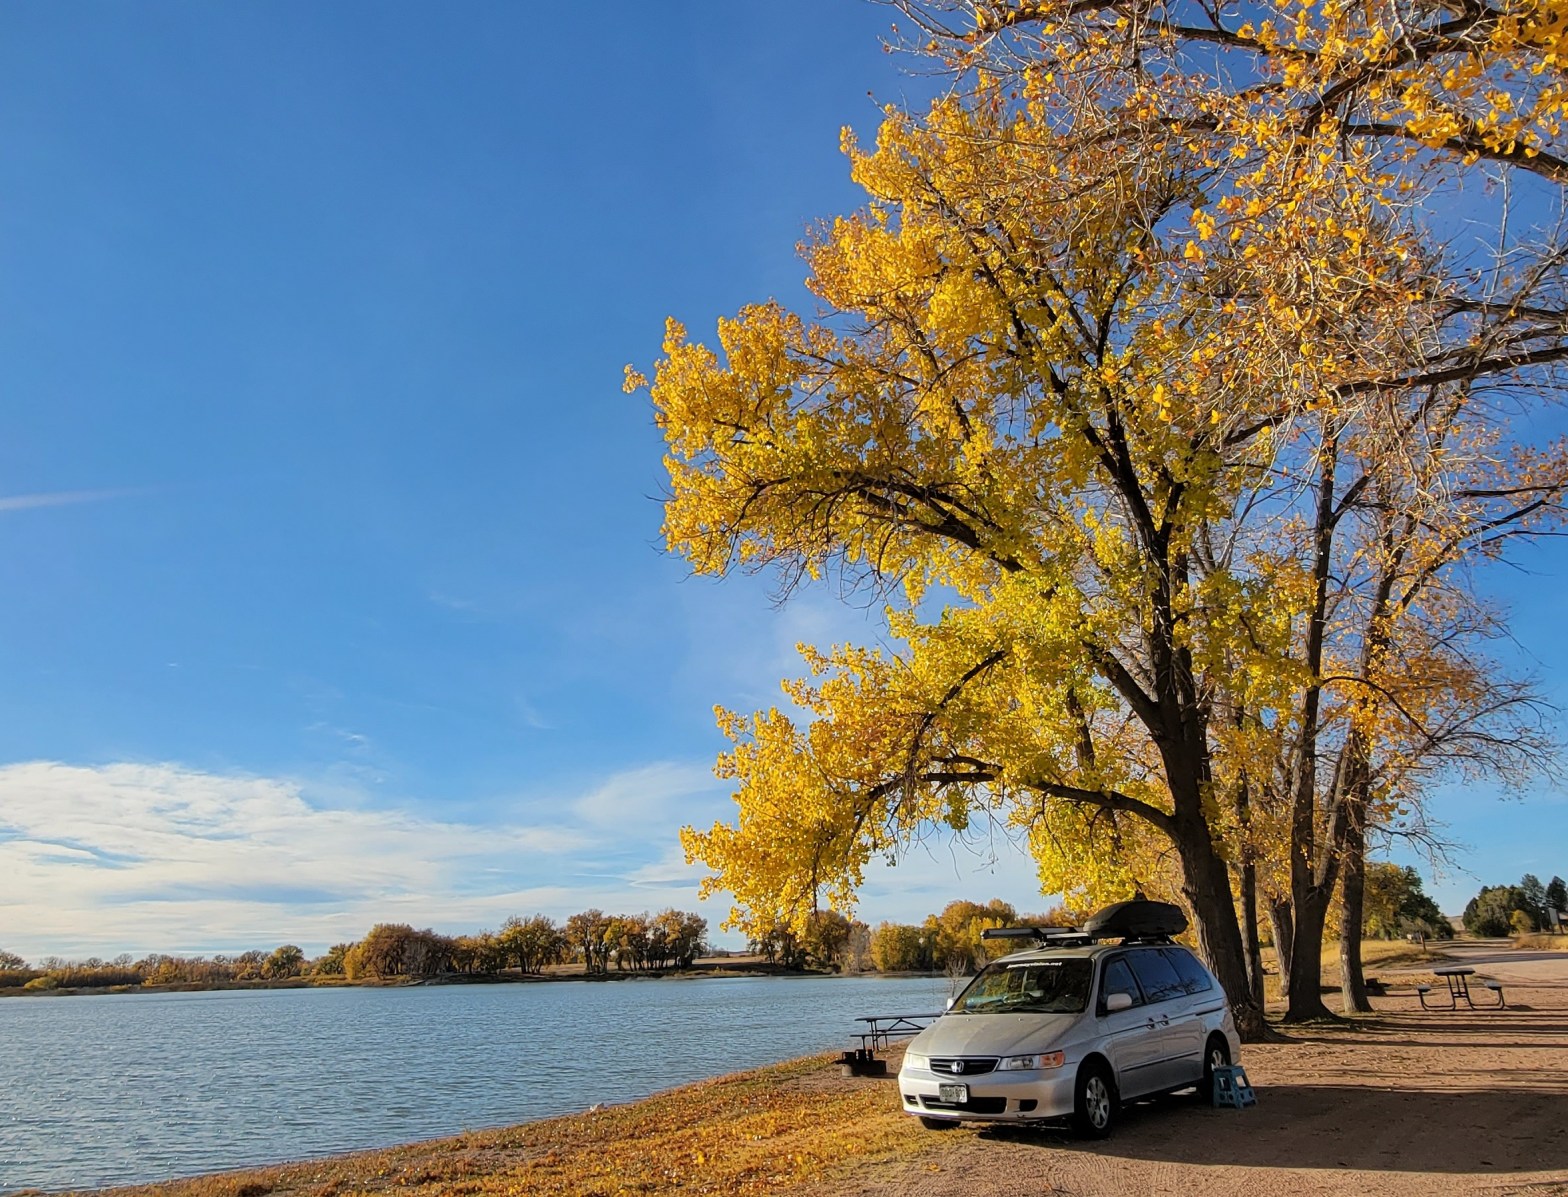
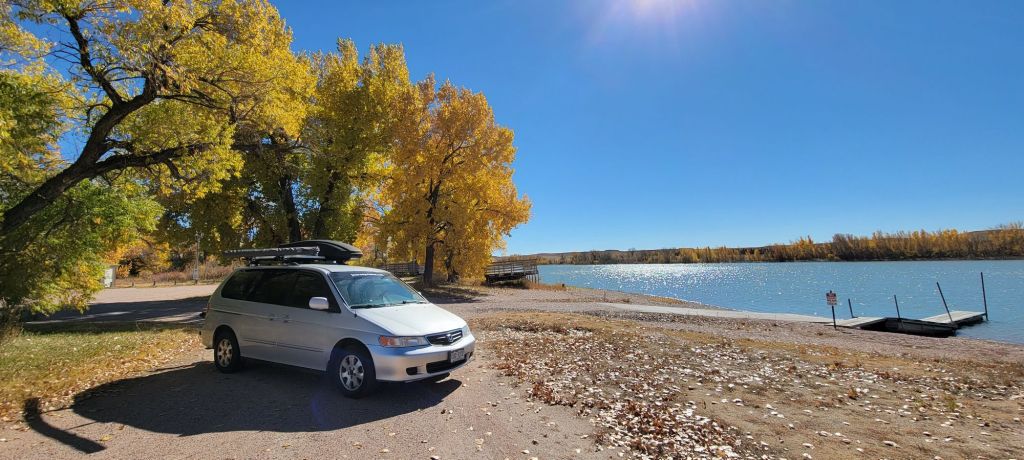
Oliver Reservoir. Perfect free camping near Kimball Nebraska
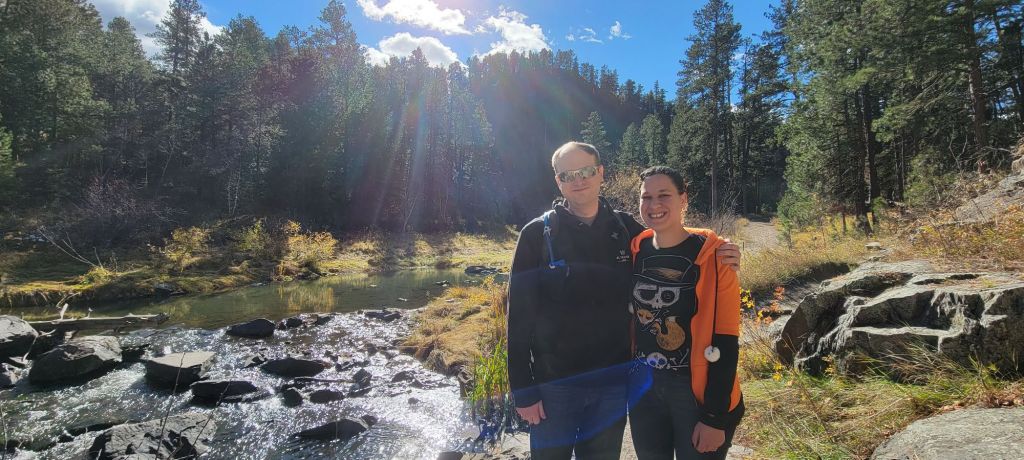
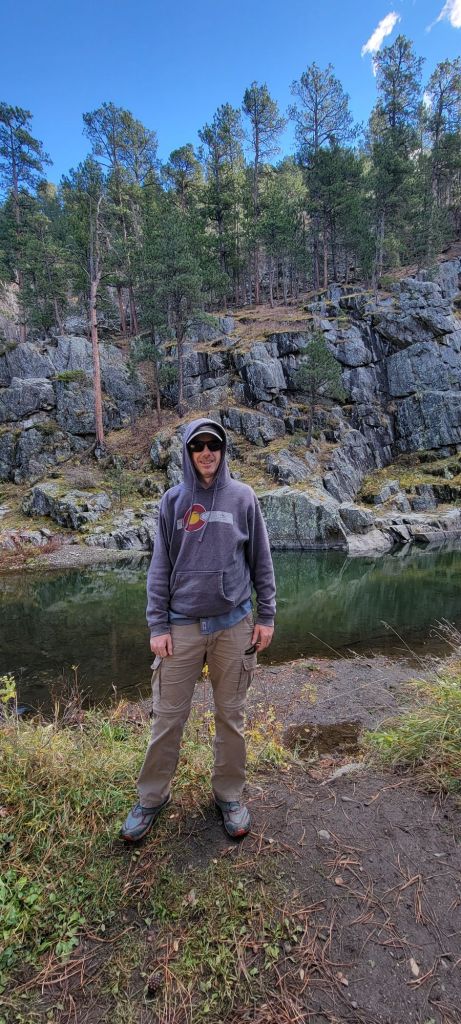
First stop… Rapid City, South Dakota. I spent some time with my stepdaughter and her husband, Nate… hiking, catching up, and enjoying something simple and familiar after a season of constant motion.
I always love making my way out to Rapid City and exploring with Susan. She has a real knack for showing me the hidden gems scattered throughout the Black Hills, the kind of places you would never stumble on your own. It turns every visit into a bit of an adventure, where there’s always something new just around the bend.
Susan and Nate have also built something special of their own…a super cool hookah lounge that perfectly matches their vibe. It’s one of those spots where time seems to slow down a little. Whether you’re just passing through or settling in for the evening, it’s an easy place to relax and unwind.
If you ever find yourself in downtown Rapid City, be sure to stop by Sierra Night’s Hookah Lounge and treat yourself…you won’t regret it.
Then I turned south, with Ajo, Arizona on my mind. Warm winters, desert air, and a loose community of nomads… it already feels like the right direction.
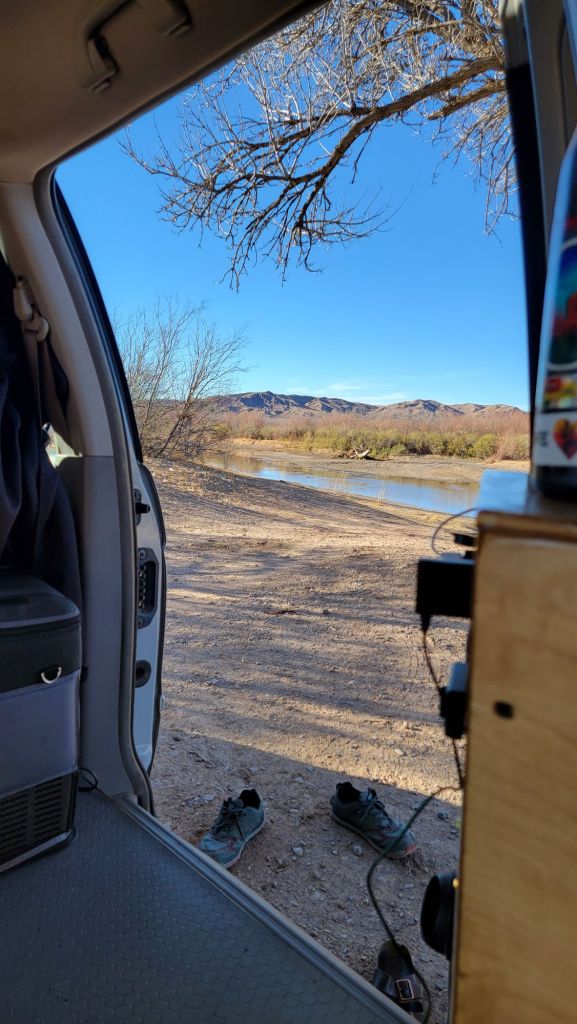
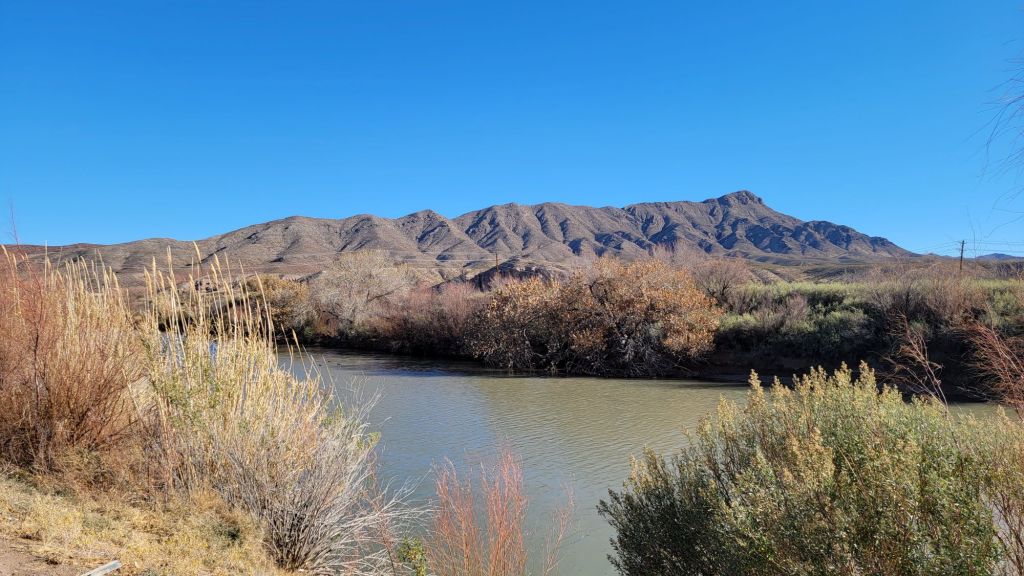
Along the way, I stopped in Truth or Consequences, New Mexico… camped one night along the Rio Grande. Nothing fancy… just a quiet reset.
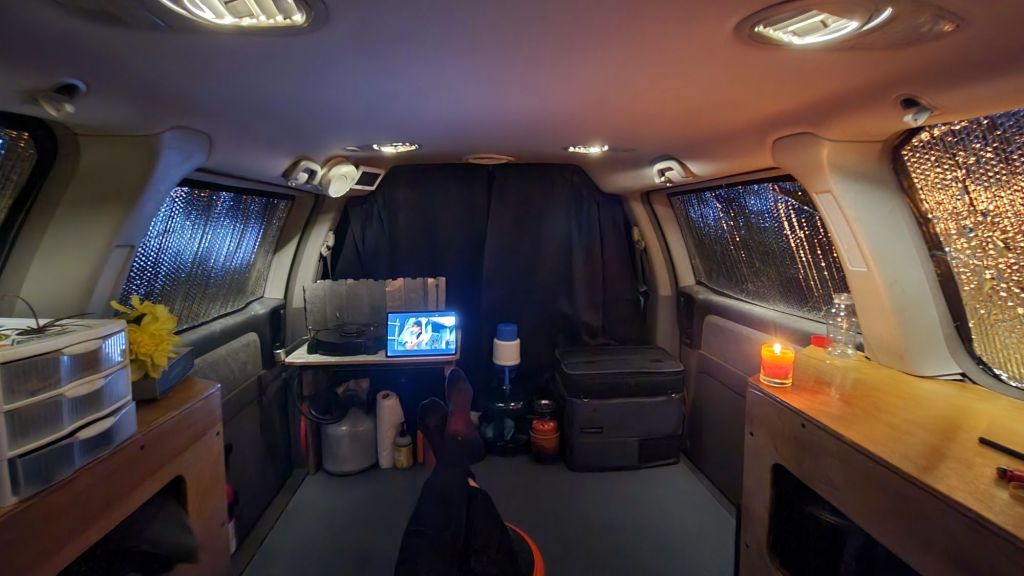
The living quarters.. Snug as a bug!
Rio Grande River Breakfast is always my favorite meal and I always try to do it up with something delicious. Things just taste better when you cook them Outdoors.
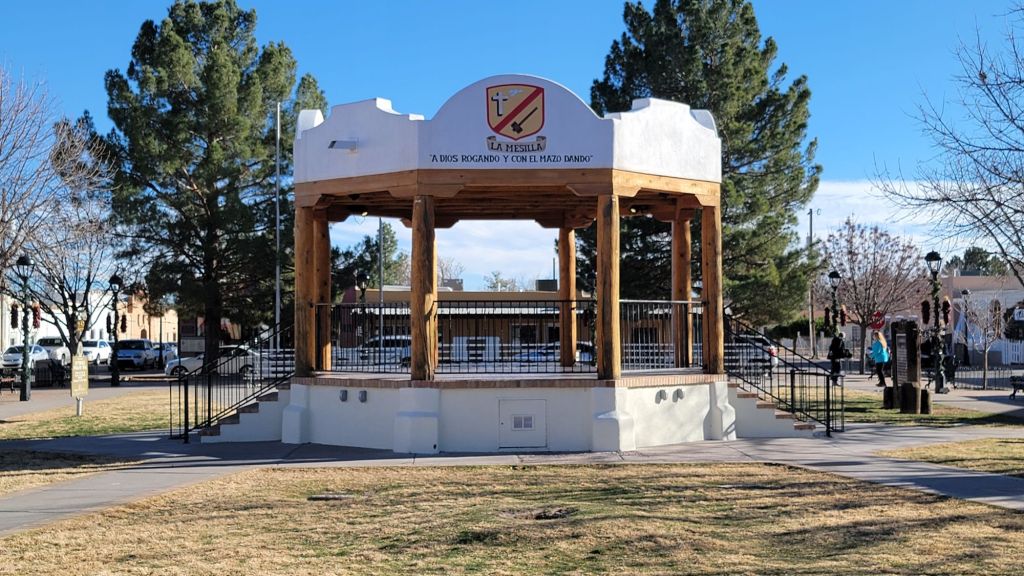
Next was Las Cruces, which caught me off guard in the best way. And just outside it… Mesilla. A small historic district full of old adobe charm and layered stories.
Including one tied to Billy the Kid… who was once held in the local jail.
It’s places like that… a little worn, a little unexpected… that remind me why I keep moving.
And I’m just getting started.
And just like that… I’ve arrived.
Me and Odie rolled into Tucson… a quick stop to grab supplies before the final push west. Ajo is close now… just about an hour down the road… close enough to feel it.
But first Birria tacos from Rollies!
Whenever I pass through Tucson, I’ve got a spot.
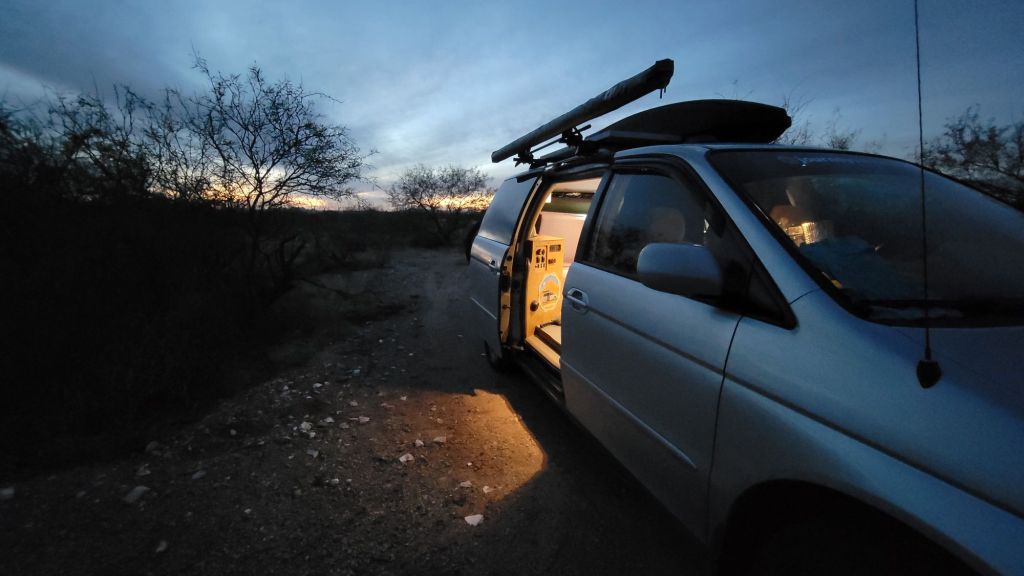
A BLM dispersed camping area I’ve come to call affectionately… “the trash pit.” You’ve gotta say it with a little emphasis at the end… trash piiit. Makes me laugh every time. It’s nothing special… rough around the edges, a little trashy … but it’s familiar. And sometimes that’s all you really need.
So here I am… staged and ready.
Supplies topped off… road ahead calling… and Ajo waiting just over the horizon.
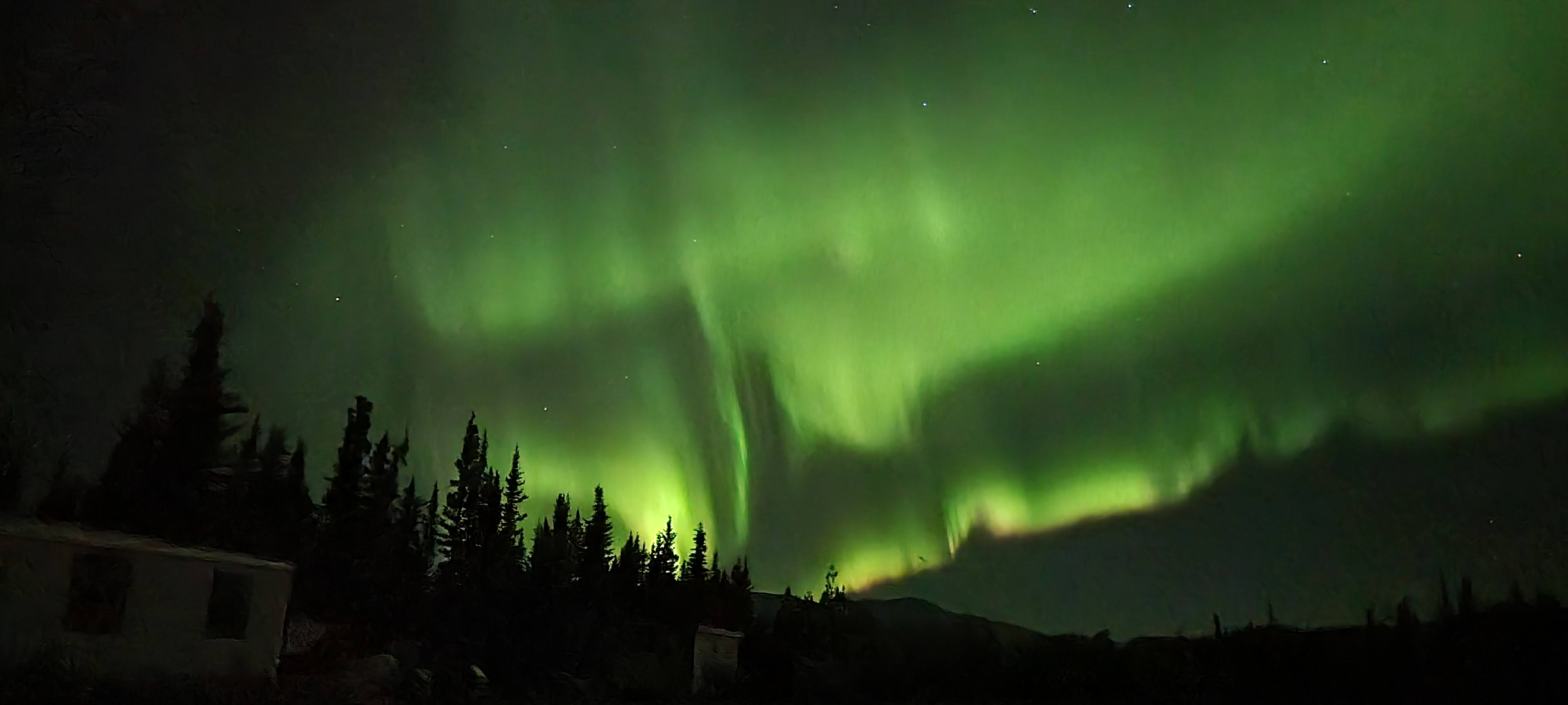
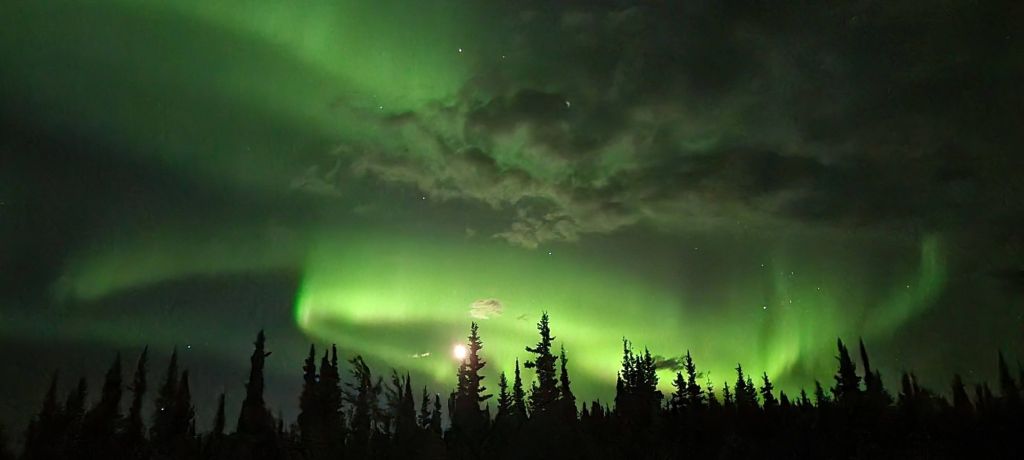
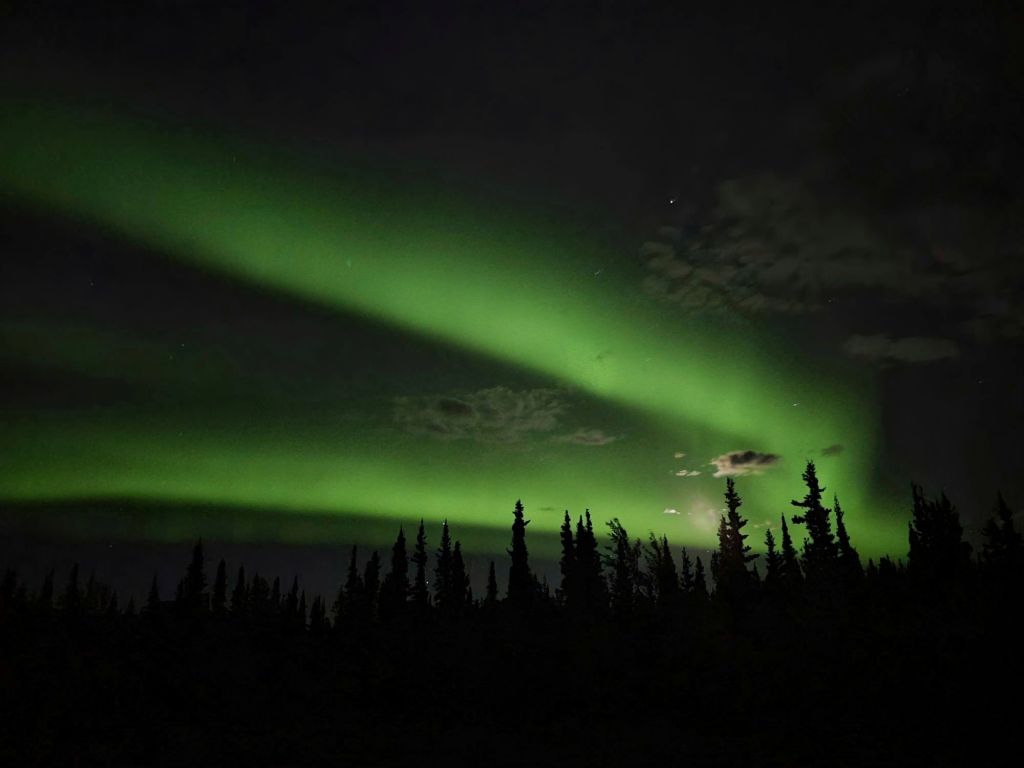
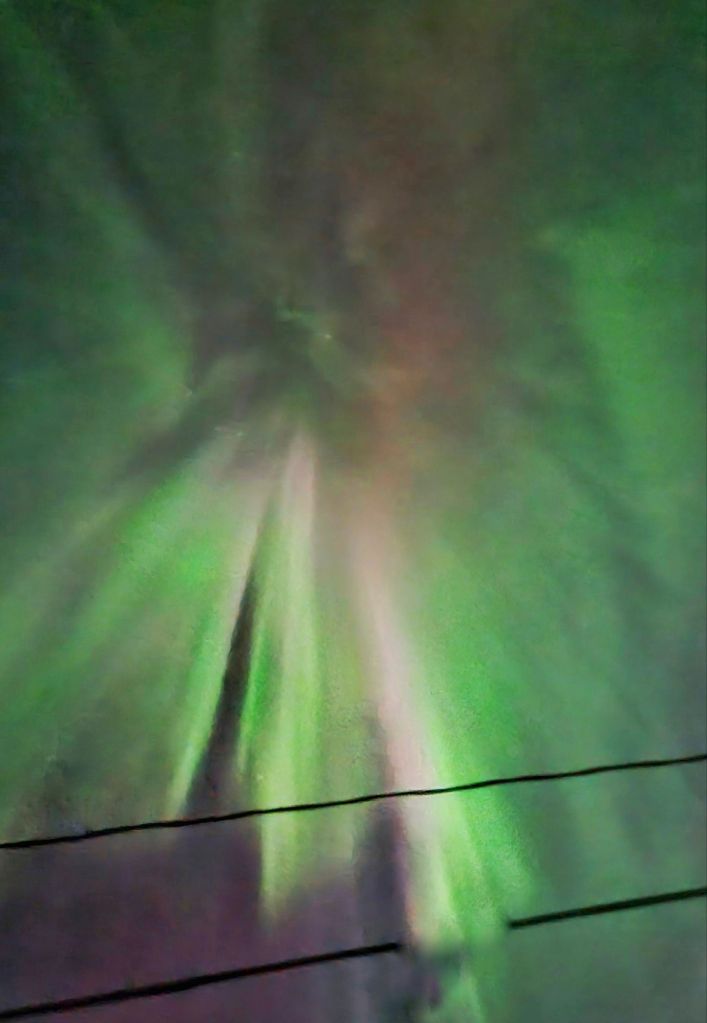
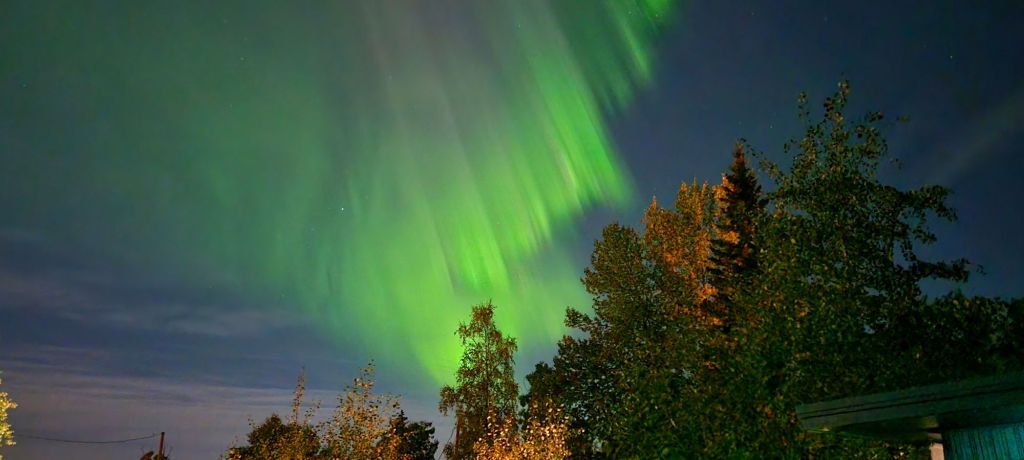
Do you know how much the aurora borealis weighs? Not much… because it’s pretty light. Ha ha.
This post is dedicated to those breathtaking northern lights — the ones that made the long Alaska nights feel like something out of a dream. All of these pictures are mine, and the best ones were taken at Raft Camp, where I had my tripod set up and could really capture the movement and colors dancing across the sky. There’s something magical about watching them unfold over that wide-open landscape — quiet, vast, and so alive.
Now, you may say you’ve seen the northern lights down in the lower 48, but yeah… that’s like seeing a fireworks show from another county. Something’s happening, sure, but you’re not really part of the show. The interior of Alaska sits right underneath the aurora oval, giving it some of the best northern lights viewing in the world. The bottom two shots were taken in Anchorage, where I was lucky enough to catch an absolutely killer show… the kind that makes you just stop and stare.
Alaska is one of the best places in the world to see the aurora borealis, especially once the nights grow darker in late summer and fall. The aurora is caused by electrically charged particles from the sun colliding with gases in Earth’s atmosphere, creating those shimmering lights that stretch across the sky — and when you’re under them, there’s nothing quite like it.
Being able to capture these moments up close — surrounded by quiet, dark skies and total stillness — bucket list item checked!
August had a different feel to it… like the season itself was exhaling. The long golden evenings were starting to slip away, replaced by a subtle crispness in the air that you could feel in your lungs first thing in the morning. The light changed too… softer, shorter, a quiet reminder that summer in Alaska never lasts as long as you want it to.
We call it “Angry August,” that stretch where exhaustion, emotion, and the looming end of it all would creep in. But for me, it was something else entirely… a time when the bonds I had built with the people around me felt the strongest they ever had.
This first picture captures a few of those people who made the season what it was.
Reed stands there… a kayaker from the Southeast, stepping into something much bigger than what he was used to. This was his first season on the big Alaska water, and you could see the growth happen in real time.
Then there’s Jimbo… still one of my closest friends to this day. The kind of person who just becomes part of your life without effort. Whether it was long days on the river or the slower moments back at camp, he was always there… steady, real, and impossible not to appreciate. Some friendships feel tied to a specific place or time… but this one stuck.
And of course, Dylan Metz… AKA Metz a legend in every sense of the word. One of those guys who seems to exist entirely within the rhythm of seasonal life. Summers guiding rivers in Alaska, winters shaping terrain parks at a ski resort in Idaho… year after year, chasing snow and water like it’s the only clock that matters. He carried this quiet authority, the kind that doesn’t need to prove anything. You just knew he’d seen it all before… and probably had a better story to go with it.
Looking at that photo now, it feels like more than just a snapshot… it’s a piece of that late-season energy. The mix of fatigue and fulfillment, the awareness that it’s all coming to an end, and the unspoken understanding that what you built together out there… it mattered.
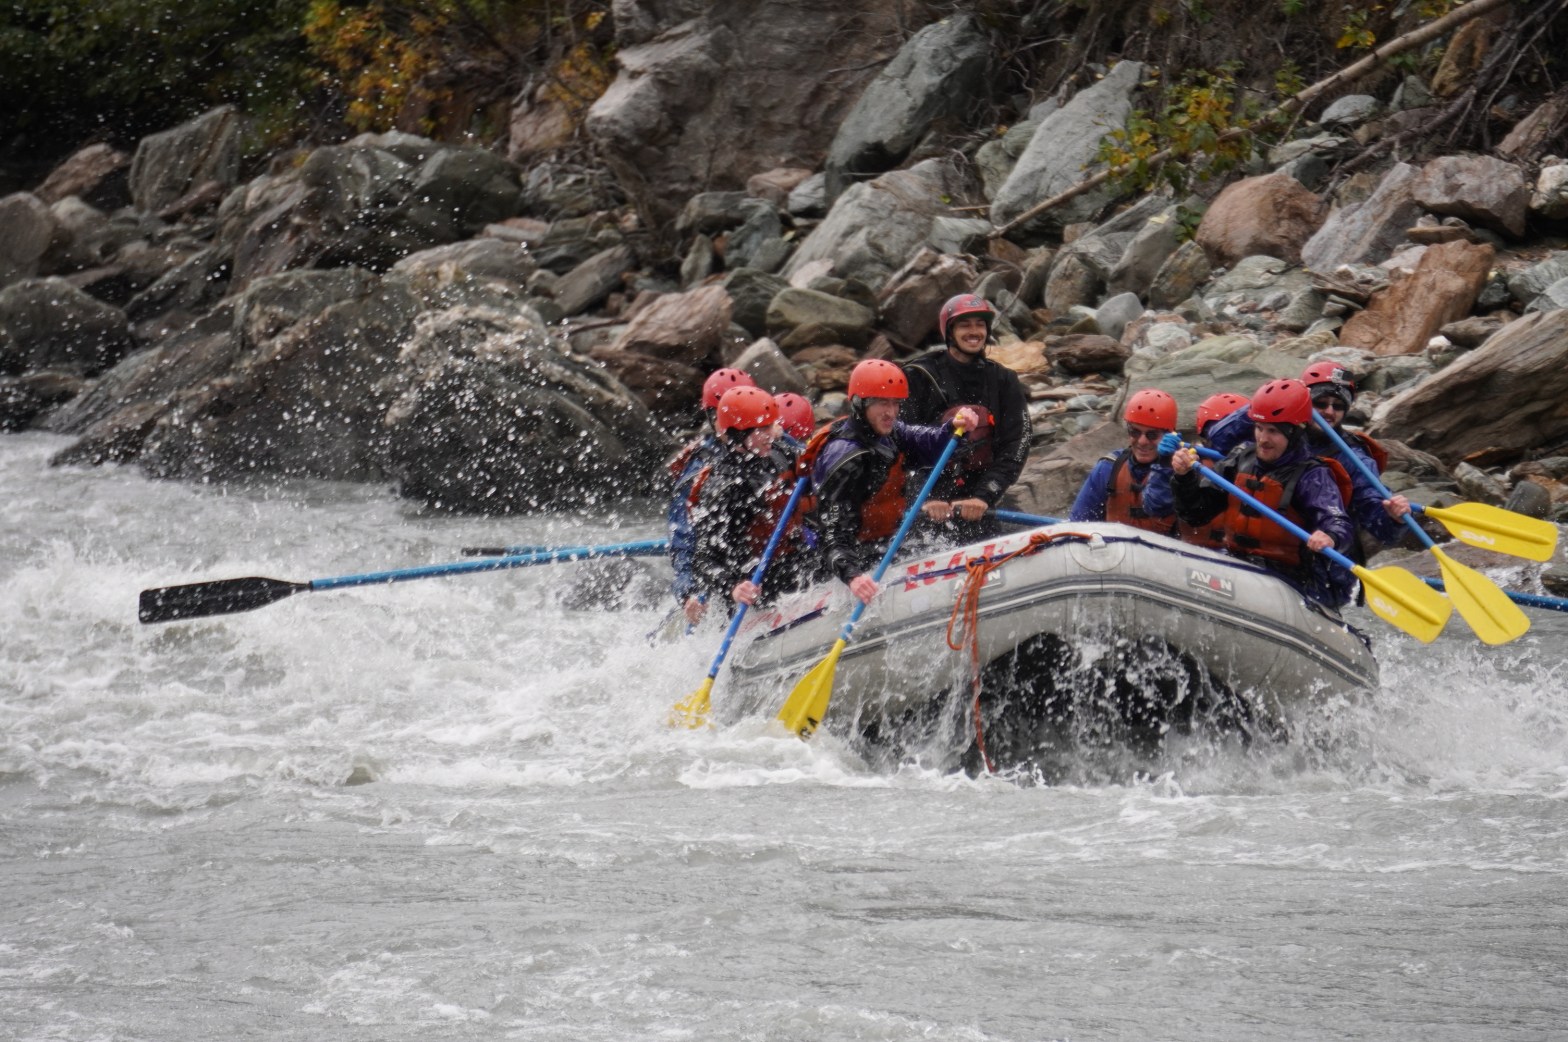
By this point in the season, my mindset had narrowed to one thing… finish. Just get to the end. Under normal circumstances, that would’ve been its own challenge. But this wasn’t normal. I was doing it all on a broken leg… fresh off the biggest surgery of my life… and in one of the most remote places in America. Not exactly an ideal recovery plan. Every step… or more accurately, every swing forward on crutches… was a reminder of it. The employee housing didn’t make things easier either. It was rough, bare-bones, and not built for someone trying to heal. But somehow, I made it work. You don’t really get a choice out there… you adapt or you don’t last.
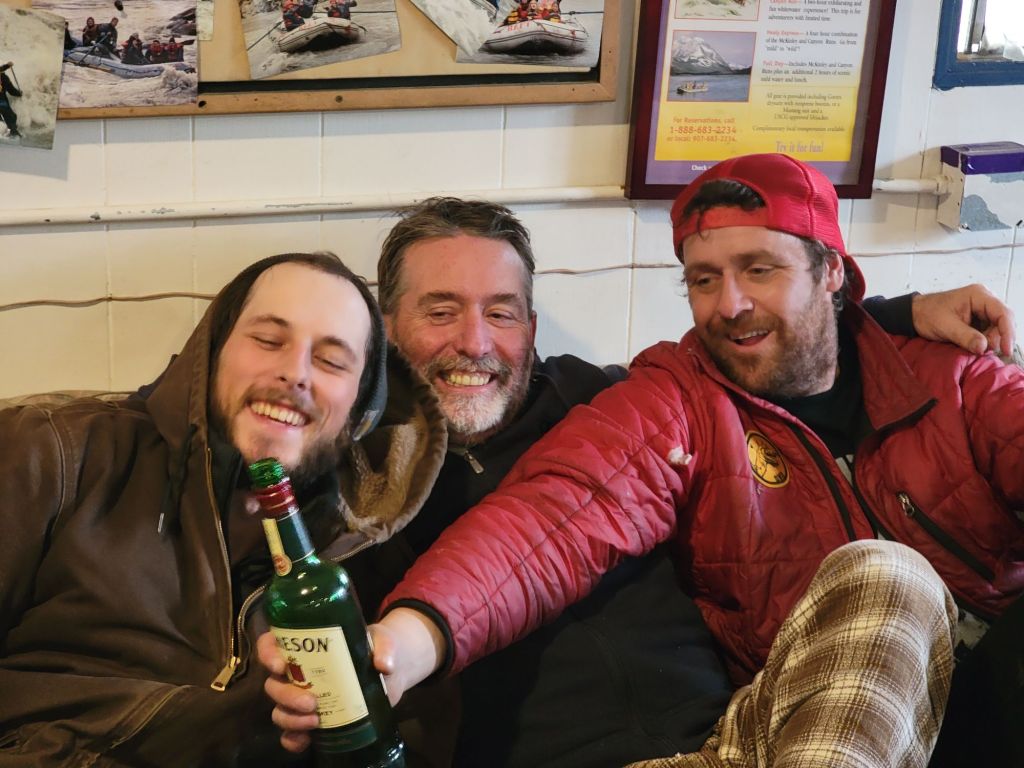
And despite all that… I still found ways to live a little.
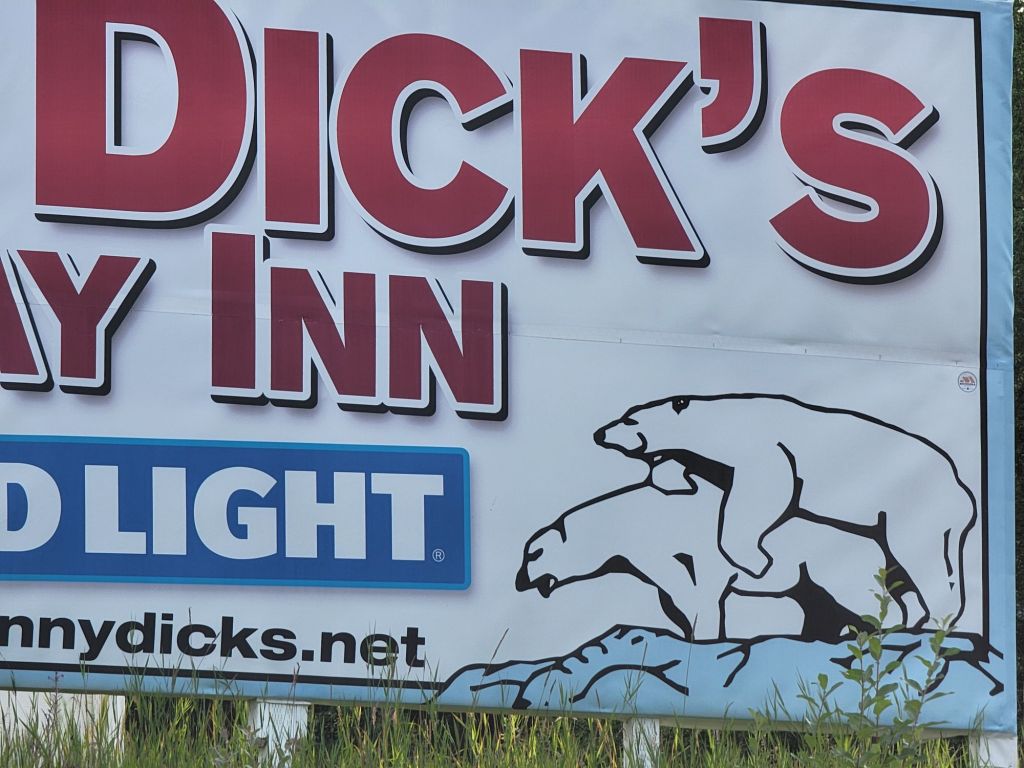
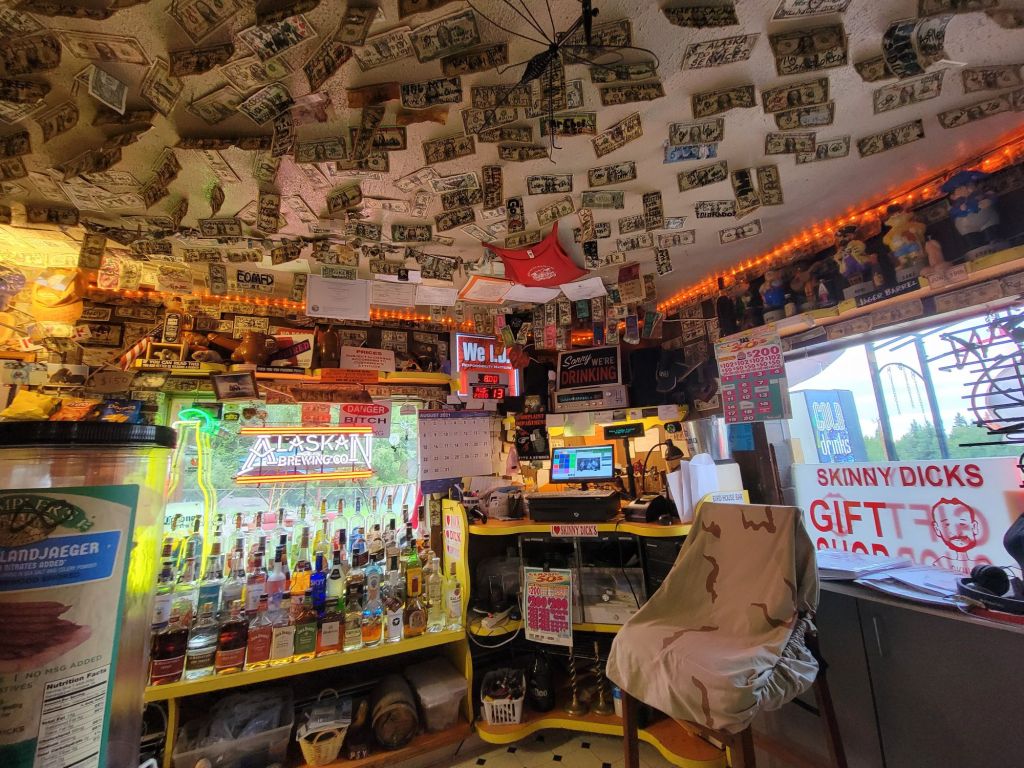
I made more than few trips to the bar, one of them being a favorite along the Parks Highway… Skinny Dick’s Halfway Inn.
Yeah… go ahead and say that one slowly. It sneaks up on you.
It’s about 45 minutes south of Fairbanks, sitting out there like a mirage for anyone who’s been on the road too long. And it’s exactly the kind of place you’d hope it would be… part bar, part gift shop, part adult novelty store… and somehow it all makes perfect sense when you walk through the door. Or maybe it doesn’t… and that’s the point. Inside, it’s a mix of locals, travelers, hunters, seasonal workers like us… all passing through, all with their own stories. It had that perfectly unpolished Alaska charm… a little chaotic, a little ridiculous, and completely unforgettable. The kind of place where you don’t ask too many questions… you just enjoy the moment and let the weirdness wash over you.
Looking back, it feels almost absurd… hobbling around on crutches, healing from surgery, and still ending up in a place like that. But that’s kind of what the whole experience was… uncomfortable, unpredictable, and somehow still full of life. Even at my lowest physically, I wasn’t going to let the season pass me by without squeezing a few more stories out of it.
Every day… no matter how I was feeling… I made sure to take a moment and appreciate where I was. Alaska has a way of doing that to you. The scale, the quiet, the sheer beauty of it… it almost didn’t feel real. There were times I’d catch myself thinking… how am I actually living here?
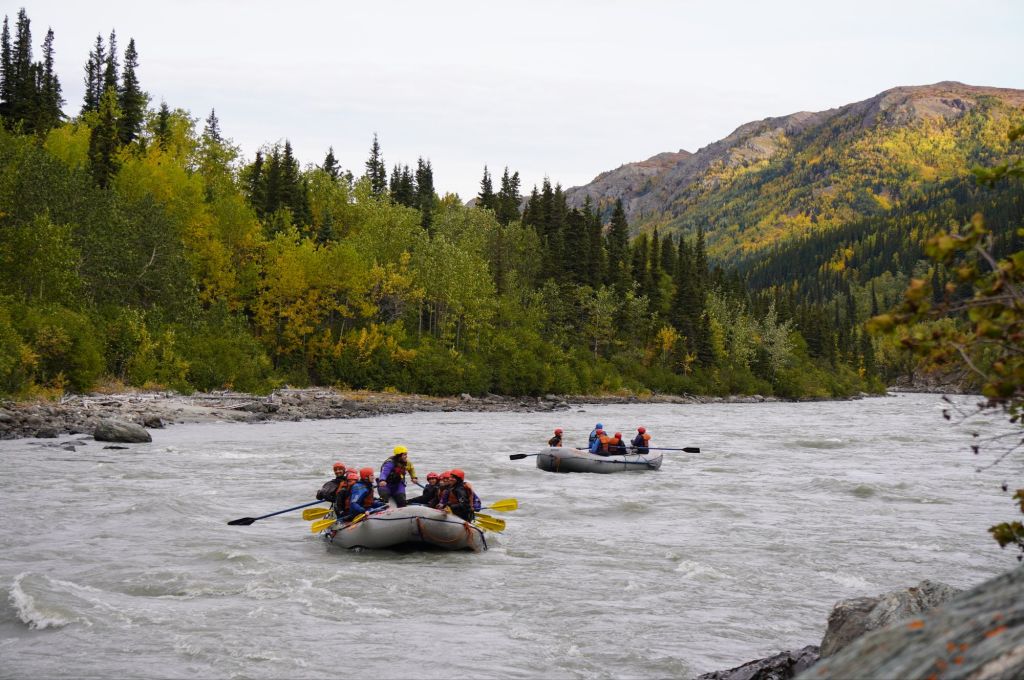
Part of my job was driving a shuttle van between employee housing and the raft office… just a seven mile stretch. But it never felt routine. Every drive was a chance to take it all in… wide open skies, distant mountains, that crisp, clean air that made everything feel a little sharper.
Even on crutches, even dealing with the injury… those short drives became one of my favorite parts of the day. A simple reminder… I was really there, and I wasn’t about to take it for granted.
This is my dear friend Kayleigh … and my manager for two seasons while I worked for Denali Raft Adventures in Alaska. She was one of those people who made a lasting impact without ever trying to… Loving, hardworking and kind, all through the chaos of a busy season.
Tragically, she passed away in the summer of 2025. It’s still hard to put into words what that loss feels like.
But what stays with me more than anything are the memories… the long days, the small moments, the laughter, and everything in between. Those are the things that don’t fade.
I’ll never forget our time out there, Kayleigh.
I love you… and I miss you.
This is our end of season group photo… taken at Panorama Pizza and Pub… easily the favorite hangout for our rafting crew. It had that perfect vibe… a place that felt like it belonged more to the seasonal workers than the tourists, and it was almost always packed because of it.
After long days on the river, this is where everyone ended up. The kind of place where stories got louder as the night went on, and nobody was in a hurry to leave.
And the pizza… unreal. They even have a gluten free crust! Easily some of the best around. I definitely spent a dollar or two there over the course of the season… and every bit of it felt well earned.
Looking at that photo now, it’s more than just a group shot… it’s the closing chapter. One last moment with everyone together before we all went our separate ways.
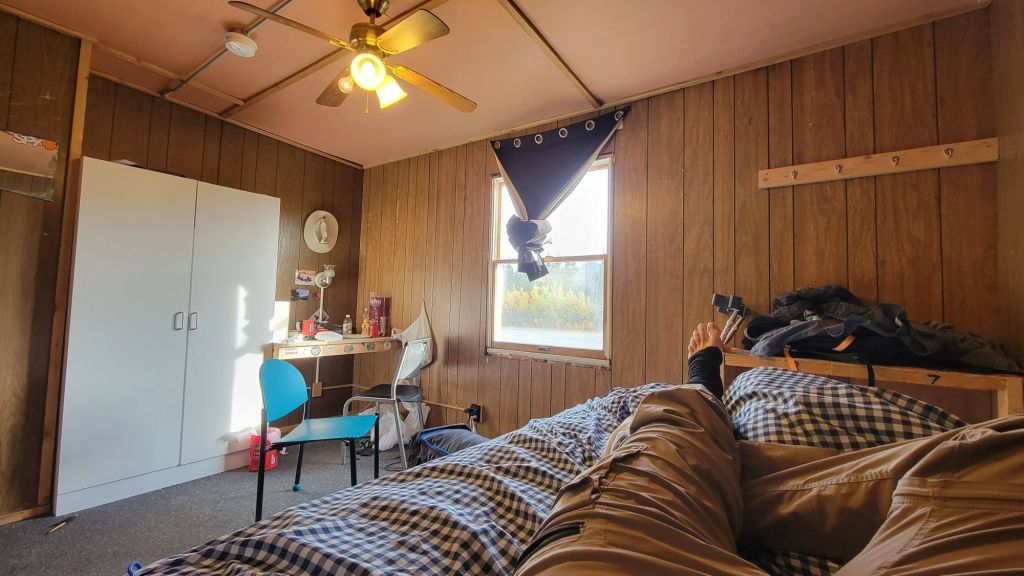
This is me… laid out in my tiny ATCO room, finally able to take the boot off and let my ankle breathe for a bit. Honestly, I spent a lot of time like this… off my feet, trying to rest and heal as best I could in a place that wasn’t exactly built for recovery.
One thing I did have, though, was the view out the window. Small planes coming and going from the airstrip… lifting off into that big Alaska sky. It gave me something to watch, something to focus on… a little reminder that life out there was always moving, even when I had to stay still.
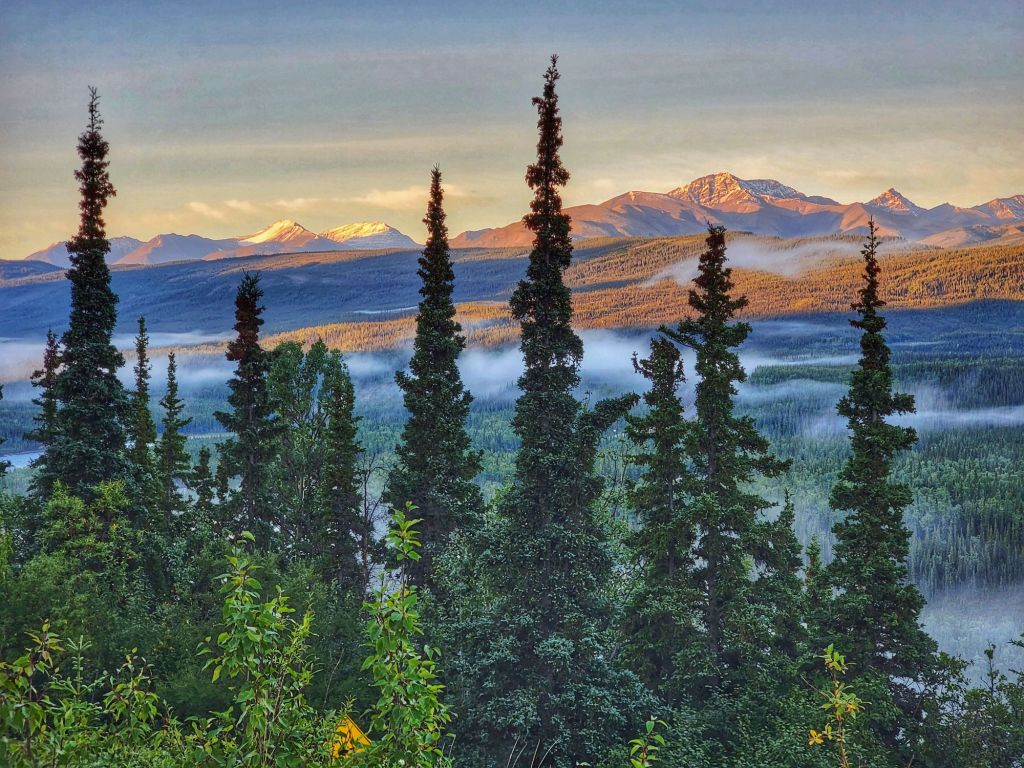
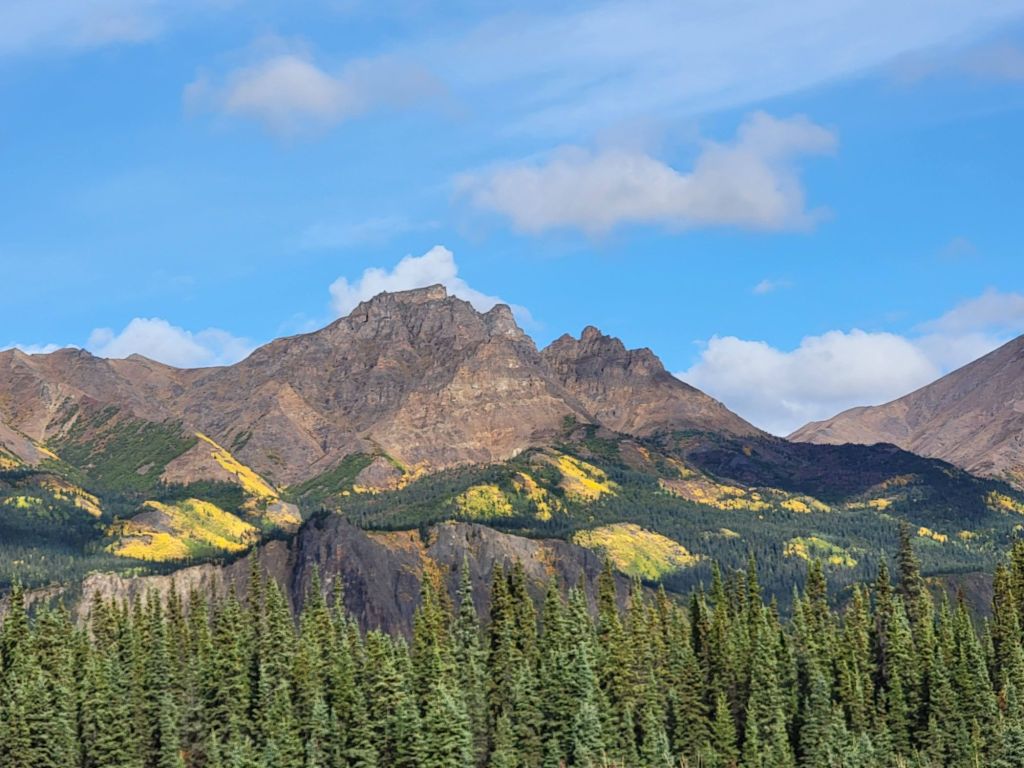
And with that… I’ll leave you with a few peaceful, crisp snapshots of fall in Alaska… the place I was lucky enough to live and work in for a season that I’ll never forget.
It really is a special kind of beauty. Fall up there feels clean… quiet… like the land is settling in. The bugs are gone, the air turns sharp, and everything shifts into these deep golds and soft fading greens. It’s the kind of season that makes you slow down whether you mean to or not.
More than anything, though, this experience gave me something bigger. It helped me connect… with Alaska, with the people around me, and with a group of friends who became something more like family. That’s the part that sticks.
And somehow… I did it. I made it through the season. Through the injury, the challenges, all of it… and came out the other side in one piece. From there, it was back to Colorado… and right back into van life, chasing the next stretch of road across the Southwest.
But Alaska in the fall… that’s something I’ll always come back to. It’s not just the colors or the quiet… it’s the feeling. And if you’re lucky, you catch the northern lights dancing overhead, like the place is giving you one last sendoff.
It was a perfect afternoon at raft camp… clear skies, warm air, the kind of day where everything just feels right. I was out on the airstrip messing around with this old boomerang I had found on campus. It was weathered, warped, and honestly didn’t work very well… but I was determined to catch it.
Throw after throw, I kept chasing it down, trying to figure it out. My friends were watching at this point, probably wondering what I was doing. And then Steve… aka Scamp… yells out, “Jay, Jay, you’ve got this. You’re gonna get it.”
So I gave it everything I had. I ran… jumped as high as I could… reached as far as I could…
And I missed it.
But when I landed… I landed wrong.
A loud crack.
Immediately, I knew. Something was very wrong.
I limped my way back to the cook shack and told everyone I thought I had just broken my ankle. Not good. I was in shock. I asked my friend Ian to help me back to my room, using him as a crutch as I hopped across the yard. Once I got there, I laid down and tried to assess the situation.
I’ve broken bones before—motocross, other dumb decisions—so I knew what this was. Ian brought me a bag of ice, and that night was just survival… ibuprofen, ice, and trying to manage the pain. No quick trip to urgent care out here. The nearest real help was two hours away in Fairbanks.
The next morning, I made the trip. I didn’t really know where to go, so I called around and eventually got pointed in the right direction… an orthopedic clinic. They got me in quickly. After the first round of X-rays, the doctor told me it could go either way… maybe a boot, maybe surgery. We needed one more set of images.
So I waited.
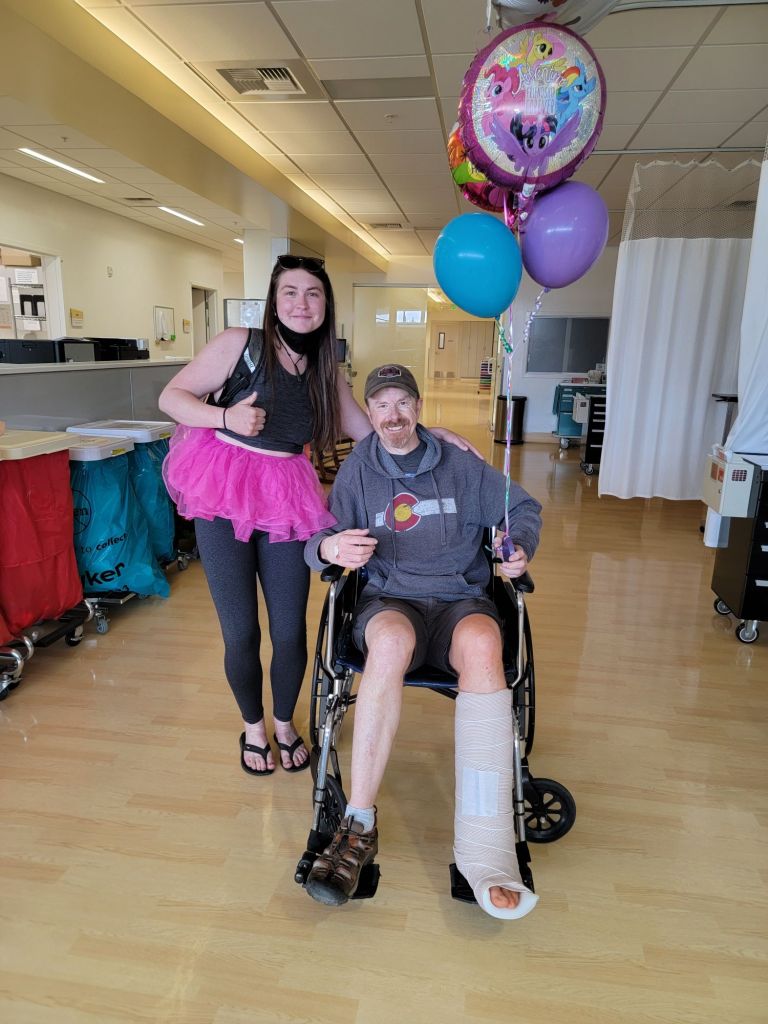
And then I got the news… worst case. Surgery.
The break was bad enough that it had essentially opened up my ankle joint. If we didn’t fix it properly, I could have long-term issues just walking. A few days later, I was in surgery in Fairbanks, getting everything put back together. Plates, screws, wires… the whole deal. It wasn’t easy. I didn’t have health insurance, and just like that, my entire savings account was gone. But… it’s just money, right? What mattered was getting back on my feet.
Recovery was rough. I was on crutches in a remote, wild place, trying to finish out the season. And somehow… I did. It wasn’t pretty, but I pushed through.
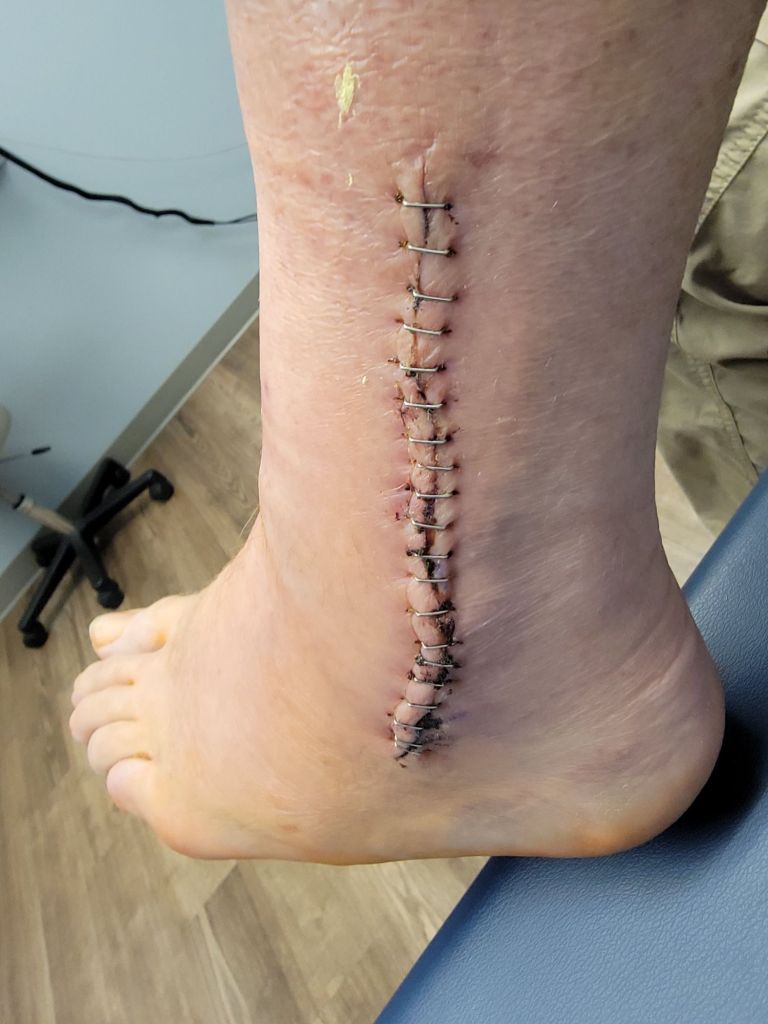
Here’s a look at the aftermath… the sutures, the swelling, the reality of it all.
Definitely a defining moment of my first season in Alaska.
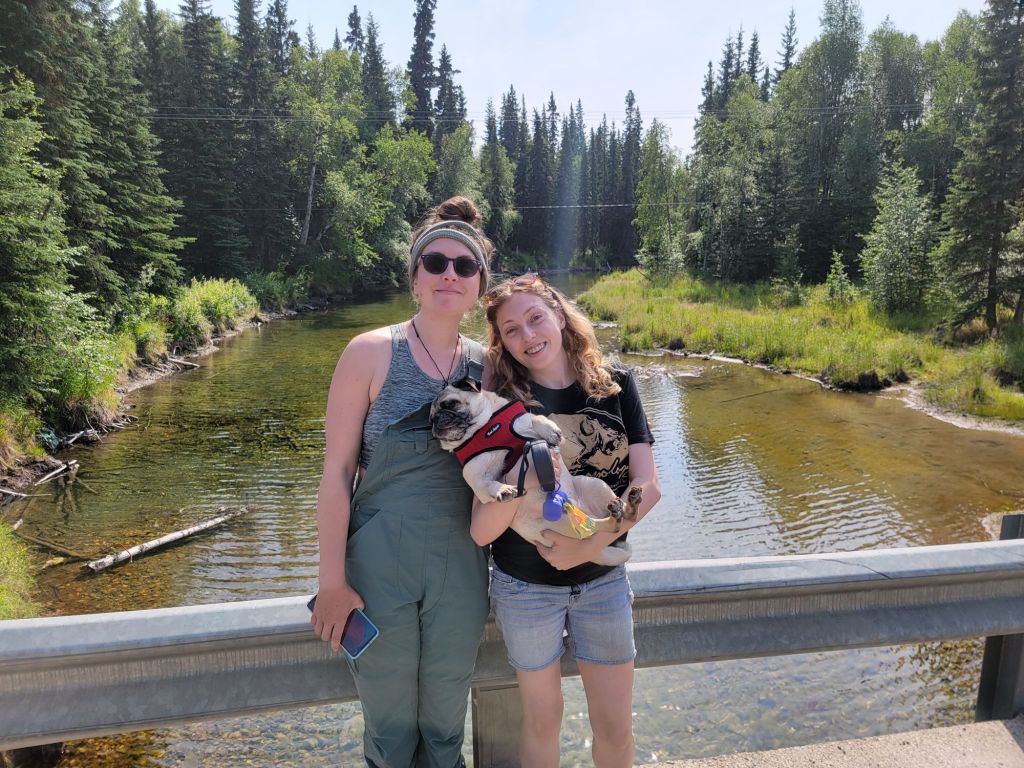
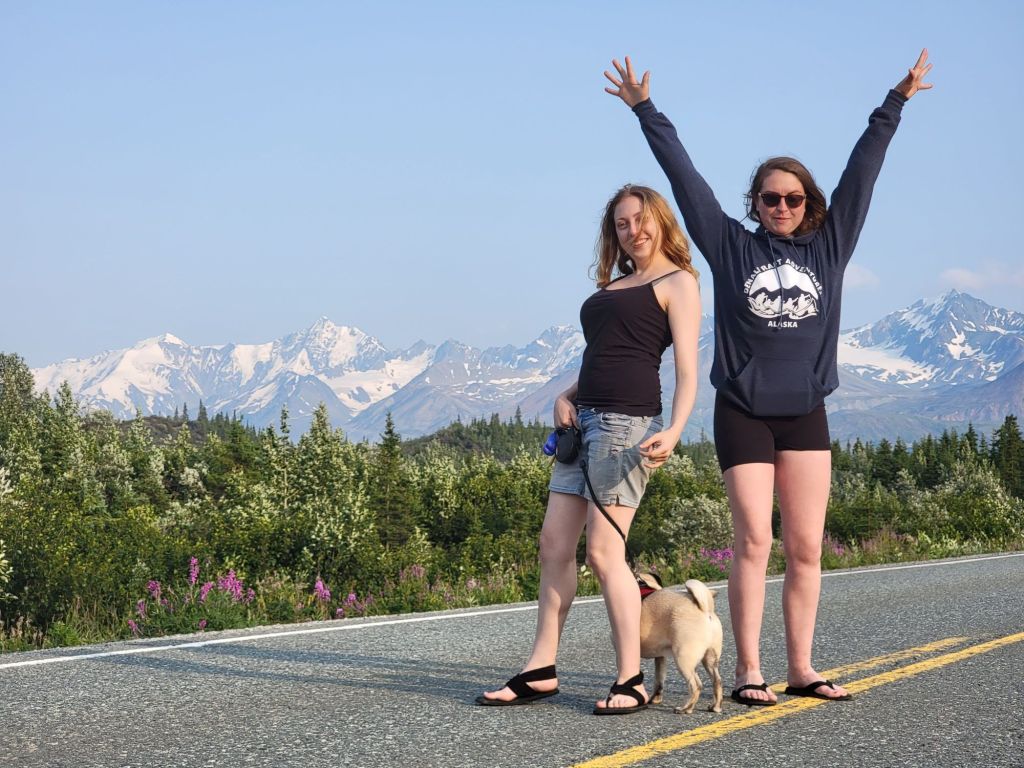
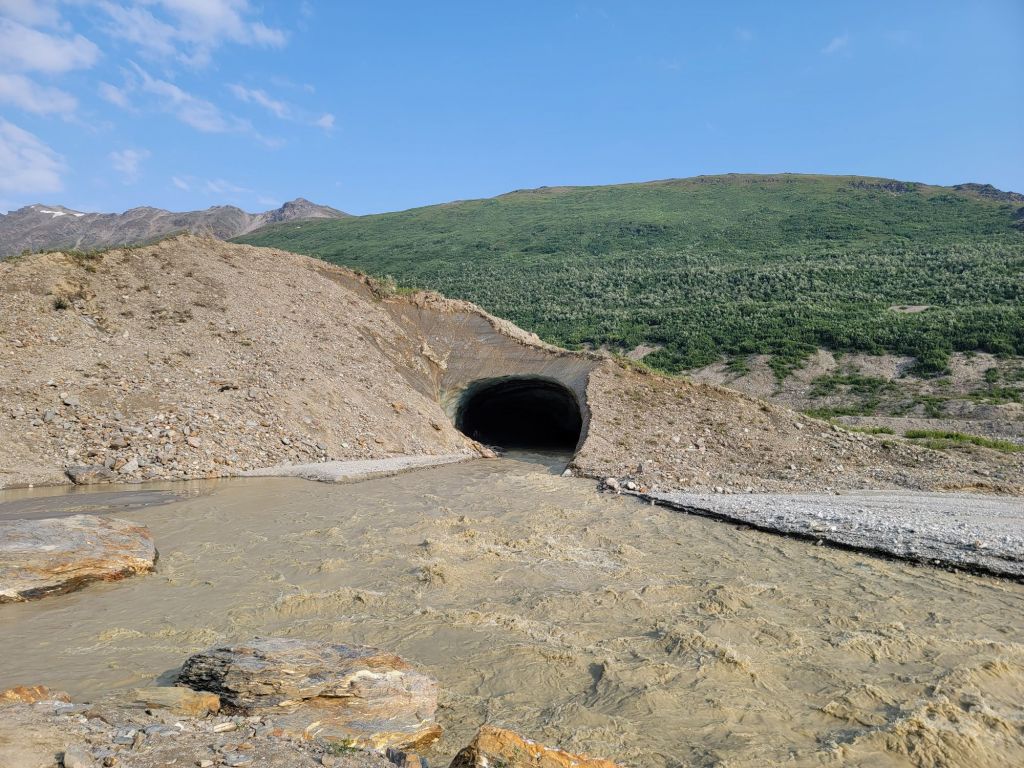
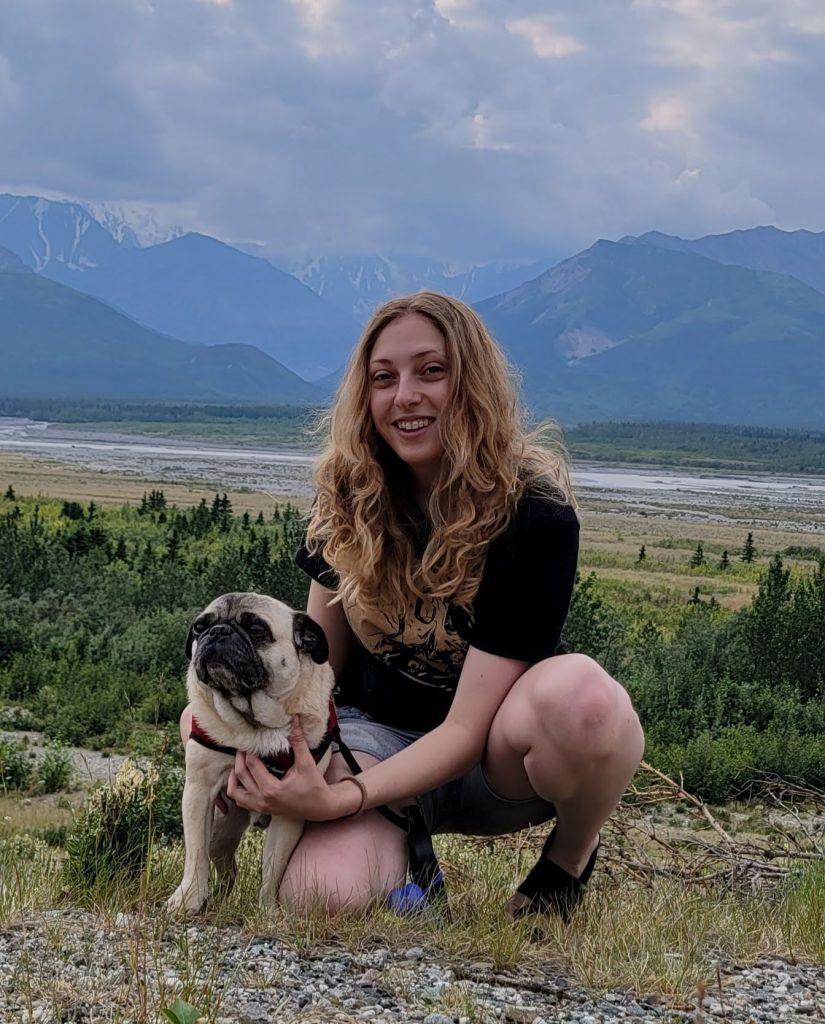
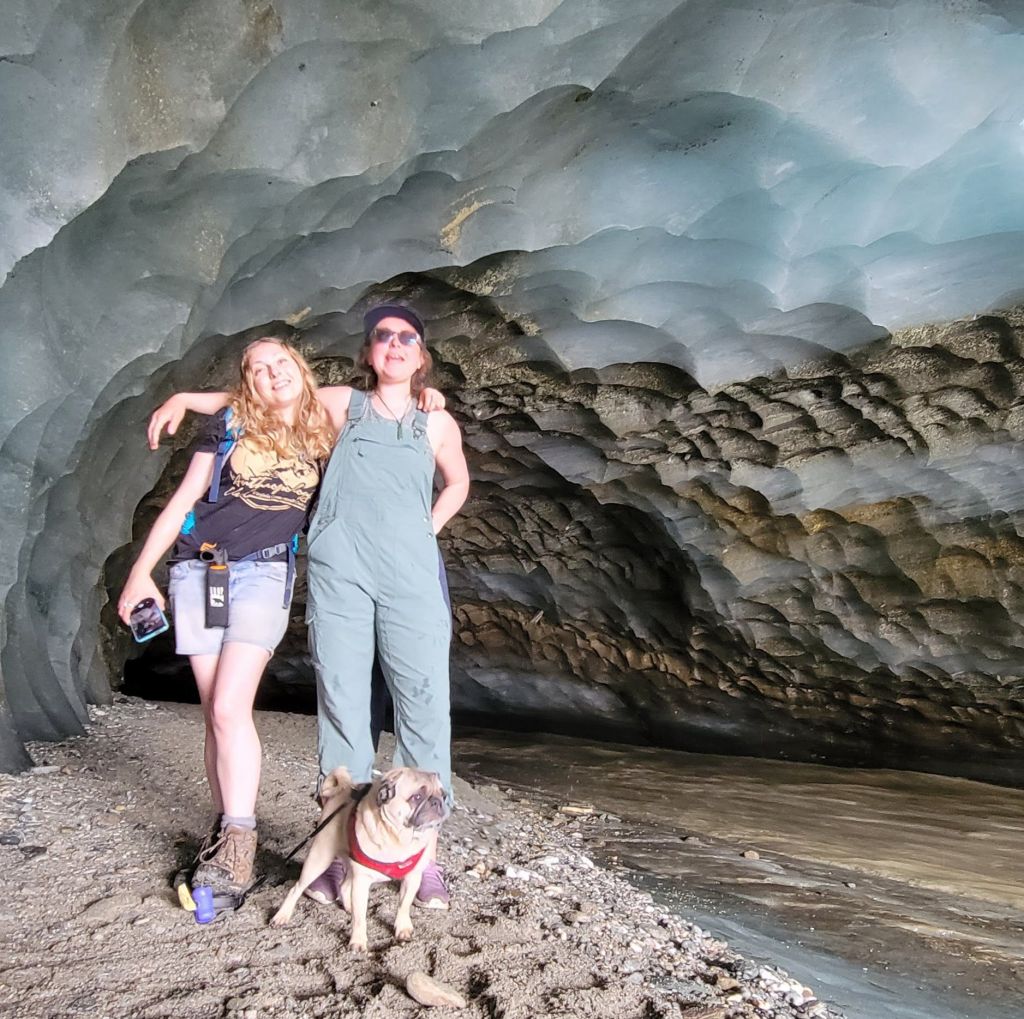
We finally had some time off, and instead of me sitting around camp, I decided to go explore deeper into the Alaskan interior with friends. So me, Adelaide, Christina, and Bearshark piled in and made the drive about two hours east of Fairbanks, heading out toward the small, rugged area of Delta Junction. Our destination… the Castner Ice Cave.
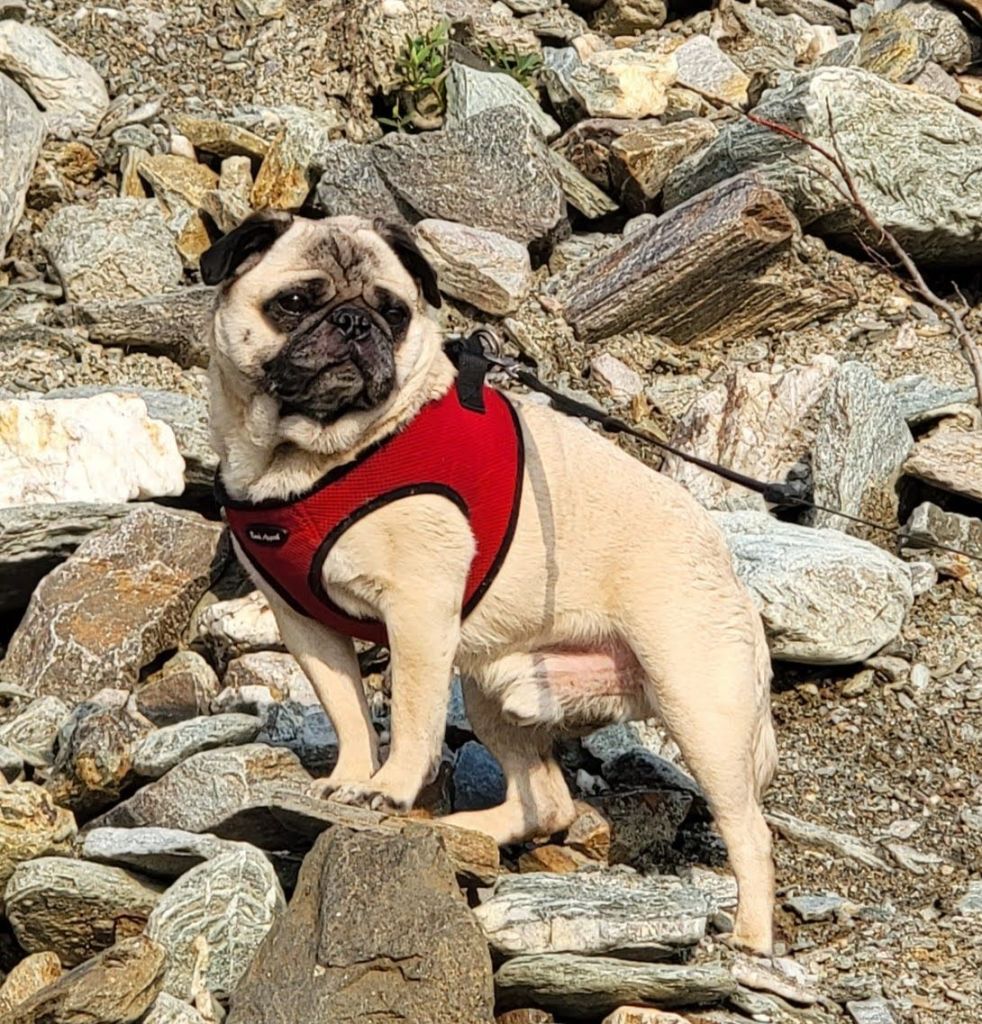
Now, Bearshark isn’t just one of the crew… he’s a pug. A very cute pug. And somehow, he handled the whole adventure like an absolute pro.
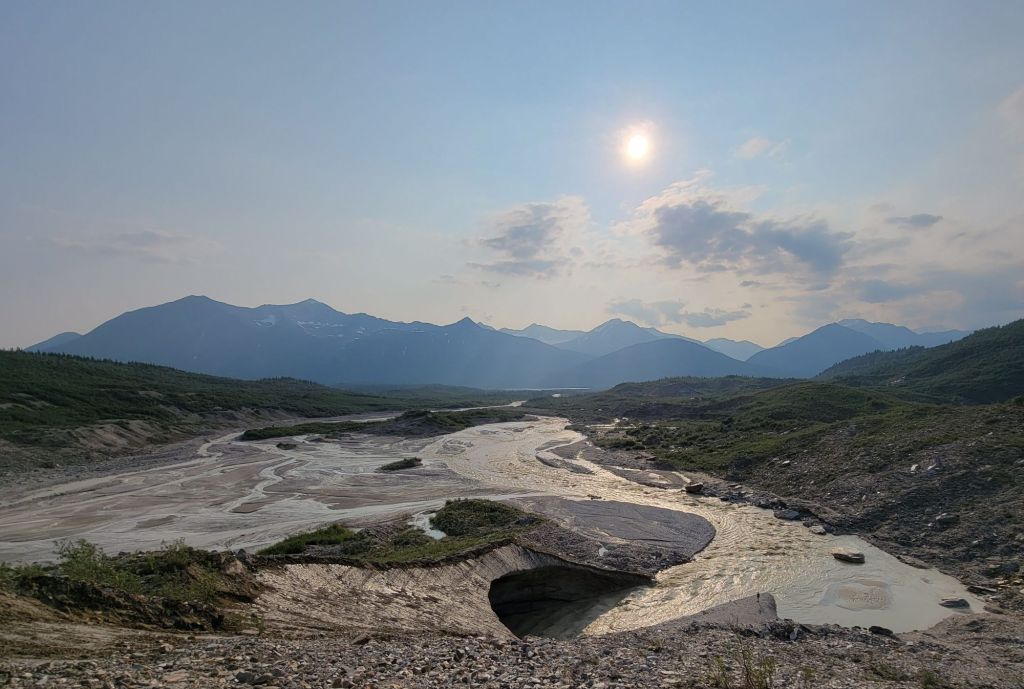
The drive alone was something special. For a stretch, we followed the Alaska pipeline, watching it snake across the landscape. It really gave you a sense of the scale of this place… the grandeur, the openness, the kind of freedom that almost feels overwhelming. Out here, everything is just bigger. Wider. Quieter. It makes you feel small in the best possible way.
When we finally reached the ice cave, it wasn’t what you might expect at first glance. The glacier itself was covered in dirt and growing matter, almost blending into the landscape. Not that bright, pristine blue you picture when you think of glaciers… but something older, rougher, more hidden. Like it was keeping a secret.
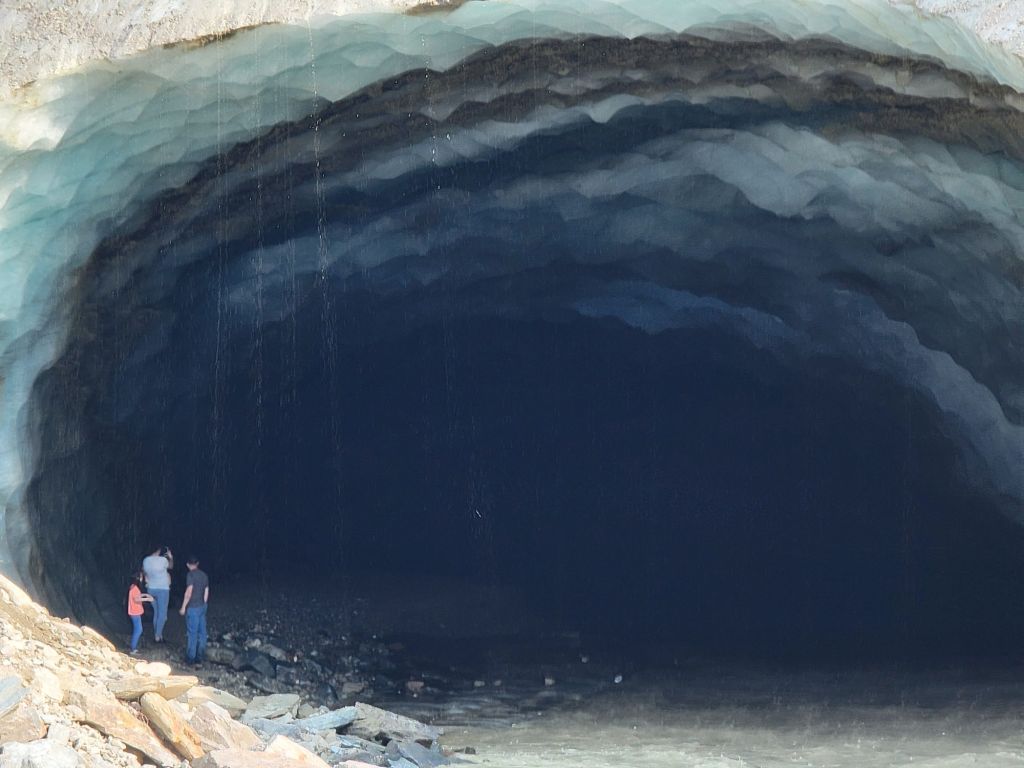
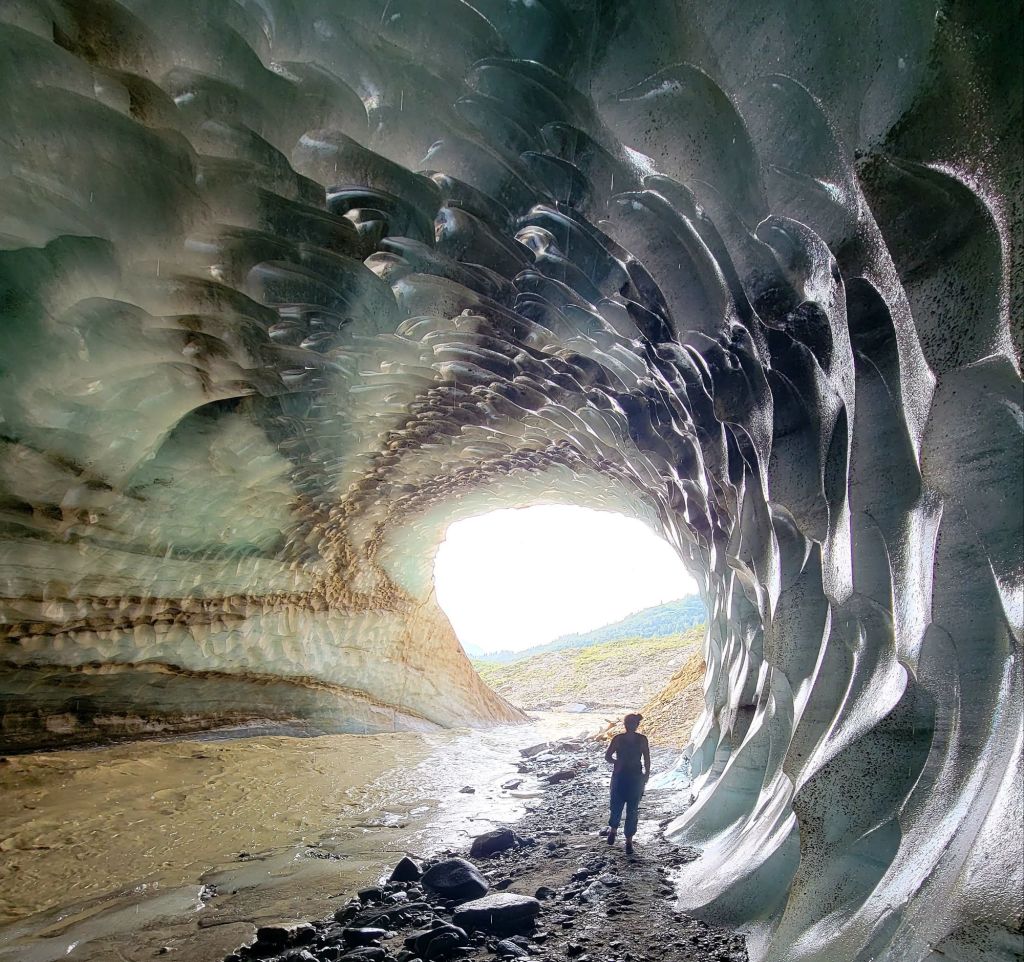
But once you stepped inside… everything changed. The cave opened up into this stunning world of ice—deep blues, soft light filtering through, textures and curves carved by time and meltwater. And then there were the sounds. Inside the cave, it was like stepping into a living, breathing thing… a kaleidoscope of rushing water, steady drips of melting ice, and the occasional sharp crack echoing through the chamber. It wasn’t quiet at all. The glacier was constantly moving, shifting, melting—alive in its own slow, powerful way. You could hear time passing in real time, each drip and crack a reminder that this place won’t last forever.It was absolutely beautiful. Gorgeous. The kind of place that makes you stop talking for a minute just to take it all in.
We spent hours exploring, laughing, climbing around, taking it all in. Bearshark especially was in his element, running around with that little pug energy, completely unfazed by the cold and clearly loving every second of it. It felt like one of those perfect Alaska days… good people, a very good dog, wild places, and the kind of experience that sticks with you long after you’ve left.
Out there, standing inside a glacier in the middle of nowhere, it really hit me again just how incredible this place is. Alaska doesn’t just show you beauty… it makes you feel it.
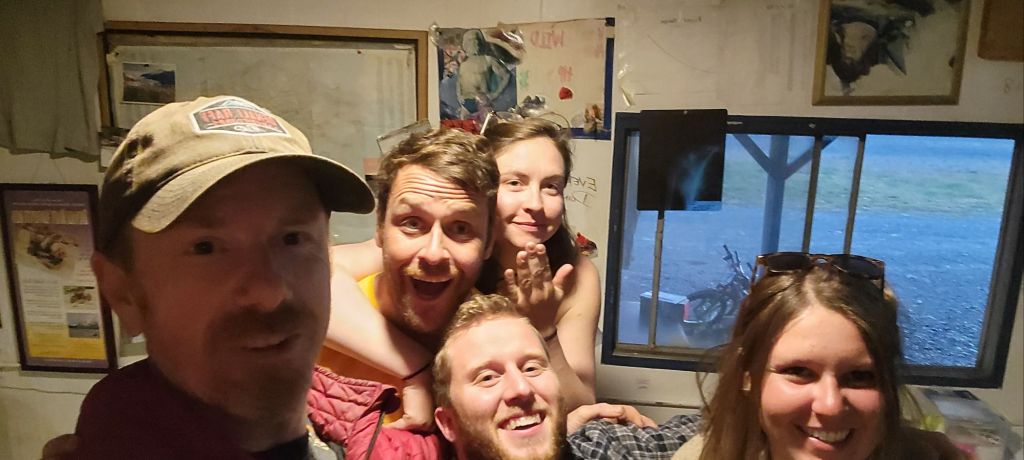
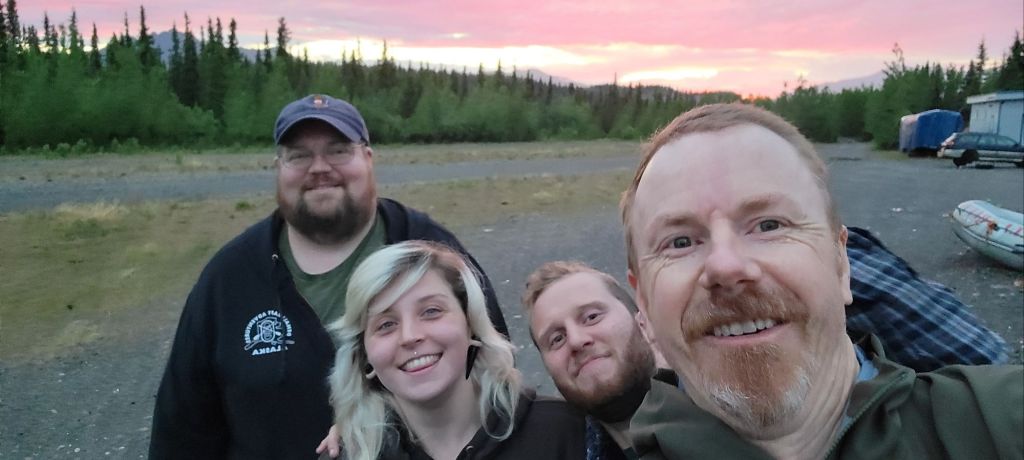
June in Alaska is something else… the days stretch longer, the sun lingers forever and everything feels like it’s turning up a notch. I’ve made so many new friends that it feels like we’re all part of one giant, wild Alaskan family.
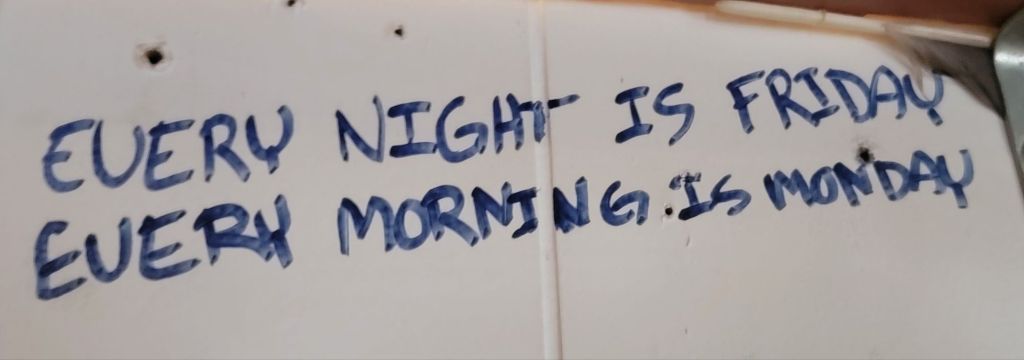
Every night is a party. In the cook shack, the place where everyone gathers—eating, laughing, swapping stories—there’s a saying that’s carved into the wall: “Every night is a Friday, every morning is a Monday.” And somehow, it’s true. The nights are electric, the mornings are a little rough, and yet, the adventure never stops.
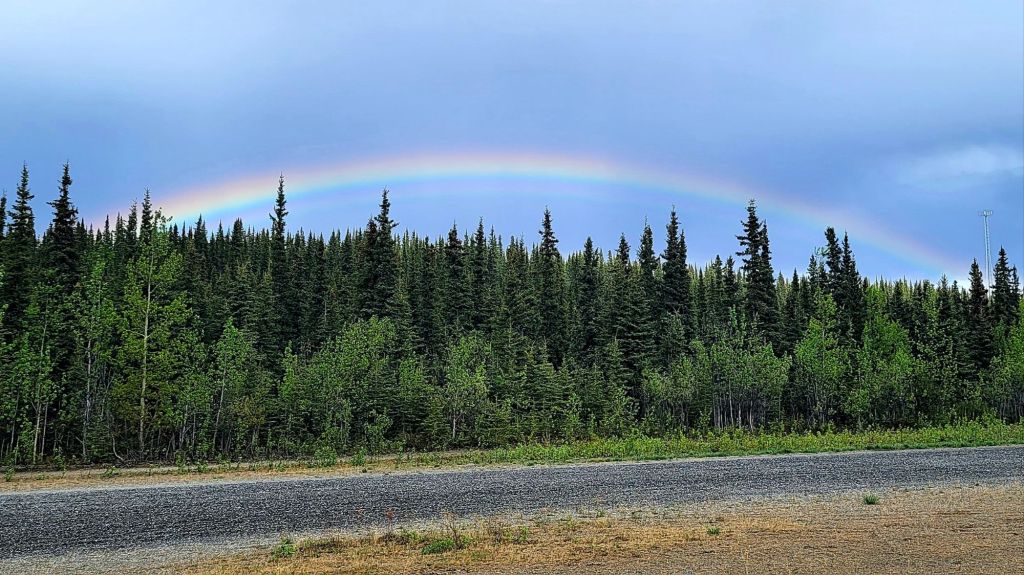
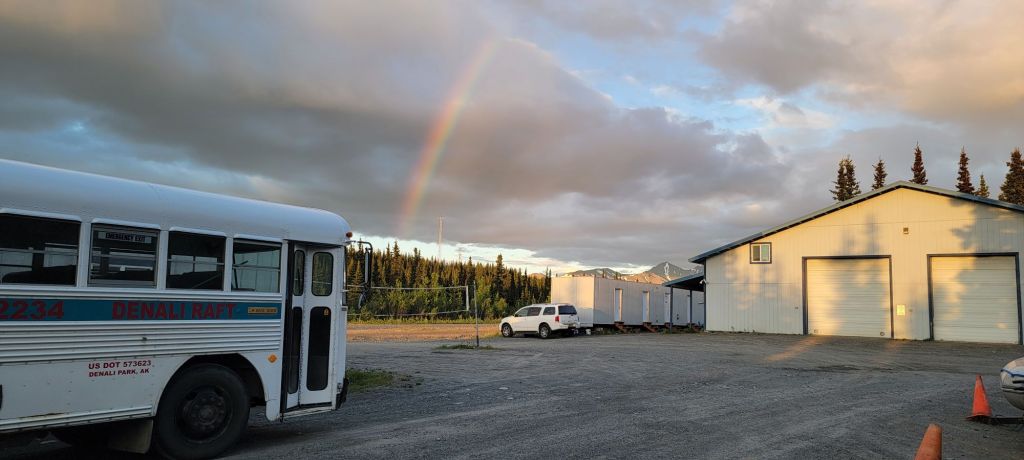
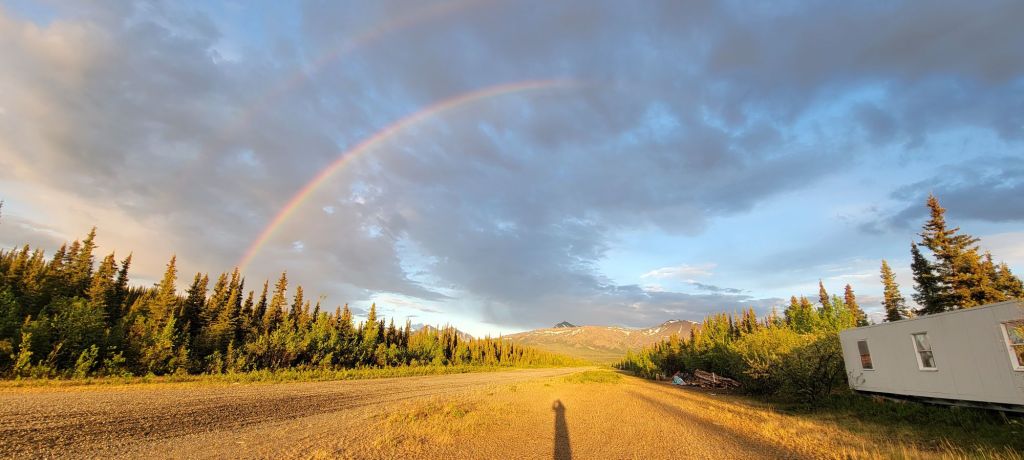
And then there were rainbows… rainbows everywhere. It felt like the sky was putting on a show just for us.
We lived right on an airstrip, and all day long, small planes would take off for flightseeing tours. I actually really enjoyed it—the constant hum of engines, the tiny dots lifting into the sky, the way it made the whole place feel alive.
Another shot shows more rainbows stretching across the sky, but if you look to the right, you’ll see the trailer I called home. We called these ATCOs. They’re basically dry cabins—four small dorm-style rooms crammed into each one. No running water, but electricity and heat keep you comfortable enough. And let’s just say the walls are thin… you can hear your neighbor talking, snoring, even pacing in the middle of the night. Privacy isn’t exactly the main feature here, but it grows on you.
Here’s my friend Steve, aka Scamp, caught mid-question, asking why, why? He’s always like that… curious, baffled, slightly dramatic.
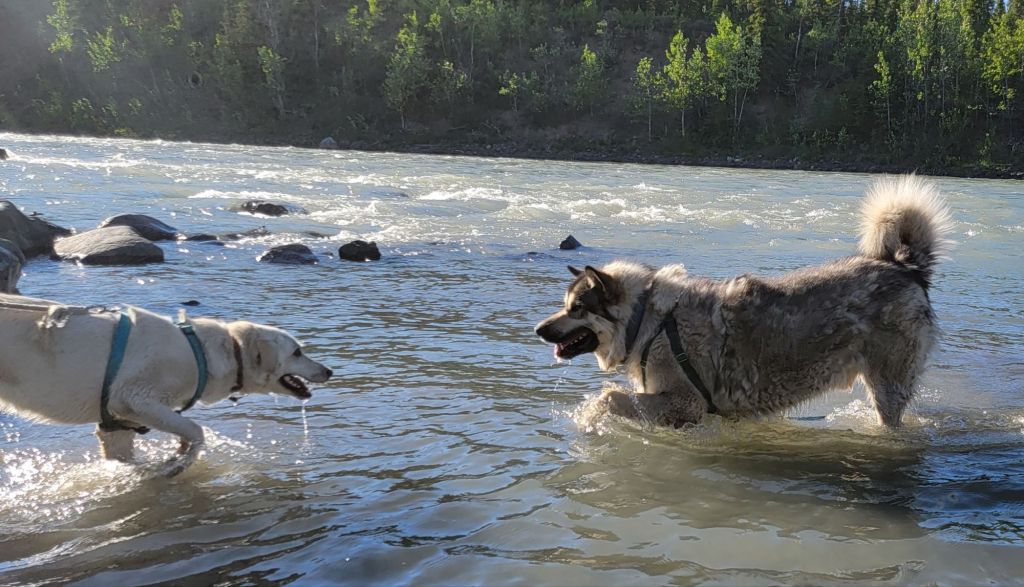
And I absolutely loved the dogs at camp. They were like our little family, each one with their own personality and antics that kept us entertained all day.
First up is Radar, the chihuahua and my personal favorite—small but full of character.
Smoke and Snow are our Alaskan native dogs—one a striking white husky, the other a powerful malamute. You can tell they belong to this land.
Then there’s Bean, the three-pawed husky all the way from Florida, who somehow managed to steal hearts despite missing a leg.
Then there’s Weezy, one of Storie’s dogs—Storie, S-T-O-R-I-E, one of the raft guides—always ready for an adventure, and in the background,
yes… Bean again, just casually photobombing the moment.
It’s impossible not to feel a little more at home with these furballs around. They’re part of the rhythm of camp, part of the heart that keeps the place alive.
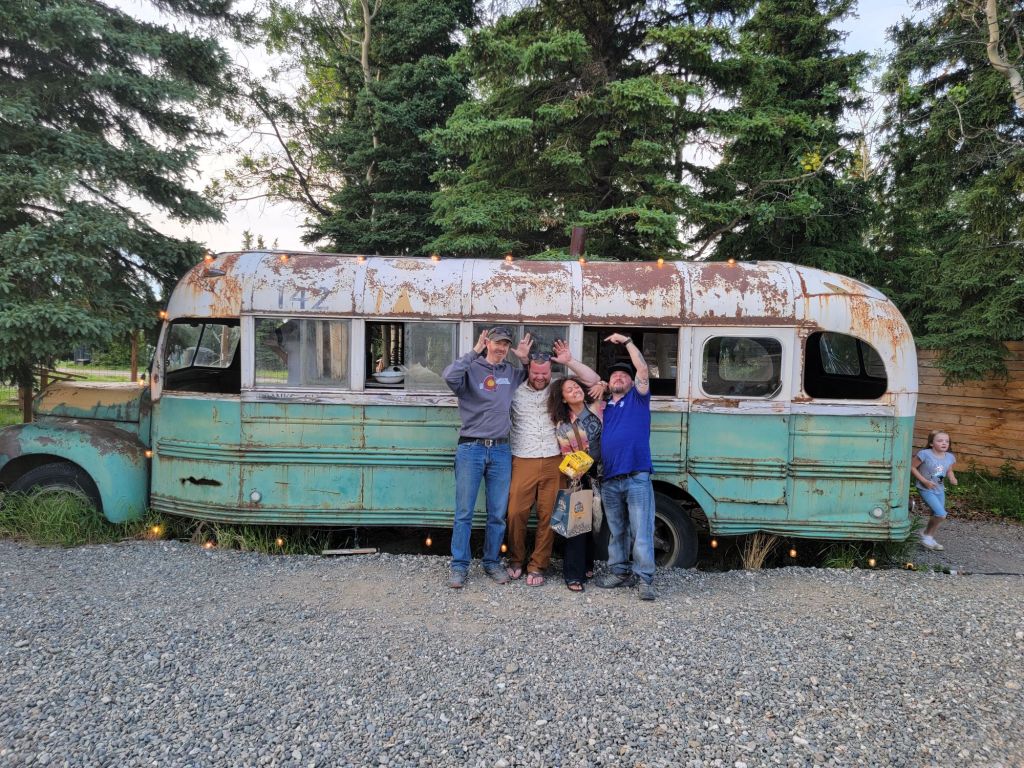
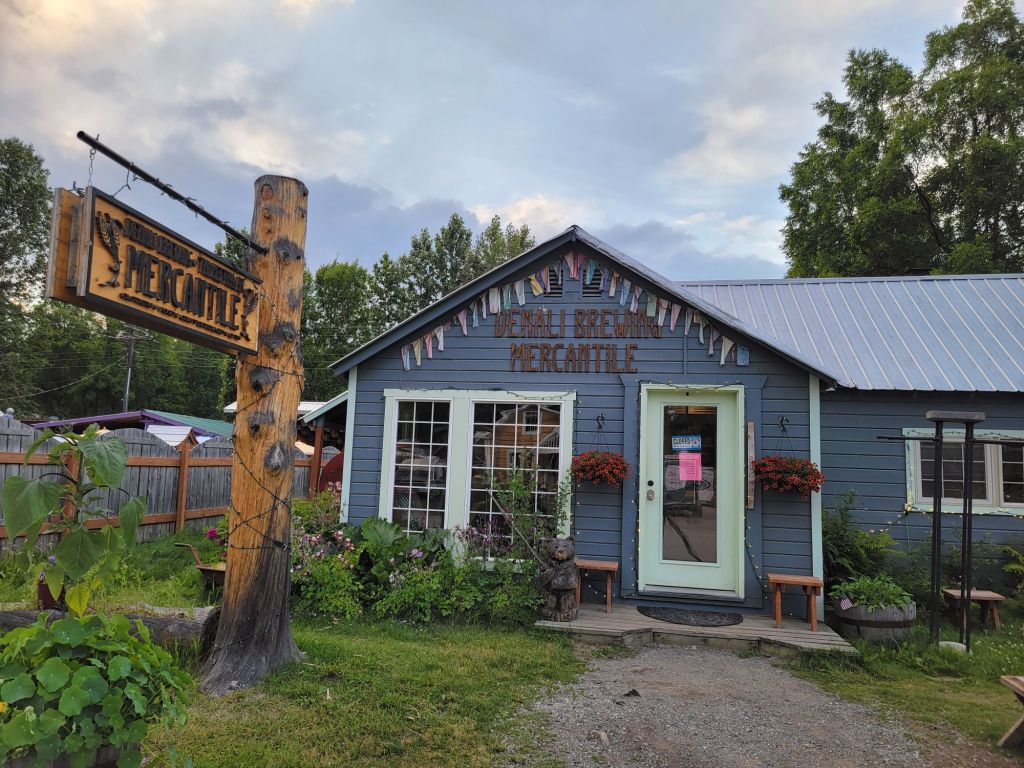
Here we are at 49th State, easily one of my favorite restaurants in all of Alaska. This is the very first one, tucked in Healy, and of course we had to take some fun photos at the Chris McCandless bus. Just to be clear, this is the bus used in the movie—not the actual Magic Bus 149—but it still carries that same sense of adventure
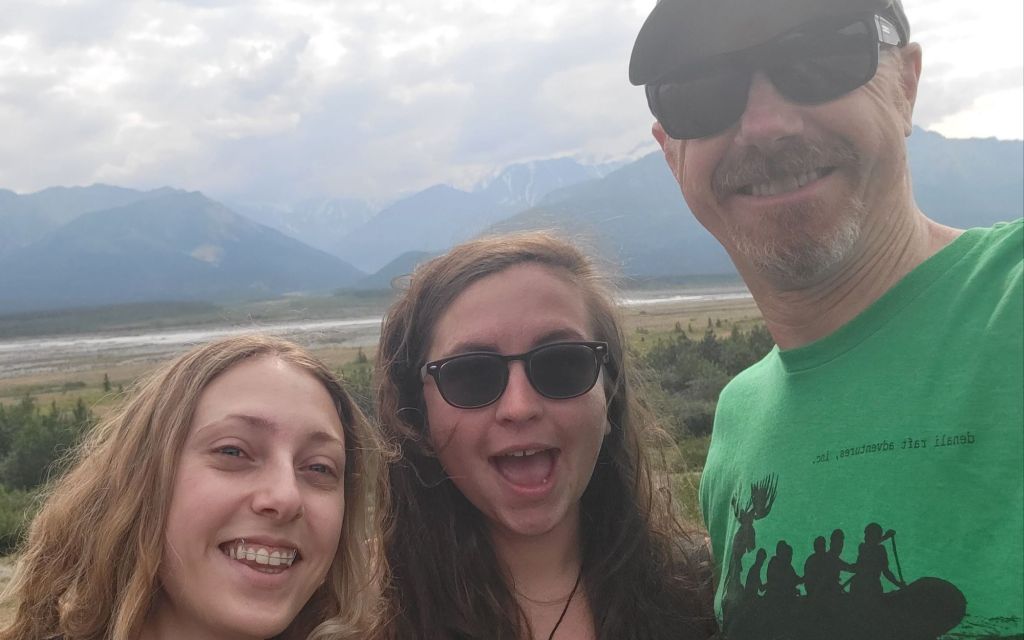
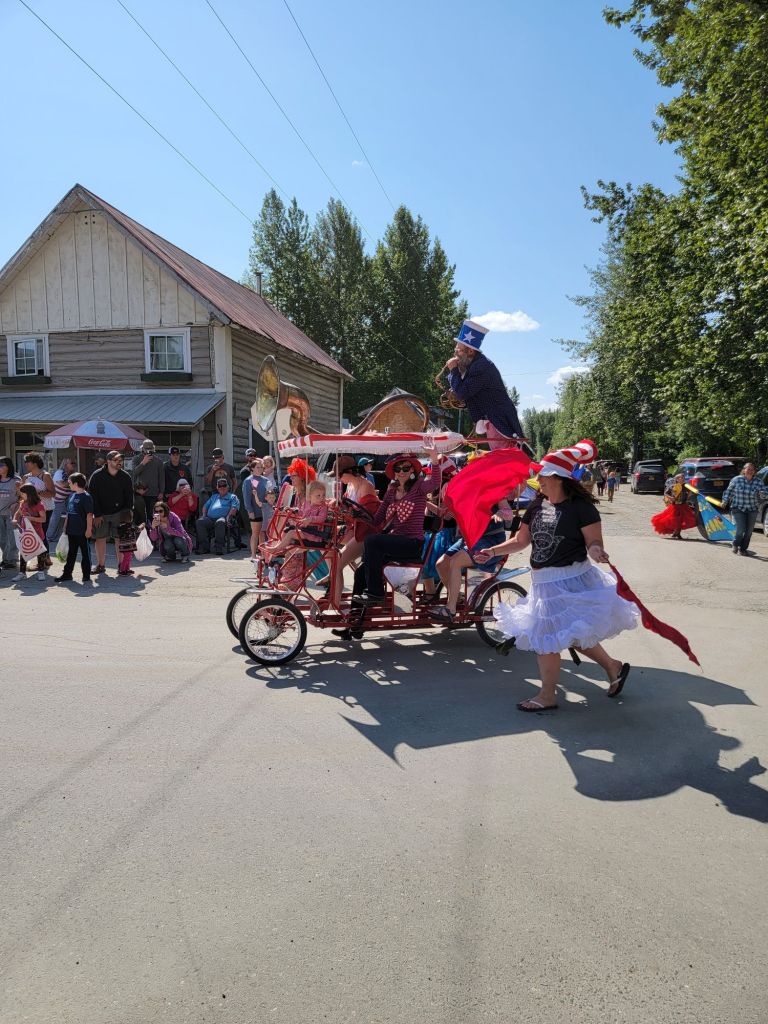
I finally made my first trip down to Talkeetna, one of my favorite little Alaska towns, full of charm and character. It was the 4th of July, and my first time leaving camp. My friend Luke let me borrow his little Saturn station wagon to drive down there—Alaska hospitality at its finest. We’d only known each other for about a month and a half, and yet he just handed me the keys for the weekend. I was blown away.
Getting out of the Denali area was a relief. After a month and a half of working hard and living in tight quarters with thirty other people, the cramped space of employee housing was starting to get to me. Talkeetna was the perfect escape.
In addition to the very temperate vegitation. the town itself was alive with the 4th of July spirit—I caught the parade and all the small-town festivities.
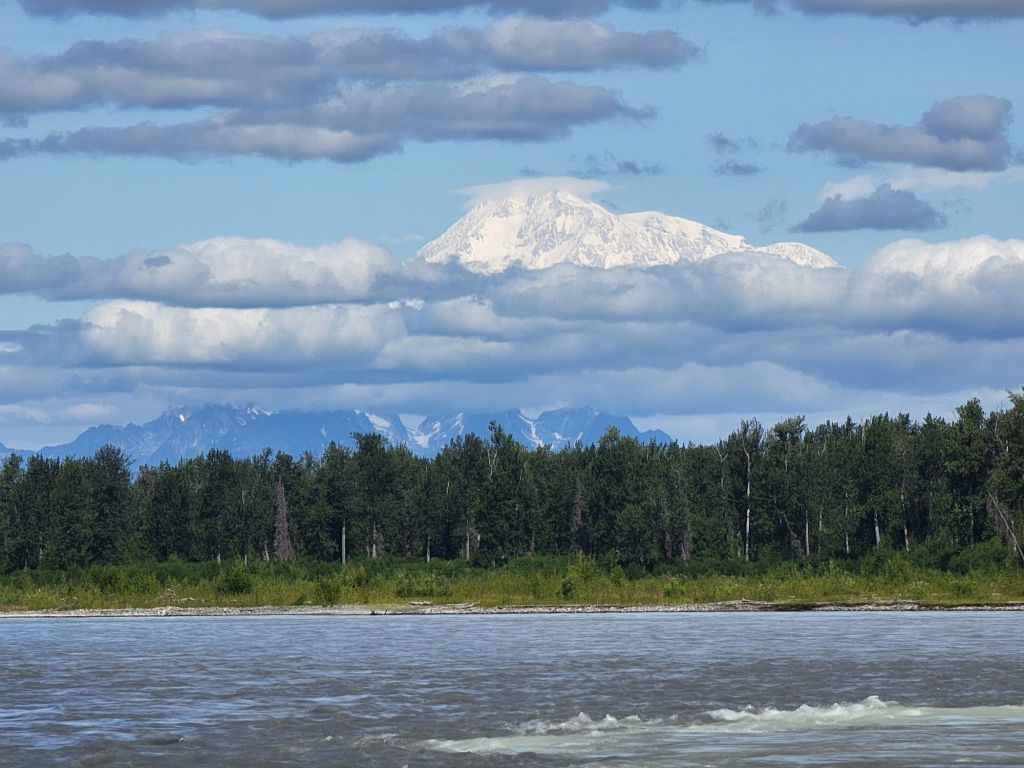
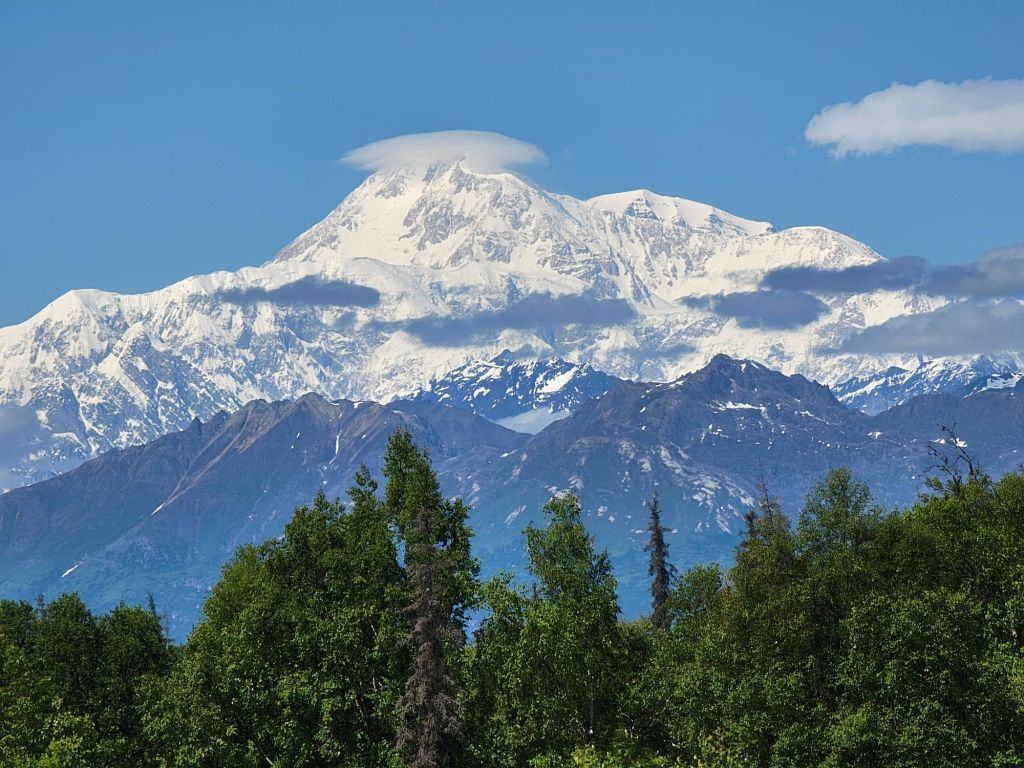
And for the first time, I saw Denali, the Great One, rising in the distance. You can actually see it from the shore of the Susitna River, its massive presence humbling and breathtaking all at once. That view alone made the trip unforgettable.
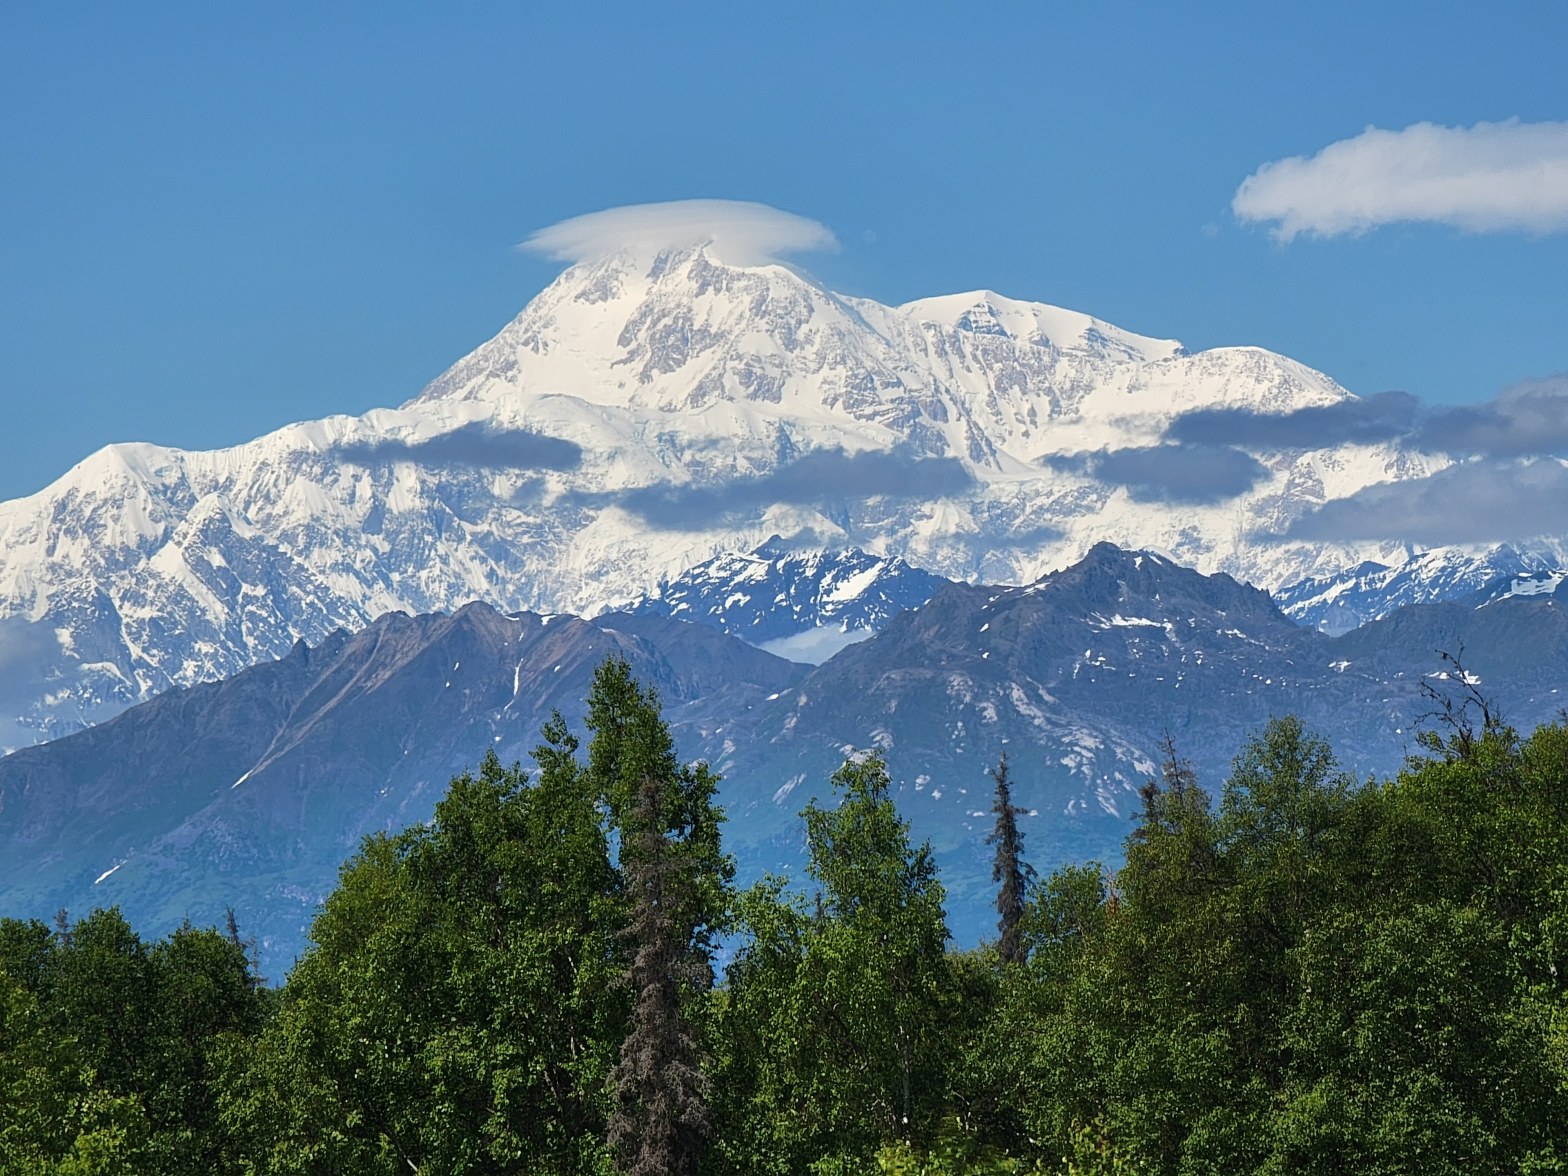
And I’ll just leave you with some parting pictures. First, Denali from the south viewpoint—a truly beautiful day, the kind that makes you pause and just take in the majesty of the mountain. At 20,310 feet, it’s the tallest peak in North America, and standing there looking up at it, you feel both humbled and inspired.
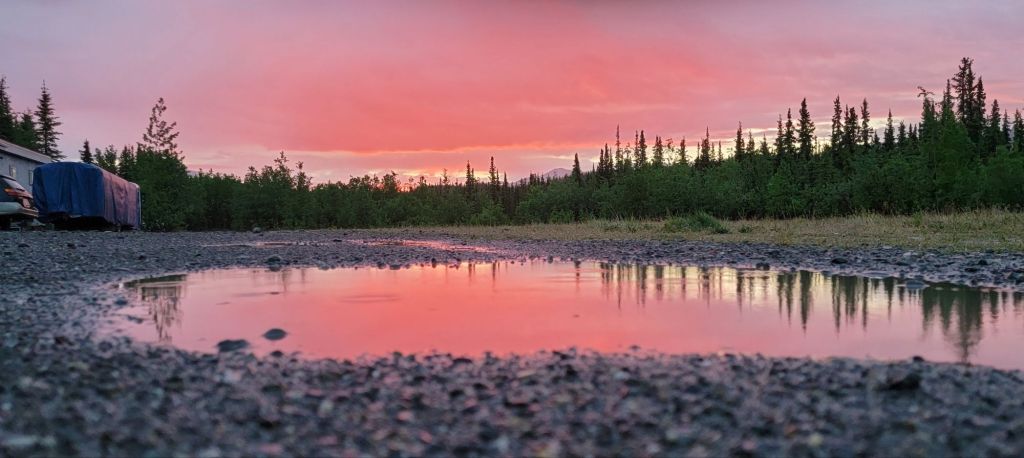
Next, another endless Alaskan sunset… the kind that drags on for hours, painting the sky in colors you didn’t think could exist. You start to understand why these long summer evenings feel magical, why every night is a Friday.
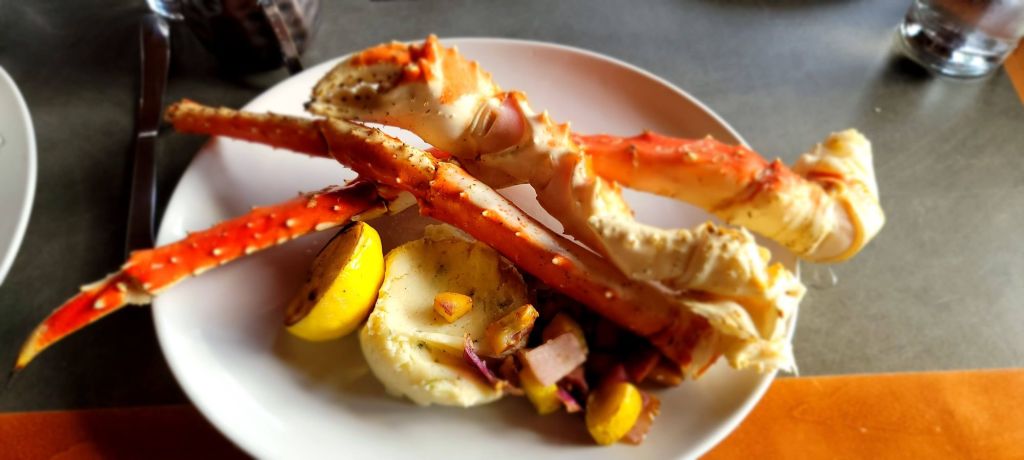
And finally, I’ll leave you with my first-ever experience dining on decadent king crab. Sweet, rich, and unforgettable, it felt like the perfect way to cap off a summer day full of new friends, adventures, and the endless beauty of Alaska. This was when it was still affordable at $65 a pound.